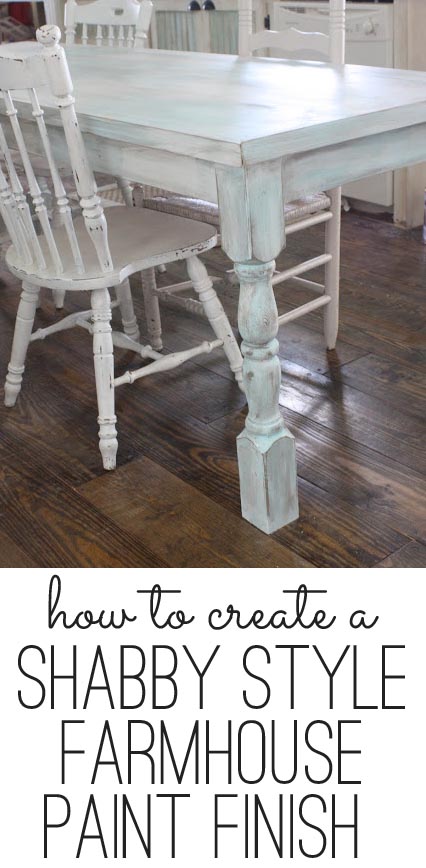
Love chippy layered paint treatments? Want to do it in a hurry? That’s the beauty of this shabby farmhouse paint finish – it’s so easy you can’t mess it up and quick enough to do it in one afternoon.
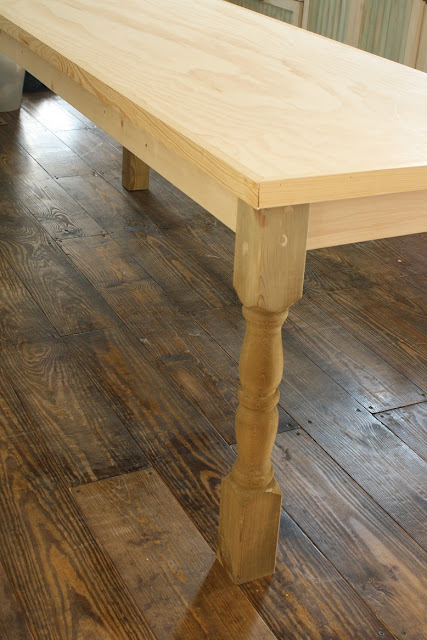
Mr. SCC was in too big of a hurry for me to take step by step photos of the table – booooo!
But, my friends, it’s the paint job that makes this farmhouse table somethin’ special!
I LURVE the weathered, worn finish of an old piece of furniture that’s been smothered in layer after layer of beautiful colors of paint. However, I’m never lucky enough to find those great pieces on my itty bitty budget. So, I fake ’em.
I love a good farmhouse finish – but every other method I’ve seen takes layers and layers and layers of paint. I’m too impatient for all that. I do mine with one coat of paint. Know what? You can, too!

Start with two (or three or seventeen) colors of paint.
I love my Hawaiian Sky and Ultra White from Dutch Boy.
I love my Hawaiian Sky and Ultra White from Dutch Boy.
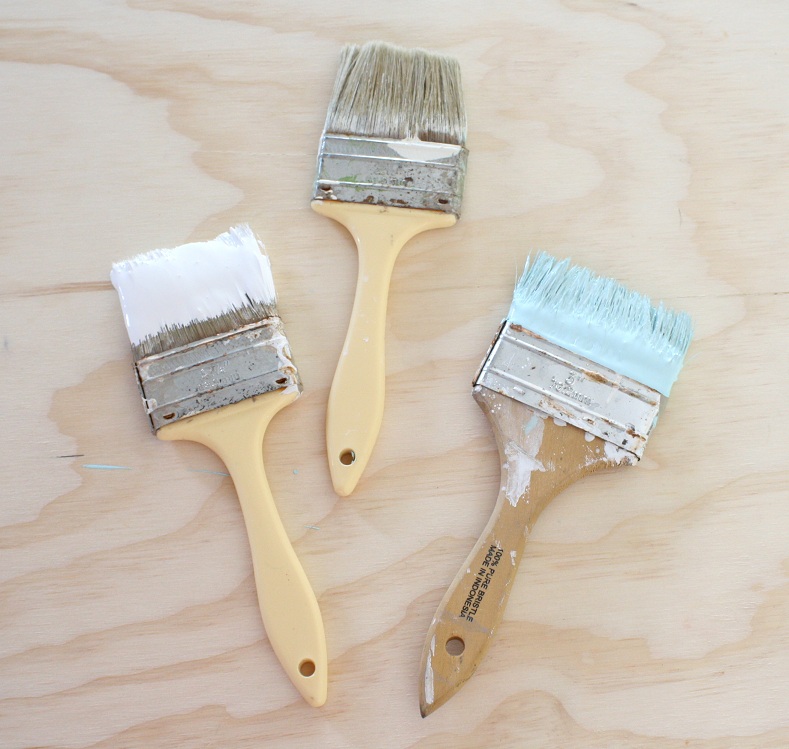
You’ll also need 3 (or however many colors you’re using plus one) paint brushes.
I actually recommend crappy brushes for this job.
Although I love my Purdy for the perfect finish, this one ain’t perfect.
We’re gonna scratch it up, scar it up, and treat it rough.
The cheap brushes means a rougher finish – which in this case is a very good thing.
I actually recommend crappy brushes for this job.
Although I love my Purdy for the perfect finish, this one ain’t perfect.
We’re gonna scratch it up, scar it up, and treat it rough.
The cheap brushes means a rougher finish – which in this case is a very good thing.

Start with your first color and slap random patches of color here and there.
Get a little Jackson Pollock with it.
Get a little Jackson Pollock with it.

Then, fill in around the patches with your second color, but don’t overlap too much.
With each big spot of paint, glop some extra in the middle.
With each big spot of paint, glop some extra in the middle.
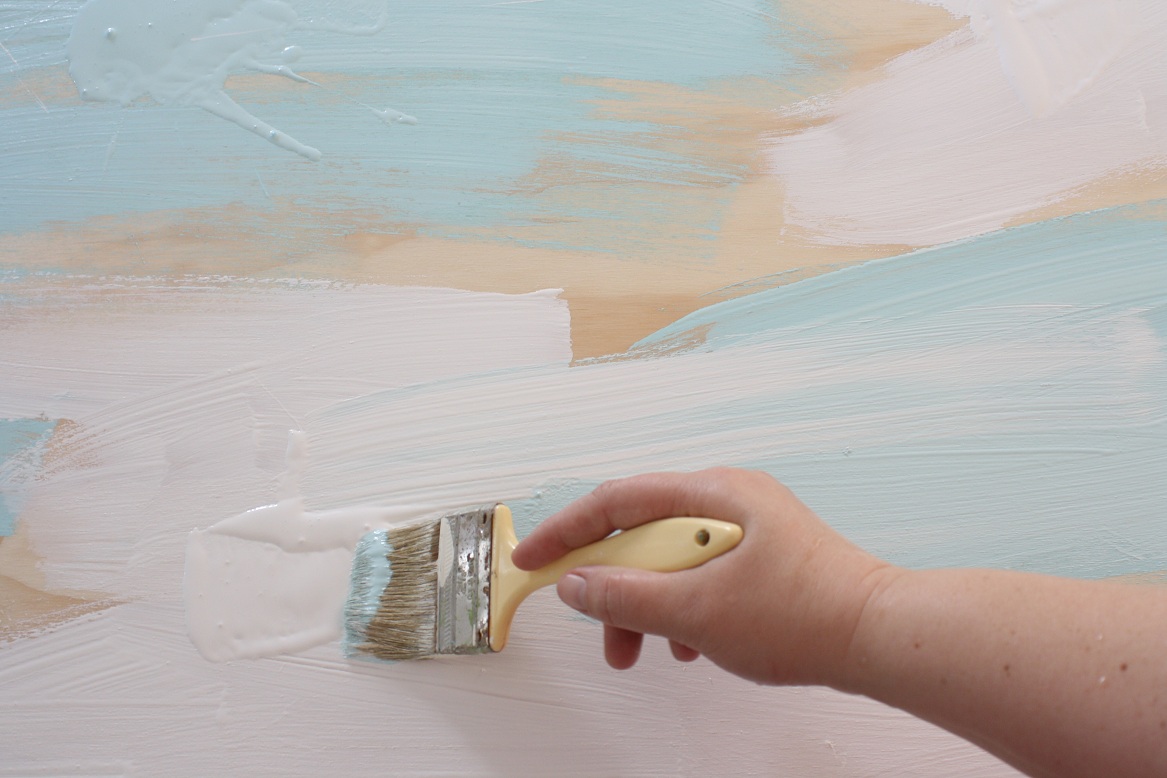
Now you’re gonna take the 3rd brush and drag paint from the middle glops and blend the edges of each one. Don’t blend it all to one color, make it look all crazy and stuff. Think camo gone bad. Trust me… it’s gonna be alright!

Do the legs and skirts, too. Don’t leave them all nekkid and stuff.

The most important part?
Work quick! DO NOT take time to be careful.
Just slap the paint all over the wood, trying to cover 99% is just fine.
It only took me about 30 minutes to paint the entire table,
including time to stop and take photos!
You can do this even faster if two people work together,
one with the colors and the other doing the blending.
Alright, now go have some sweet tea and call your mamma so you can chat while the paint dries.
You’re all dry? Ok, now comes the fun part!!! Let’s get rough 🙂
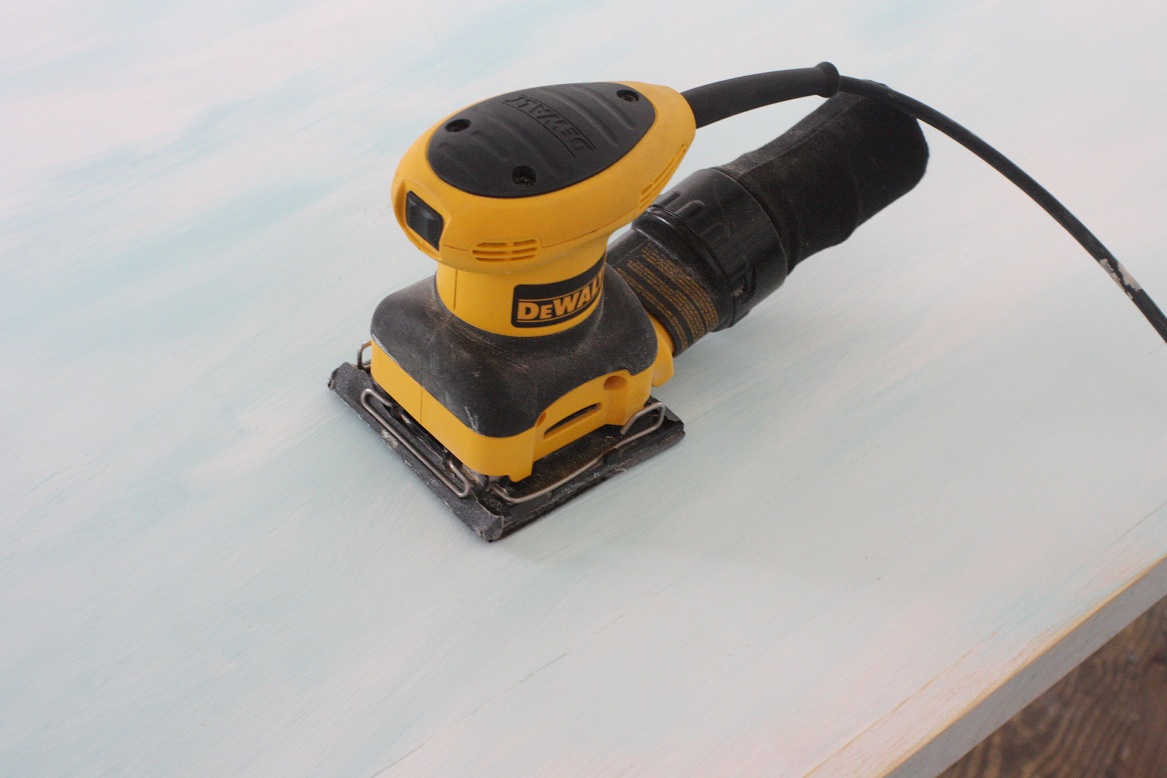
Sand the top, edges, legs, wherever you slapped paint on it.
DO NOT be gentle.
The sanding is actually much more important to this finish than the painting is.
Sand the top, edges, legs, wherever you slapped paint on it.
DO NOT be gentle.
The sanding is actually much more important to this finish than the painting is.

Sand more than you think you need, let a little wood peek through here and there.
The more you sand the better it looks.
The more you sand the better it looks.
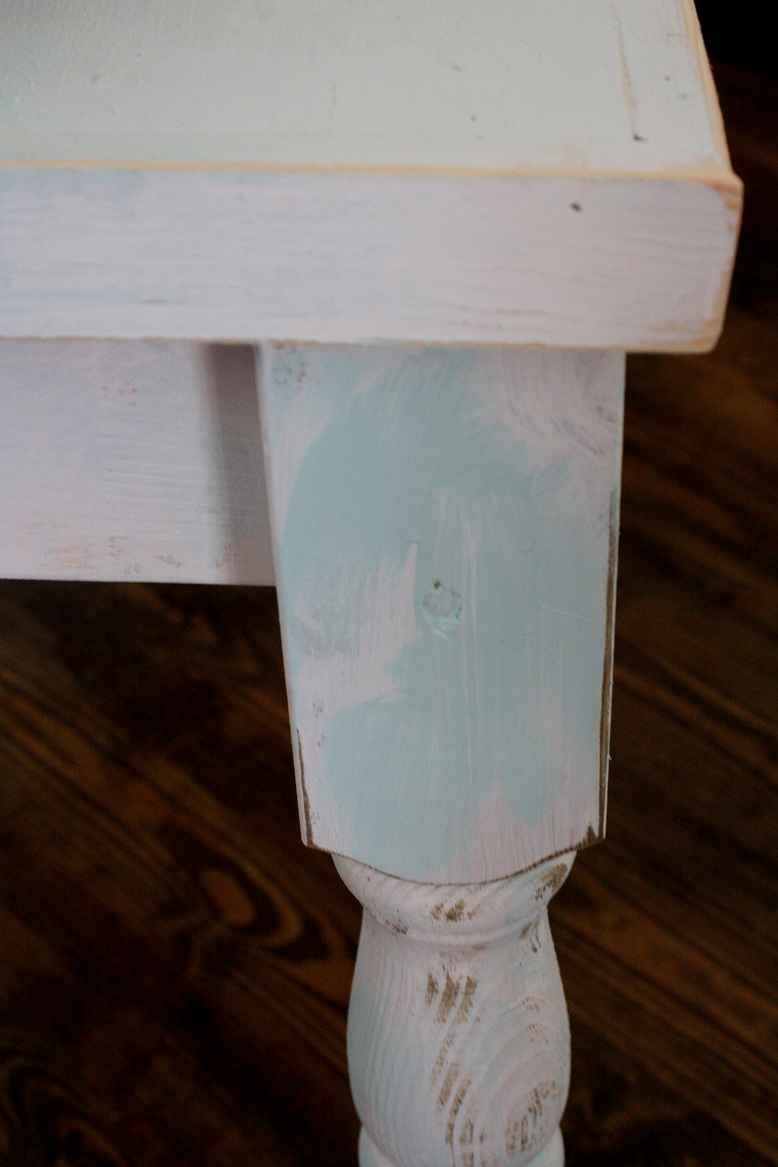
Be sure to sand where two colors abruptly join,
so when you’re finished it looks like two different layers.
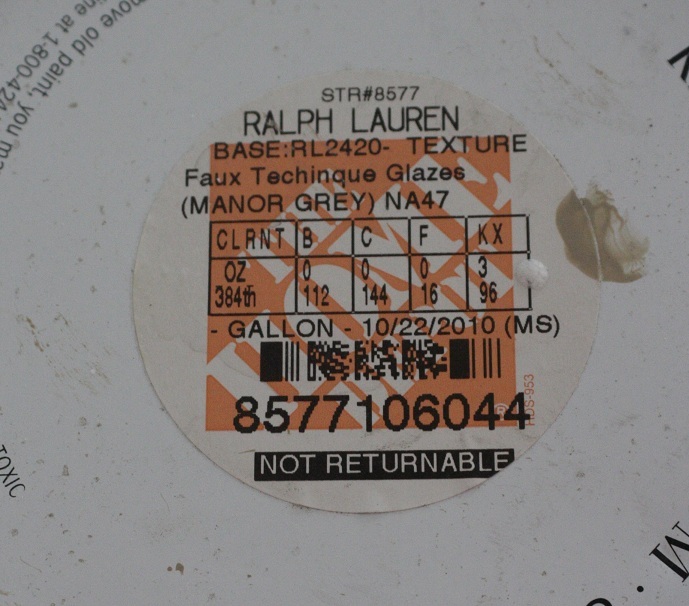
Now let’s glaze. I use Ralph Lauren Manor Grey.
(This recipe is for 1 gallon.)
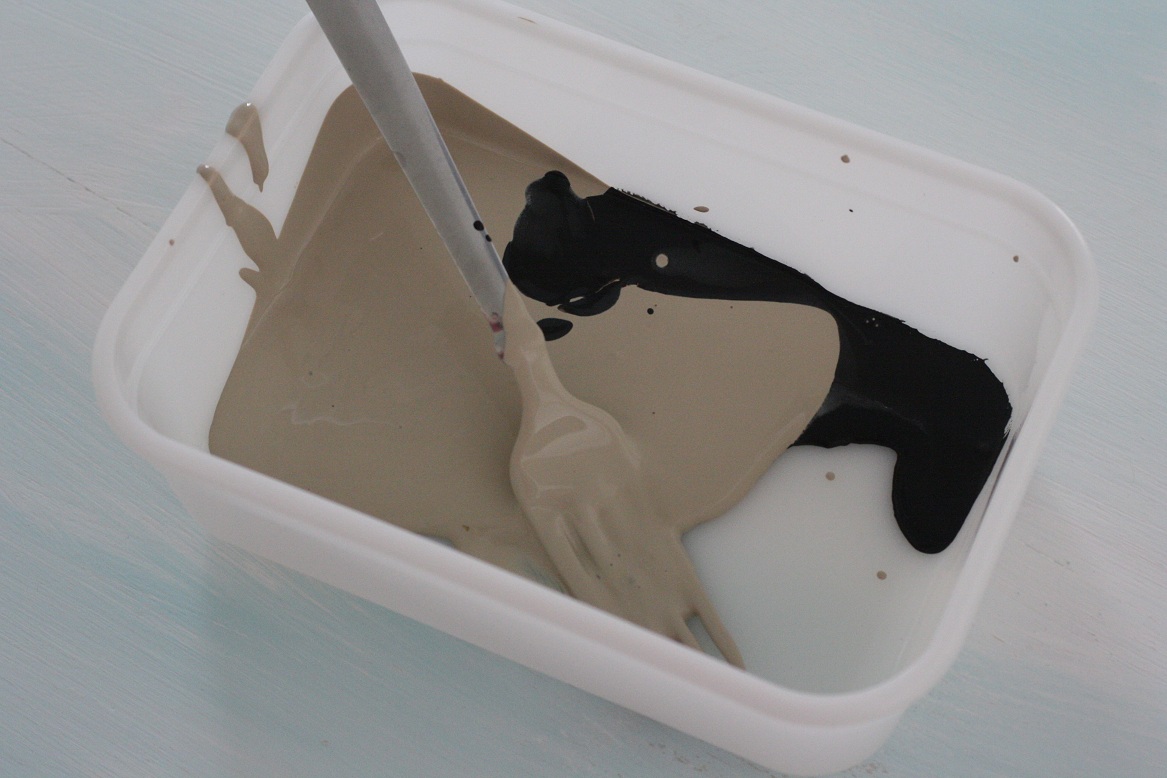
But for this I also added in a little black and mixed it all up.
I also added a dash of water to thin it down a bit.

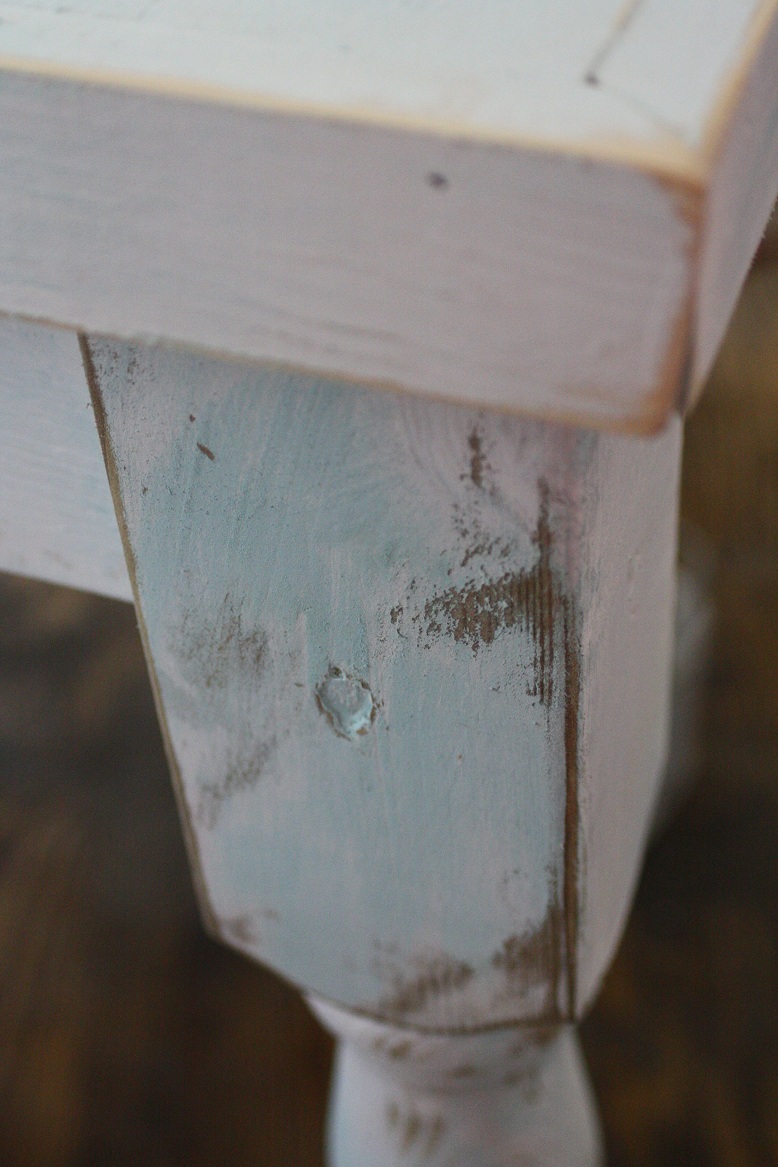
Take a dry cloth, dip it into the glaze and rub it into the surface.

Here’s where the sanding job starts to shine.
The glaze will get caught in all those beautiful imperfections
and it creates a patina that is to die for.
The glaze will get caught in all those beautiful imperfections
and it creates a patina that is to die for.
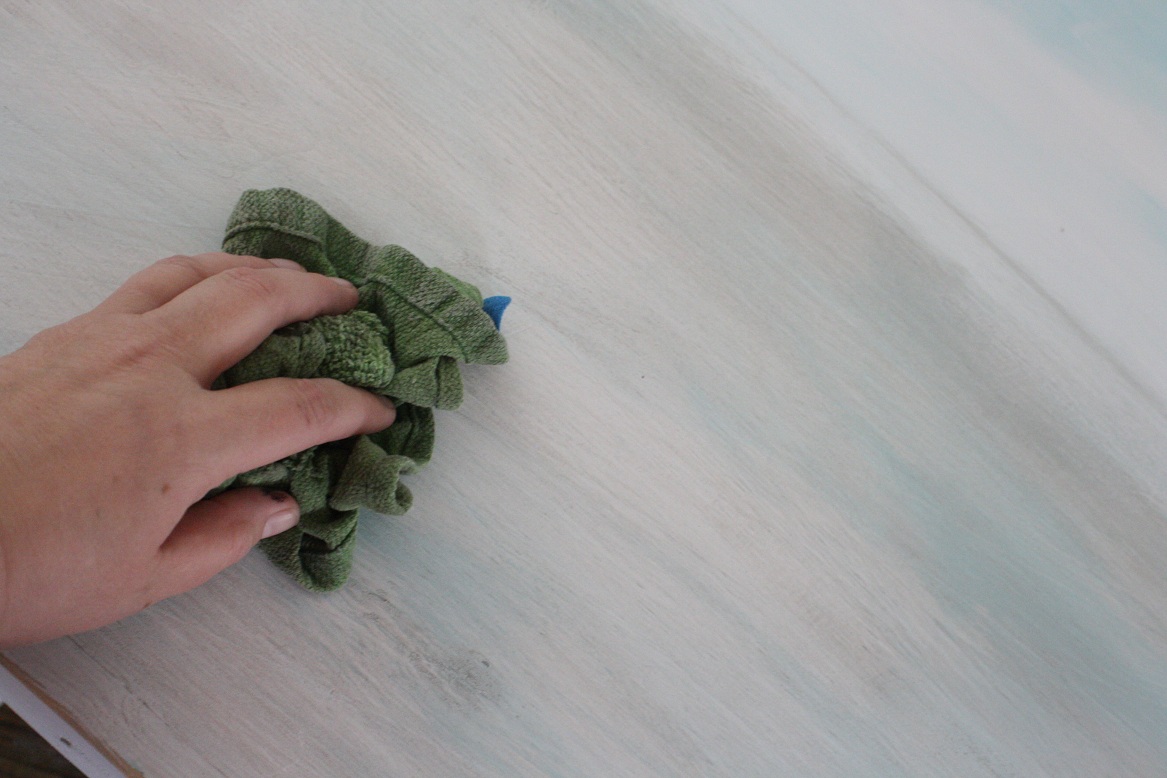
Next I take a little off with a wet cloth (not real dry or super wet),
so that there are darker and lighter spots, making it all pretty and stuff.
so that there are darker and lighter spots, making it all pretty and stuff.

The glaze tones it all down, marries all the colors together and unifies the paint.
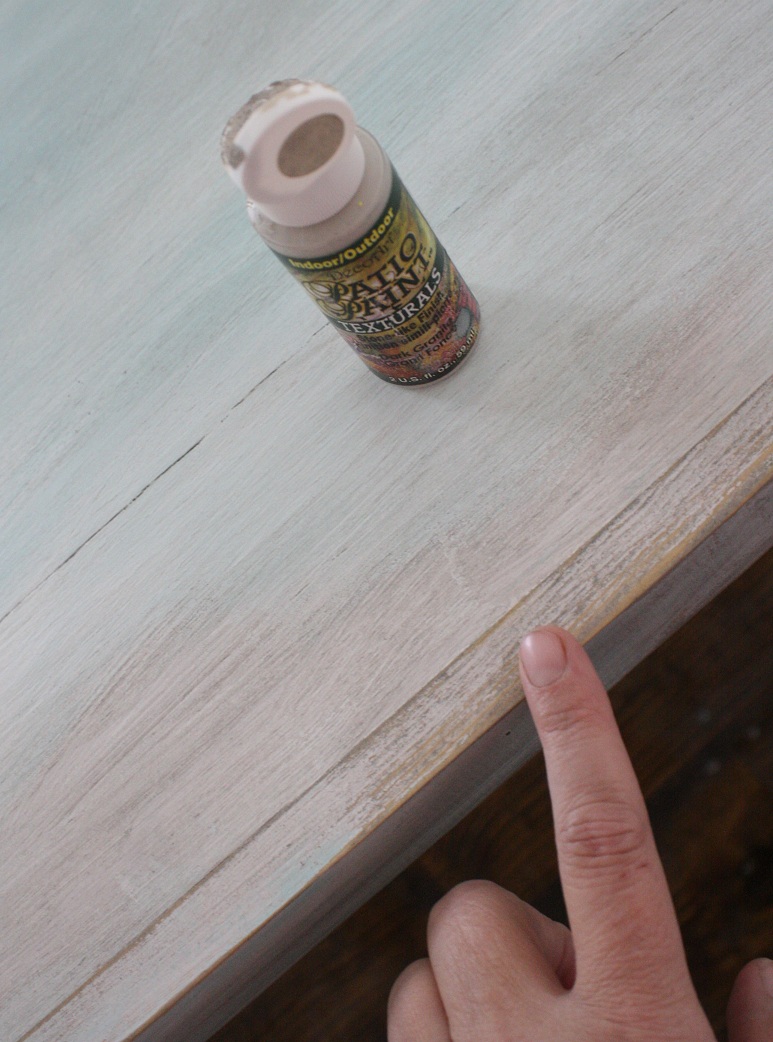
After you’ve wiped it all down, add a little DecoArt paint
in a complimenting color to bare spots by rubbing it
straight onto the wood with your fingers.
This will help get it into the grain of the wood.
in a complimenting color to bare spots by rubbing it
straight onto the wood with your fingers.
This will help get it into the grain of the wood.

Although you could poly it, I had some beeswax from Ikea in my supplies.
I used a couple of thin coats, rubbing on and buffing off with a lint free cloth.
I used a couple of thin coats, rubbing on and buffing off with a lint free cloth.

Now, she’s all done. Excluding drying time, I did the entire table, by myself in about 2 hours. Even with drying time, I did it all in one day. I have finished several other pieces of furniture this way, and still love them.
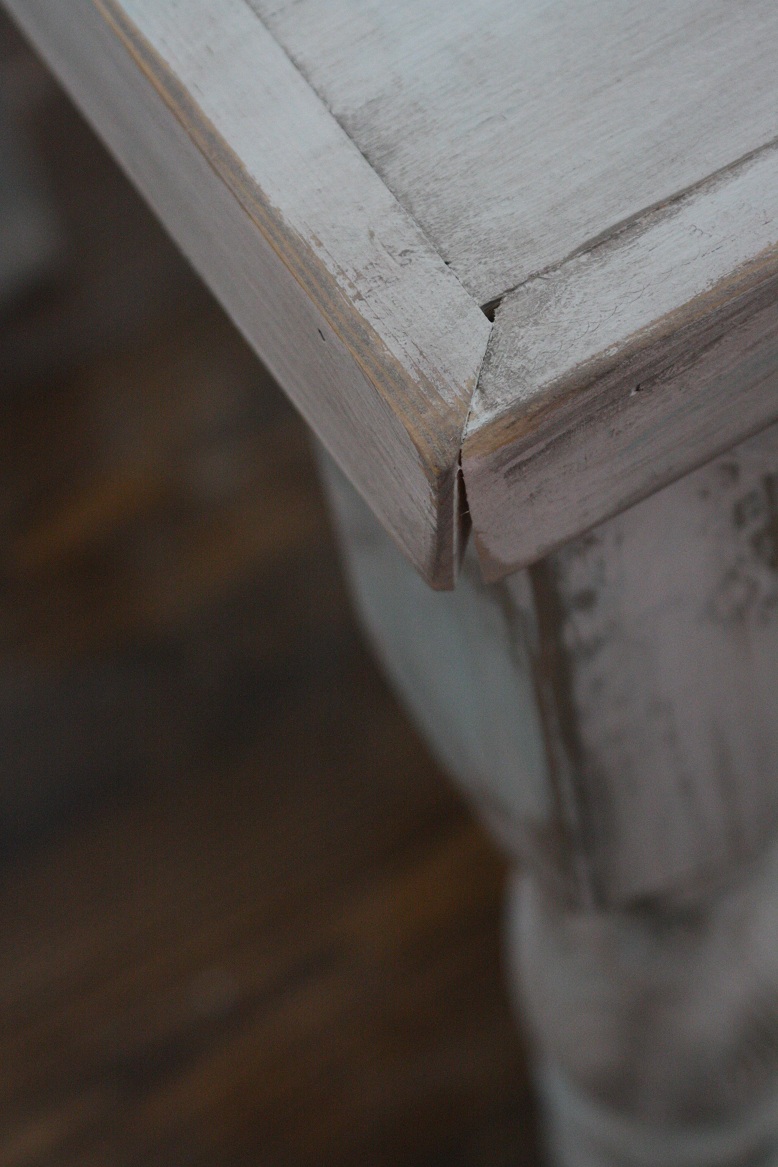
I honestly love imperfections. What character!

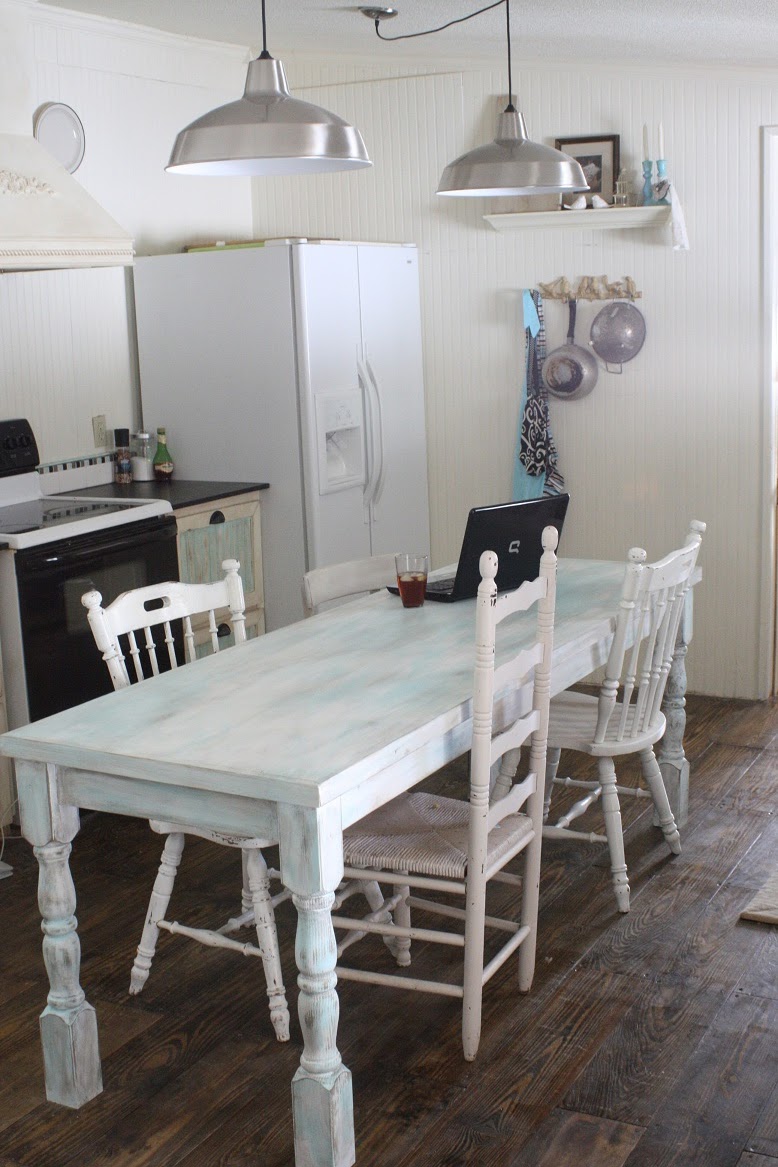
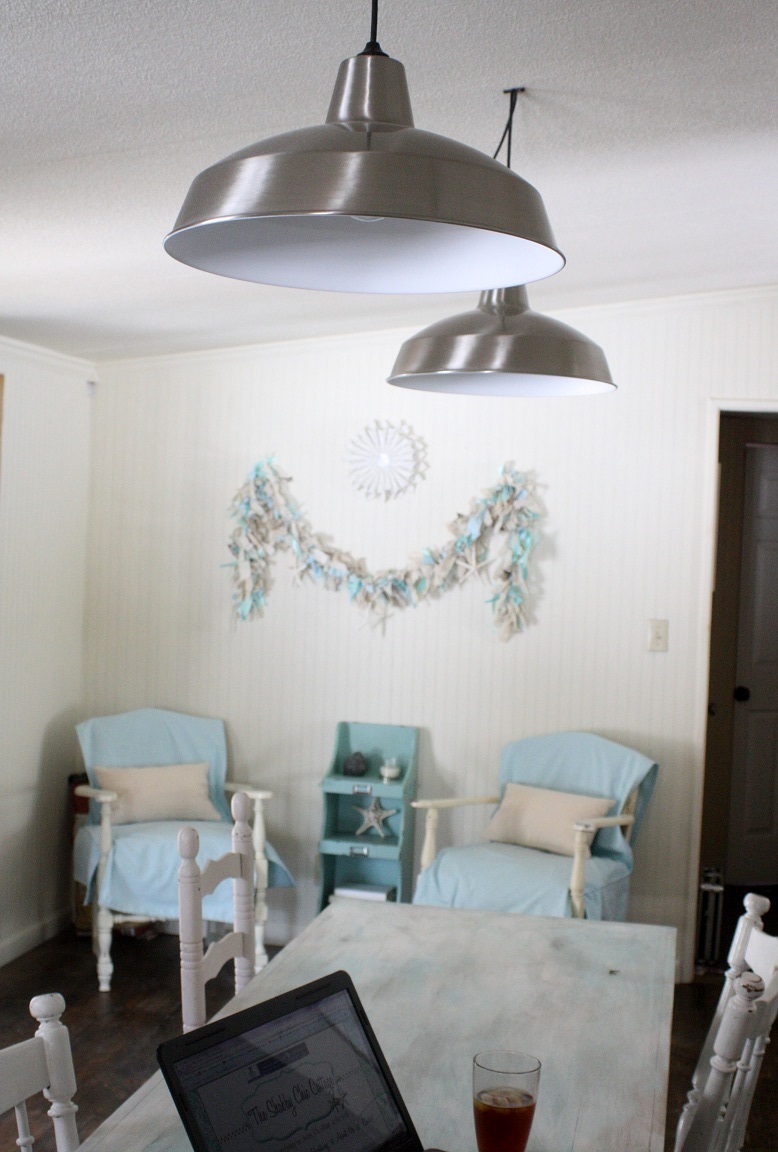
Ditching the dining room was such a good idea!
Now we have more room for family dinners, board games,
and I have a bigger work surface, too!
Now we have more room for family dinners, board games,
and I have a bigger work surface, too!
Can someone go rush Polly to come help me make slipcovers?
I really want to put my current couch on this wall!
I really want to put my current couch on this wall!

Thanks for sticking with my longest tutorial ever!
You really can do this, I promise.
Just test it on a scrap piece of wood.


You really can do this, I promise.
Just test it on a scrap piece of wood.

wow, that is fast! good work. will have to give this a go next time i manage to find some furniture, which has been a little slow as of late! liz
Awesome tutorial! Thanks for sharing, I love your new table!!!!!
That is gorgeous Gina!! 🙂 Love it!!
Your table is BEAUUUUUUUUUUTIFUL! Just got a new electric sander for Christmas, and I’m looking forward to putting it to work. Thanks for a great tutorial!!
Great tutorial. I haven’t seen this gray glaze before; love the color combination!
Mary
Your table is gorgeous!! I love the color. Thanks for sharing the tutorial and for hosting!
It is beautiful! My paint brush is whispering my name…….
gorgeous…can’t wait to try that technique out. thanks for hosting
Holy Cannoli Gina! I thought I’d done every paint technique known to man! I’m looking around my house trying to figure out which piece of furniture is getting a re-do with your technique! I LOVE it!
So funny…the photo of you with 2 paint brushes just going at it! 🙂
xo
Robin
Love it! I will be trying this out soon!
Awesome job on the table!
I am incredibly impressed!!!
gorgeous table! i am a new follower of your blog and linked up for the first time today too! (Laundry Room Reveal)
Wow! It looks amazing! I never knew how to make it look worn like that. Great job!
That table is to die for! Thanks for hosting!
Take care,
Lisa
Love this tutorial! Thank you, thank you, thank you. I will definetly be trying this out in the near future.
-Aaron
Fabulous job and tutorial Gina. I love the colors you chose, very fresh. I’m lovin’ your floor too;-)
great painting technique!
thanks for hosting!
gail
I’ve been wanting a farmhouse table. Yours looks great.
Gina, I am obviously spending way too much time painting our furniture. I love your technique and the table turned out fabulous. This will be how I paint from now on. Thanks.
Hugs,
Sherry
I love how the table turned out. The result is beautiful. Thanks for hosting again this week.
Looks gorgeous, thank you for the painting tips and hosting the best Linky Party ;O)!! Love the colors you chose!!!
Seriously…..that is AMAZING!!!!!
I might make something like that for my sunroom!! I could see a smaller version and a shelf on the bottom with baskets and my TV on top!!!
So cute:):)
Gina the table is great! You always do such a good job on painting furniture!!! Love the lights too!! Aren’t those IKEA, I love that place!!
Gina – I agree!!! Seriously amazing!!! You made it sound so easy!! I’m saving this great tutorial, Gina! Thank you so much for the help!
xoxo laurie
Wow! I love your table. I have one waiting to have something done with it, and this might be it. I like it a lot more than painting it straight white, especially because I do a lot of work on it and it’s going to get scuffed up, anyway. Thanks for hosting the party! I’m new here and it’s nice to fee welcome!
That looks great! thanks for hosting this blog party. Love your design style.
that table looks amazing!!!
Umm, could someone please tell Gina I’m currently hiding from her……..just until she gets over that urge to slipcover her sofa. 🙂
That turned out beautiful girl. Tell Mr. SCC he does (I)alright(I) with that building thang he’s got going on. Maybe I’ll hit him up to build my farmer’s carts afterall. Hey, I thought you were under that table earlier today with a dremel. Did I miss that part? Your color choices were great!
How big is that table? Looks pretty long to me. That’s what I need in my workroom to replace all those little tables I have in a row with all my machines on them. Hmmmm, thinking…thinking. 🙂
You’re gonna love it!
This tutorial for painting is the best I have ever read. I can do this!
Hey there! I’m new to the Party, thanks for hosting! I gotta say, I love that technique you used on the table! I’ve never seen that before & can’t wait to try it out. Thanks so much for sharing.
~Mary
http://www.thecraftygals.blogspot.com
Oh, G… I love it!!!
I’m a first timer! Thanks for hosting the party!
WOW!….WOW!!…..WOW!!!! It’s GORGEOUS!! I LOVE IT! I think it’s a FANTASTIC tutorial too!! One that I would LOVE to try someday!!
Thanks for hosting! 🙂
That table is AWESOME! I LOVE it!!!!
And hi! I’m Michelle! I’m a new follower 🙂
Those legs are SO pretty! LOOOOOOOOVE the finish!!
:)Thanks for hosting!
I am suffering incredible envy!! The legs are great, I love the whole thing! And thanks for hosting!
lifeofperks.blogspot.com
Gina your table is gorgeous!!
Ha! That looks SOOOO good Gina! What the heck! You got mad skills. I LOVE the way it looks. Especially the up close one towards the end. It has depth, and looks old. Love it!
♥ Amber
What a beautiful table & a great tutorial!
You did an awesome job on this table! It looks great!
Kim:)
Great job, your table is gorgeous, I love it:-)
Thanks for hosting, hugs Biljana
What a great job you did on that table! Love it and thanks for hosting a great linky party :)Alyssa of Boston Bee
Love the table. I linked up my transformed (clean) shower and wanted to say thanks for hosting.
I love it! I’ll have to try your technique!
Wow what a great tutorial! I have done this many different ways, but I like the way that you presented it. I can follow this more methodically than my approach.
Your table looks great.
Thanks for sharing.
Love it!
And like I don’t have enough blogs to read… I just found several more to add to Google Reader! I love being introduced to new blogs and new ideas! 🙂
Great table, Gina! I’d love it if you’d link it up to my Paint Color Party going on now!
http://lessthanperfectlifeofbliss.blogspot.com/2011/01/paint-color-party-link-up-your.html
Your table looks wonderful! thanks for the how-to!!
I adore the table! And the tutorial was fabulous ~ information I really needed. I’m dying to refinish something! 😉
GREAT tutorial, Gina, very clear, and the results are fabulous.
Looks terrific. Not sure if I have that much patience.
Hi Gina! I just wanted to tell you that I posted up some pictures and plugged in a link to your etsy shop on my blog…you KNOW how I just LOVE your etsy store. <3
http://www.mooreminutes.com/2011/01/decorating-with-wintertime-cozies.html
Also, that table is just gorgeous. I would be so excited to have it in my home. I really love the colors.
I love the new table, and the raggamuffin garland from the other day. I just posted my first Transformation Thursday, and hope to post many more 🙂 Barbara @ http://www.livelaughloverecycle.blogspot.com
Gorgeous table makeover! It’s better than you could probably find anywhere. Lovely details and craftsmanship.
http://shannonsews.blogspot.com
Thank you SO MUCH for the tutorial. I am new to refinishing furniture but I love that farmhouse table look!!
Love the table. There are some talented people out there in blogland!
oops–just saw that you want to know if it’s the first time you participated. It’s my second time. I just started blogging in November so needless to say I was thrilled by so many people stopping by from your site to mine. Thanks a million.
BTY, my first post was my checkerboard floor. This week I’ve re-done my foyer with layering and with horizontal stripes as a background. Let me know what you think if you have a minute.
Thanks for the bump.
Kathy
Hello Gina,
Thanks so much for hosting the linky party.
Fantastic tutorial and your table is just fab!
Kinga
The table looks awesome and you made it look very easy!
It’s my first time linking here! I love all the crafty projects here!
Um…you’re AWESOME! I got here from TCB, and I love love love it! Thanks!
You did such a beautiful job! I really love it! ~tai @ taidye original
I really enjoyed your tutorial.. thanks so much for sharing and just LOVE how your farmhouse table turned out…take care, Maryann
LOVE LOVE LOVE the table!! I’m new – just found you tonight through Nester!
So I have a question – I just went to Home Depot tonight and bought paint to redo my coffee table. It’s got a dark walnut stain on it now and I was going to do an antique white over it and make it look distressed.
But I love your blue and white combo even better and it totally goes with my living room.
BUT….my table has wrought iron legs. Do you think that would still look OK?
Thanks! Love your blog and your etsy store!! 🙂
Hi Gina, thanks for hosting your linky party. I really enjoyed the tutorial too….great job!
What a wonderful tutorial. I have always wanted to do that two-toned finish but never have had the guts. Now I will Gitter it Done on my next project.
Thanks for linking up!!
It turned out great!! Quite the process! Thanks for the step-by-step details!!
I was admiring your table in another one of your photos. Great tutorial. Beautiful results! Thanks for sharing, Gina! 🙂
Roeshel
Fabulous job Gina
Cheri
Perfect tutorial for me. Thank you for your time. It is beautiful. I’m a new fan!
I am “Kerrie” as well as the last commenter! Funny, since it is a very uncommon spelling of the name…Anyway, I loved this tutorial, and just found this site. It’s right up my alley! I am now a loyal follower!
This has to be the most beautiful table I’ve ever seen!! I just love it!! 🙂
LOVE THIS PROJECT! So much so that I,ve made it my first ever DIY.
I’ve been folliwng step by step. And have run into a roadblock: I’M in Canada and we don’t have the same brands of Ralph LAuren paint for the glaze…IS that glaze speical, or can you recommend something else?!?
Thank you!!
Cassandra
Great job, but I didn’t see what TYPE of paint you’re using: Latex, oil, nterior, exterior, flat, semi-gloss???
Thanks!
Hi Connie, plain old latex but you could also use chalk paint 🙂
Love this!!!!! I have a farmhouse table and chair set that I recently picked up….you’ve inspired me! Question….what do you put on top to protect it? Will beeswax protect it from water rings and spills? You are a rock star!
I gave it a coat of polyurethane to help seal it all in.
Lurve it!
Thanks Mary!
Hi there! first time here. I am a visual learner so i think pictures would have really helped me or a video. the table looks awesome but i was confused.
Thanks Cheryl, this is a super old post before I learned my photography and video skills, LOL 🙂
Hi there, this will be my first attempt in painting a shabby chick look on a dinning table. I am a little confused on whether to sand the table back or just paint over with chalk paint. I love the way you did the table, its beautiful.
I usually paint it with chalk paint and then sand after to get a distressed finish. Just have fun with it 🙂