I have a thing for polka dots. And anything gold. But gold polka dots…. be still my heart. I’ve seen gold wall dots roaming around for a while, but never really had a place to try it out, that was until I started working on my office a few weeks ago. Then I decided to do my own DIY Gold Wall Dots. Why you ask? Take a look at these…
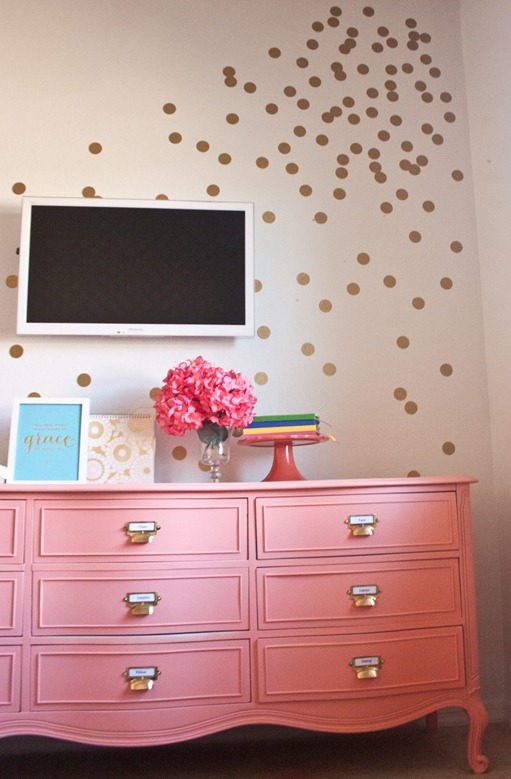
This version from Destiny who contributes at Infarrantly Creative is a show stopper.
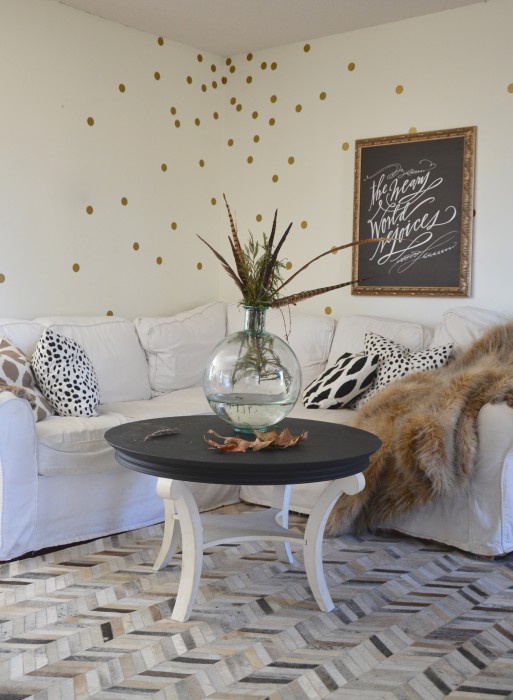
Then there’s my girl, The Nester. She’s done them a few different ways, but this is one of my faves.
So I looked around and realized that the ones I liked best were from Land of Nod and were outrageous for what they are: $24.95 (plus shipping) for a set of 48 polka dots. Say whaaa? Yeah, I knew I could DIY it cheaper, so I did.
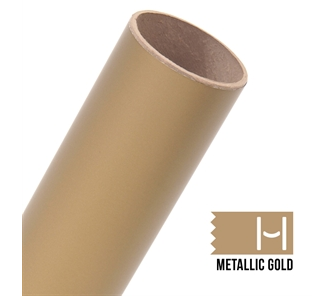
To make your own set of 48 dots you’ll need one sheet of Metallic Gold Vinyl (I love this kind from my partners at Happy Crafters). And it’s only $2.19 for a sheet. Big savings, my friends!
Now you have three options:
1) Make a sheet of periods that are 3 inches wide with your Silhouette Software and cut them out with your machine (this was my method).
2) Use a scrapbook punch and cut out circles in rows (of course you could use any size – the smaller the dots, the more you will get out of one sheet.
3) Find something circular the size you want, then trace circles all over the back with a pencil (once again, rows work best), then cut out the circles with a pair of scissors. Of course this is the most tedious, but it’s still an option if you don’t own a Silhouette or a scrapbook punch the size you want.
Once you have them all cut out, then randomly place them on the walls. You do have a little work time to move them if you need to tweak it a bit. Just do a few, step back, then do a few more. Keep going until you have the look you want.
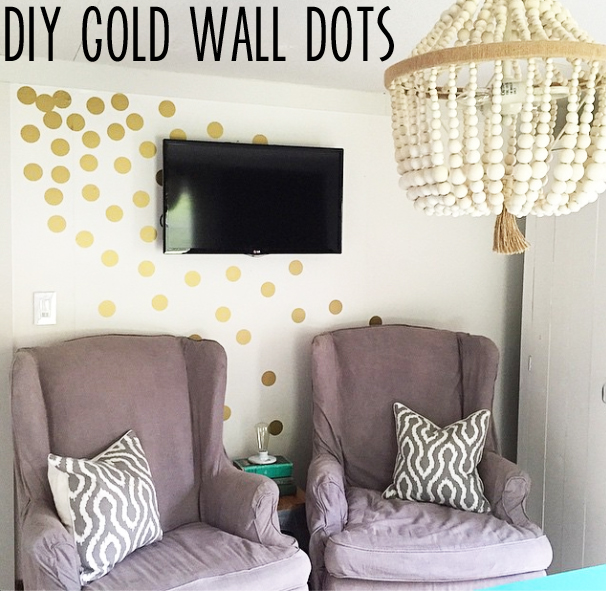 Not bad for about $2, huh? And best of all, it takes so little time you’ll be amazed. I created my template, cut out my circles and had the dots all on the wall in less than half an hour.
*Thanks to my friends at Happy Crafters for partnering with me on this post. All ideas, words and opinions are my own.*

Those walls are fab girl 🙂 What a brilliant idea.
I too love the Gold Dots! Yours look awesome. This old gal lives so primitive. I need a silhouette machine, heck I need a printer. Like one of your free printables said (I loved it), “I have more issues than Vogue”!!! Lol Have a great day and thanks for keeping me smiling.
Hey! Did you make one of the tiered chandeliers I first hacked?! Yours looks AMAZING! Do you have a post on it somewhere. I wanna check it out!
I’m loving gold lately. I can’t believe. I thought I’d always be a silver girl, wrong! 🙂
~Lindsey @ SimplySalvage
No it came from Pottery Barn
Looks Awesome! Just what ive been wanting to do! Question: Does it ruin the paint on the walls though? Im renting, im wondering if i can still do this?
Nope, they peel off super easy – so it’s perfect for renters!