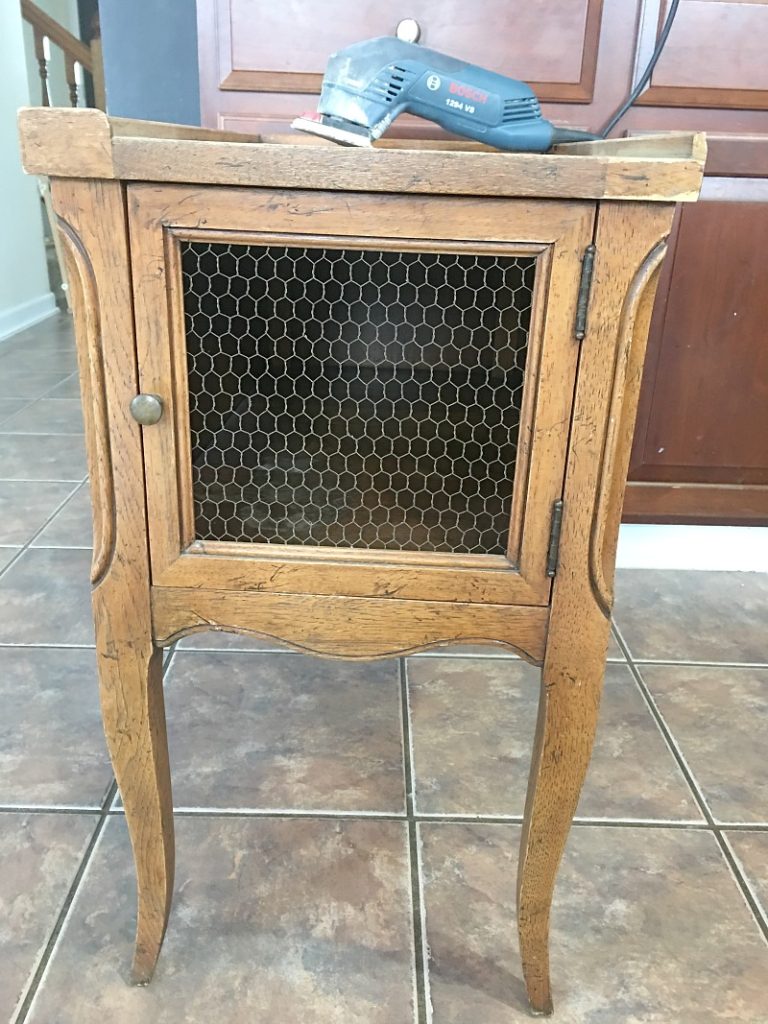
There is nothing more exciting than a thrift store in January. Everyone is decluttering, and there are serious treasures to be had. It’s more fun than the after Christmas sales. I am in the midst of a mega purge session myself, but I’ll admit I’m not above dropping my junk off at the back door and circling around to the front to buy someone else’s. Upcycled furniture projects are some of my favorites, so when I spotted this cute little side table I had to take her home.
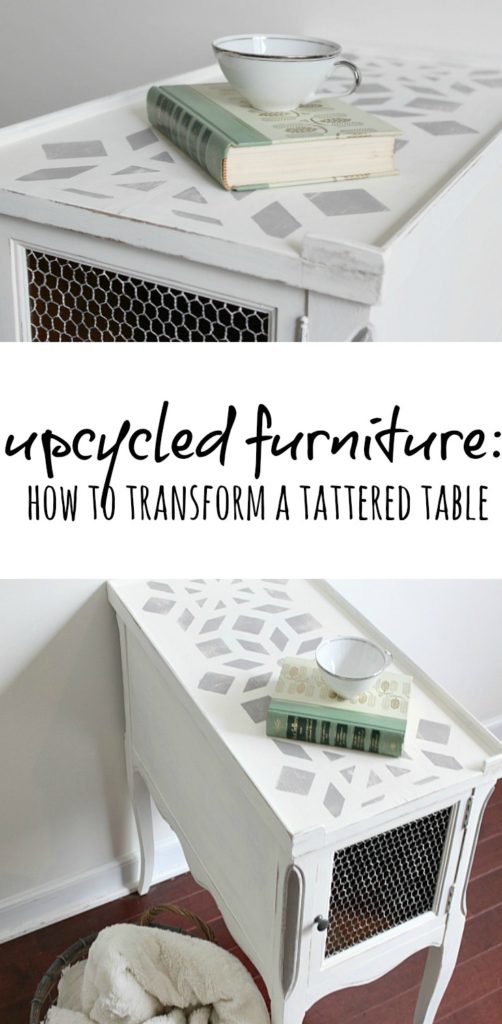
Upcycled Furniture: How To Transform A Tattered Table
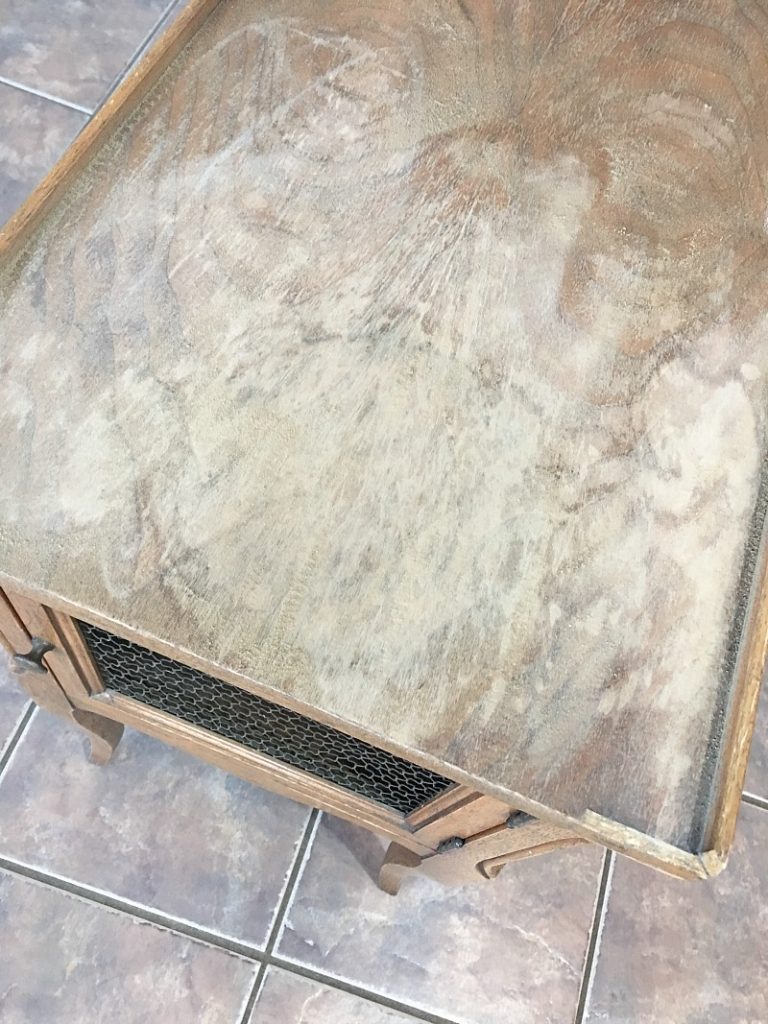
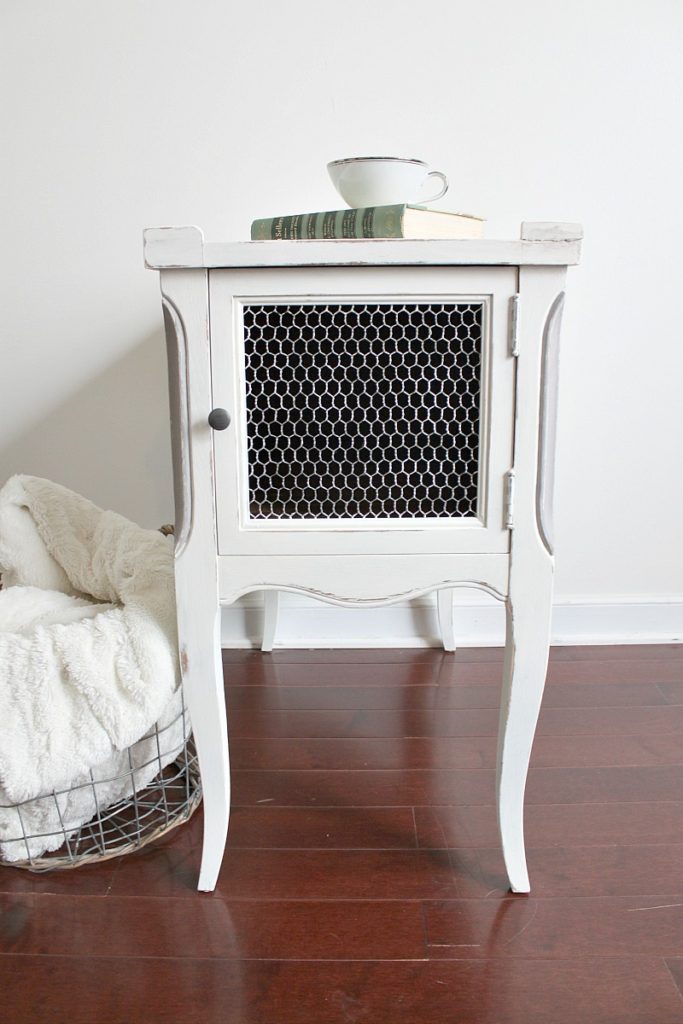
My new BFF had seen better days. She’s solid, but her outfit is so 1970’s. She had some water damage on top and was missing a tiny bit of trim, but those curves hinted at her glory days.
I cleaned her up and sanded the top well with 180 grit sandpaper to smooth out the ridges left from a spill. I planned to use chalk type paint for this makeover and distress her well, so no more prep was necessary.
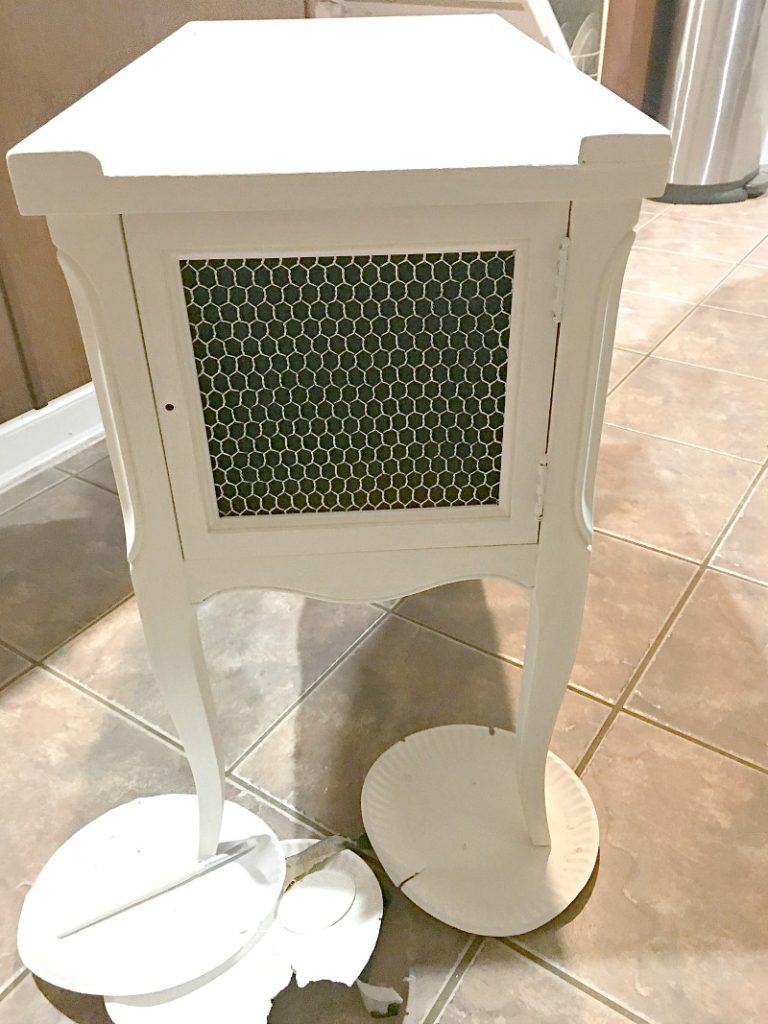
As soon as I spotted that chicken wire door I knew this table would really shine with farmhouse style. I first gave her two coats of creamy white paint while the engineer (that’s what I affectionately call my husband; if you don’t know what it’s like to be married to an engineer, stick with me and I’ll tell you all about it. ;)) crafted a new piece of tiny trim.
Five quick tips to use chalk paint
1. Make sure piece is clean to paint will adhere. Most pieces won’t need sanding/priming, but you need to ensure that they are clean before you start. This piece had a little damage to the top, so I sanded the top to smooth it out, but if your piece is in good condition then you most likely won’t have to sand.
2. Apply paint in light coats. If you want a distressed look apply less paint in the areas you will distress.
3. You can distress with sand paper or a wet rag before sealing. Remember to distress lightly, it’s always easier to add more distress than to repaint if you distress too much.
4. Always seal chalk paint with wax or poly. Wax is the traditional choice, however adding a couple of coats of polyacrylic also works well to seal the paint.
5. If you use wax, buff with a soft cloth about 30 minutes after applying the wax. Choose a lint-free cotton cloth for the best result.
Want to make your own chalk paint? Here is my easy Chalk Style Paint Recipe.
Bonus tip: Use paper plates to protect your floors when painting inside; they won’t bunch up around the legs, and will slide easily if you need to sit in one spot and rotate your project cuz you’re lazy.
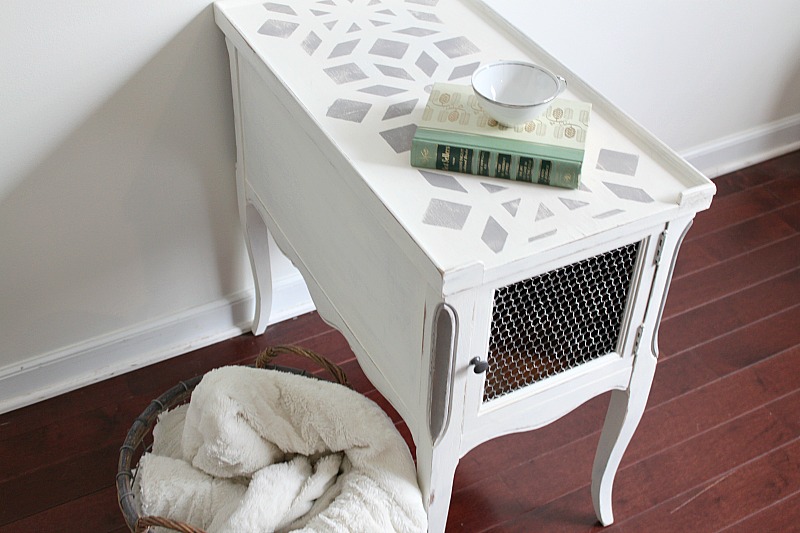
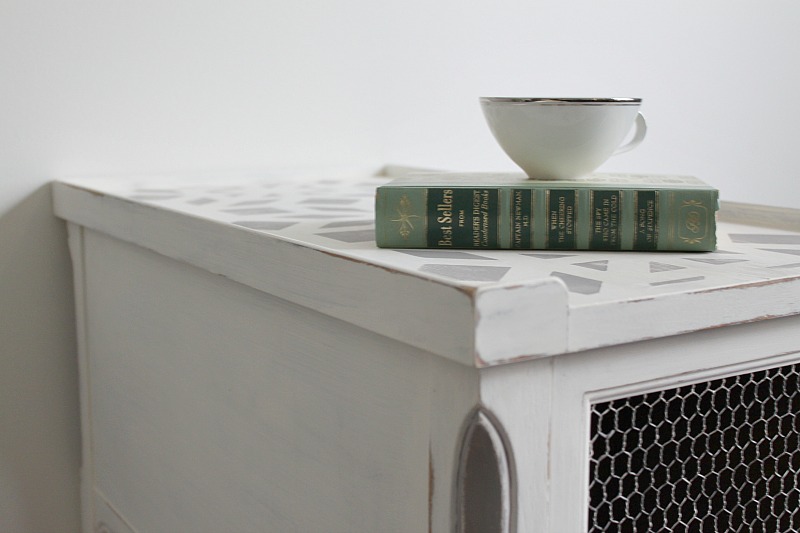
This table is narrow yet deep, perfect for a lamp and a book, and sporting a large surface that I just couldn’t leave alone. I pulled out a stencil (the same stencil I used for our modern farmhouse wall art) and added a light coat of gray with pattern with a foam roller for a softer look. The addition reminds me of the crocheted doilies my grandma added to every table top.
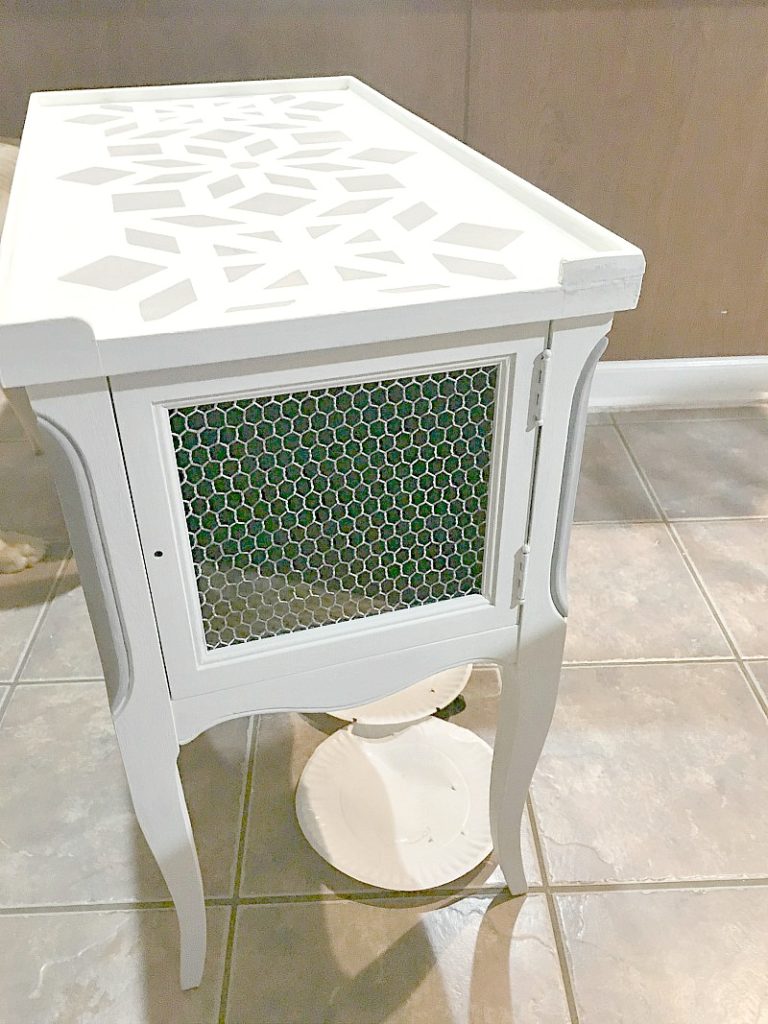
To paint metal hardware when it’s too cold for spray paint, I add a coat of gray chalky paint first, (it will stick to the metal) then wipe on a little metallic craft paint for shimmer. The hinges were painted white so they would blend in.
Lastly I added more gray paint to the corner accents to match the stencil, distressed her with sandpaper, and added a light coat of wax to protect her new look.
Ready for some after shots?
Those girly curves get me every time!
I might have visited the same thrift store every day for a week hoping she had a long lost twin I could adopt…
Are you purging and thrifting this month too? What has been your favorite thrift store score?
If you love upcycled furniture like I do, check out my painted furniture project gallery over at Reinvented!

Oh my gosh this turned out beautifully! I love it!
Thank you so much Jane! I haven’t been able to part with her, so I’ll be making a space in our house. 😉
Lol! I love it – I’m totally guilty of doing some mass purging… then going right around and bringing something out the front door. =’D I’ve donated nearly $1000 worth of stuff (biiig old farmhouse filled with stuff, especially expensive, never-touched remodelling supplies)… lord knows how much I’ve bought. 😛
This turned out beautifully! What a treasure. 🙂 That paper plate trick is genius!!
(Also, oops, I should add… $1000 worth of stuff total in the past few years, not just recently. :D)
Oh Zovesta, I’m so glad it’s not just me! 😉 Thank you so much for your sweet comment. I tried to buy something at the back door that had just been dropped off once, and they made me go around to the front first. 😉
Lol!! It’s common knowledge that the workers pick through the good stuff at our local thrift stores before pricing it… I swear the best, best stuff you see dropped off never gets a price tag on it. ;'(
I love this and I want to make them too, what a wonderful gift with lots of love your create when you make them.