Making your own word art is a budget friendly way to add color and personality to a space. Making a sign has always been my solution when I need a little sumfin-sumfin to a space, because as a writer I’m kind of obsessed with words (go figure!) Even if you’ve never attempted to make your own hand painted sign before, this project is super simple and can be made in a couple of hours (plus drying time.)

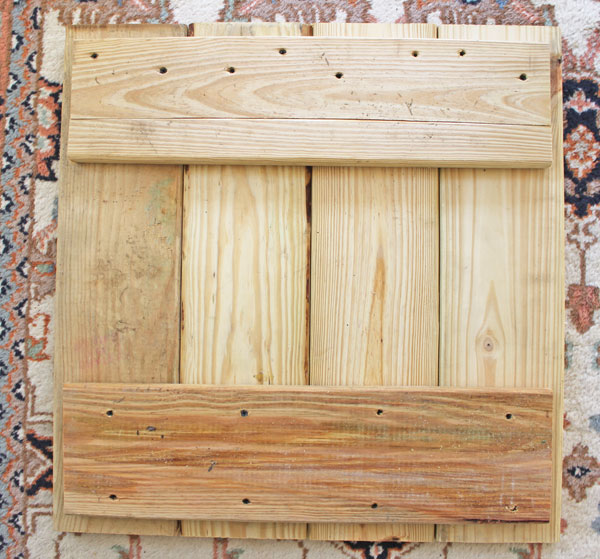 To make the sign itself, use decking boards to assemble it. If you cut them 22 inches long, you’ll have a square sign with 4 pieces of wood. For the backers, cut two pieces that are 20 inches long. Secure them together with 1 1/4 wood screws, going through the back (and again on the front for extra security and some pretty cool detail.)
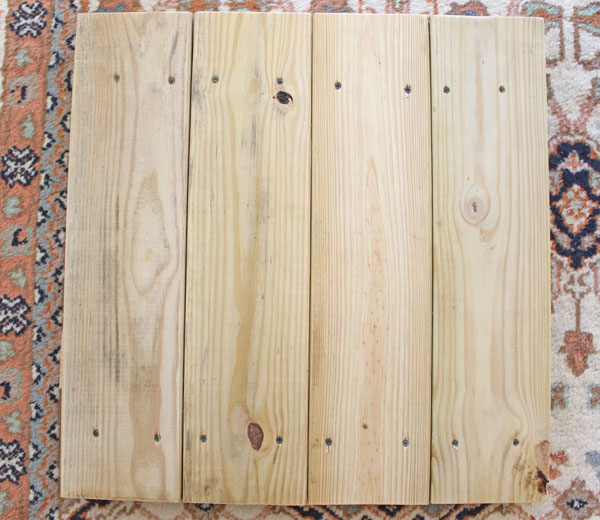 You could skip the screws on front, but I personally like the extra rustic touches (it reminds me of a recycled piece.)
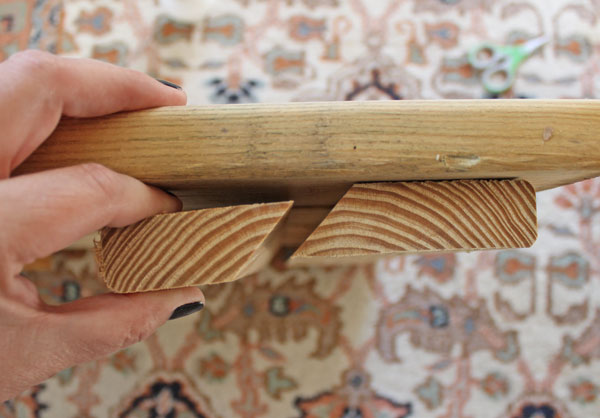 If you wanna get super fancy, you can create a cleat hanger by running one of the cross pieces through a table saw at a 45 degree angle. When ready to hang, install the clean on the wall and then hang your sign from it. If you want to keep it simple, you can just use straight boards and hang it with screws (using an anchor if needed). If you want to skip this step, then just get Lowe’s to cut your boards to length – 4 pieces at 22 inches long, 2 pieces at 20 inches long. It should all fit easily onto a 10 ft board (which is less than $7 – cheap for word art, huh?)
 So let’s talk a second about paint. Y’all know I’m a sucker for all things aqua, but I want different shades without having 99 paint samples hanging around my office. So I’ll buy one, use it for a couple of projects, then mix in a little black to get a different shade. This is what I like to call “dirtying the paint.” It’s probably got a technical term, but who am I kidding… I am no means technical (unless you wanna diagram sentences – I’m a CHAMP at that!)
Back to the paint…. I bought a sample of a Pantone color called Cockatoo (which is amazing), but I’ve already used it a couple of times and wanted a little variation. I had a half a sample left, so I added in a couple of plastic spoonfuls of black paint, mixed it with said plastic spoon and voila – dirty cockatoo. Sounds like a yummy mixed drink, huh?
 Now let’s paint that word art! Give your sign a couple of coats of paint, letting it dry between coats. Paint the edges, too. Make sure that it’s completely coated well and thoroughly dry (like overnight) before heading to the next step.
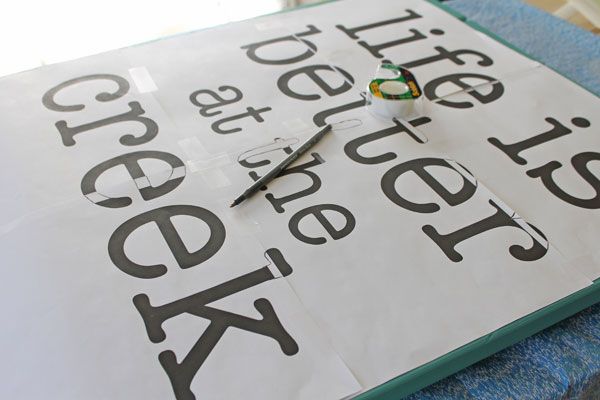 There’s a billion ways to make a word sign, but I always love the process of hand painting the letters. Imperfection is a beautiful thing! To make my big print out, I put together the graphic in photo shop (but you could use any photo program) and then used BlockPosters.com to paginate and print it (and it’s free!)
But here’s the thing: on a Mac it’s harder to trim off the edges, so where the letters didn’t connect properly I had to kind of pencil it together. It’s much easier than you think and it’s kind of like connecting the dots when you were a kid. Using regular wrapping tape, tape the pages together and fill in the gaps.
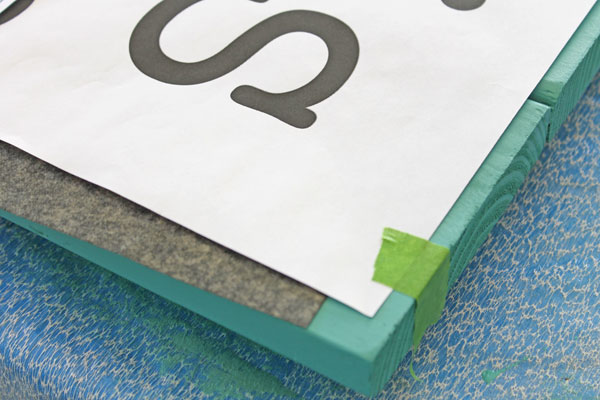 When your pages are all together, use a bit of painter’s tape on each side of the top to secure it. Do NOT tape it all around. Just the top edge. You will need to lift the page a billion times, so we’re just trying to keep it in place.
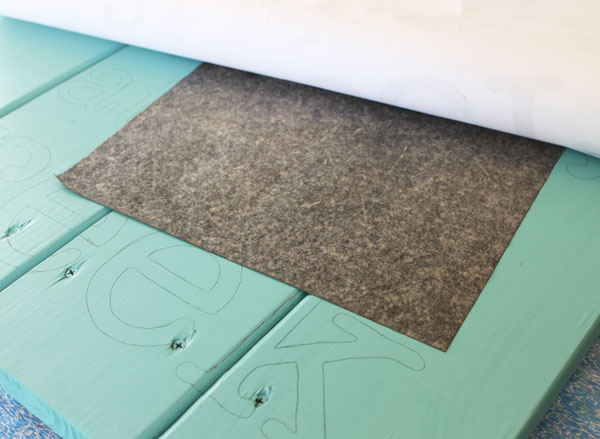 Using old school carbon paper (find it at an office supply store), put a sheet between the print you taped together and the sign itself, then take a pen and trace along the outside of the lines. The cracks in the sign will make it a little harder, but they really do add a lot of character so it’s worth it (to me, anyways!)
 With a paint brush, fill in those letters. If you need help I wrote another post on sign painting to get ya started. Remember those imperfections are beautiful, so don’t try to get it perfect. If you’re looking for crisp, clean lines you should use a different technique (vinyl stencils are great for that.)
The letters will need 2-3 coats, depending on the colors you use. Take your time, don’t stress, keep a wet cloth for mistakes and remember to enjoy the process.
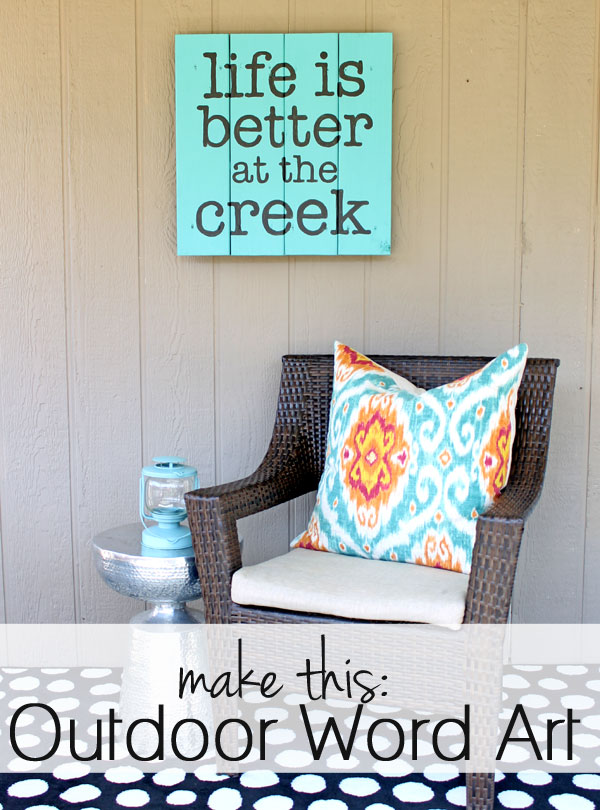
When you’re finished you’ll have a completely unique piece of word art to grace your space. And, yes, my friends, life truly is better by the creek 🙂

Thanks to Lowe’s for partnering with me on this post. For more ideas, be sure to download the newest issue of Lowe’s Creative Ideas Magazine!

I love it! What font did you use?
I used American Typewriter (which is a basic font on a Mac)
Love this!! Pinned!
Thank you for giving such detailed instructions – especially about how to create the lettering and how to print it out. That is often overlooked, and for someone like me who is craft-shy, and not very artistic (but who really wants to try), your help in this is much appreciated. I find such inspiration in Bible verses and quotes, and would love to post some of my favorites on my walls to give me a boost on difficult days.
Thanks again, and God Bless,
Wendy
Love the idea of “dirtying” the paint to get a new color. Always looking to reuse or recycle objects. But I must know, where did you get the fabric for that pillow???!!??! I would be perfect to recover my kitchen chairs with.
I got it at OnlineFabricStore.net (love that site!)
I love the bright spring colors I too am a sucker for aqua! I will have to try something like this.
Really big fan of this!! I love taking inspiration from the creativity of others. Well done you 🙂
I love the pillow on the chair! Where did you find it??
I love that pillow. Where did you find that?
I made it 🙂 you can learn all about it here: http://www.theshabbycreekcottage.com/2013/11/how-to-make-pillows.html
Although I live by a creek my sign would say either life is better with sand between your toes -or- life is better at the beach.
Where ever your heart takes you Kay 🙂