Want to make a pretty leaf wreath that won’t die? This project is so simple and cheap to make, with only two supplies plus a pair of scissors: Frog Tape and foam core board. No fancy die cutters, no hot glue. It’s so easy you can sit in front of the TV, turn on your favorite movie and craft while you watch (don’t you just love those kinds of projects?)
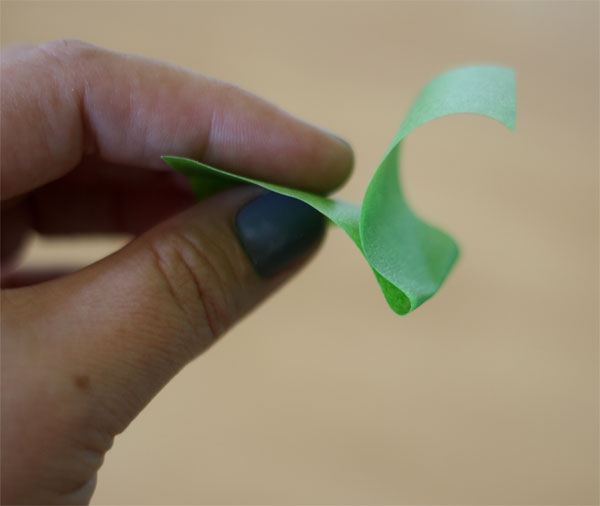
Start with your Frog Tape. You’ll need to cut pieces that are 5 or 6 inches long, but just eye ball it. Fold the piece in half, sticky sides together. (I used the 2 inch wide tape.)
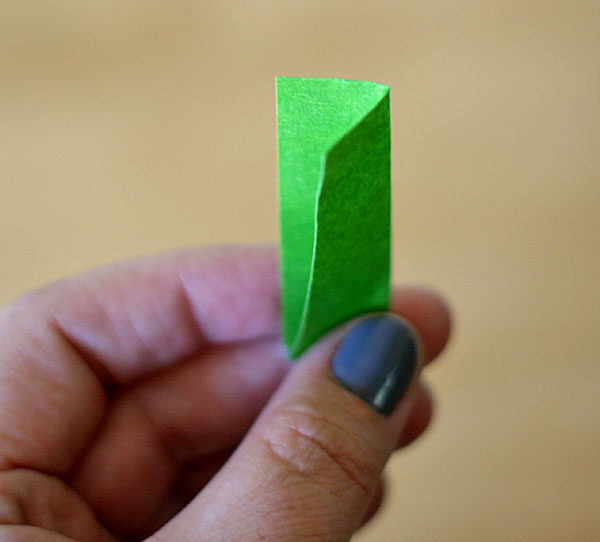
Then fold the piece in half long ways.
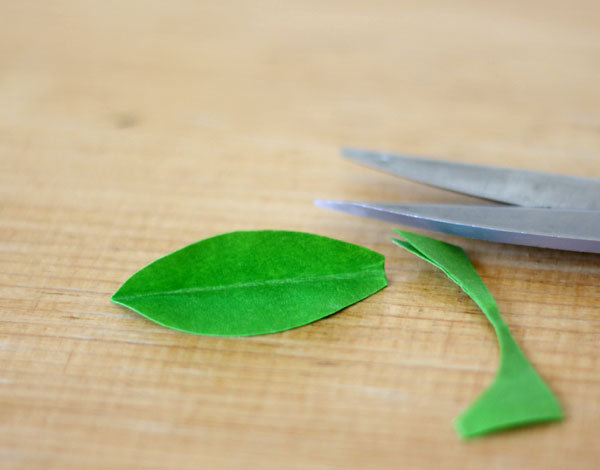
Then cut out a leafy shape, using a half moonish shape, using the fold as the center of the leaf. You need some smaller and some larger, but we’ll get to that in a sec. Make lots and lots and lots of leaves. Probably around 100 per wreath. It ain’t quick – but it’s kinda calming to sit and snip them out.
When your leaves are all cut, the take the foam core, and use two bowls, one a couple of inches smaller than the other, and trace them on the foam core (large one first, then center the small one inside it.) Cut on both lines, so you have a foam core ring.
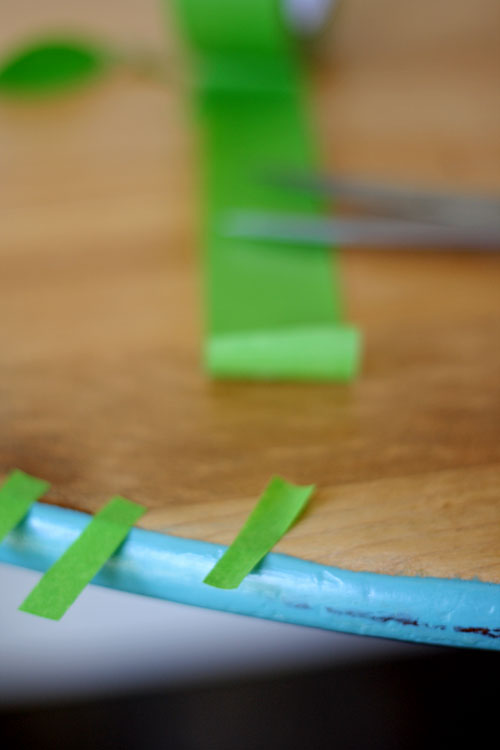
Snip off short pieces of the tape, they’re gonna be the “stems” of the leaves.

Tape the leaves on, starting from side to side. Use smaller leaves on the inside of the ring, larger ones on the outside to keep everything even.

After the first outer leaves are on, tape a third leaf in the center. Repeat all the way around the ring.
Tape, tape, tape, all the way around, lifting up the first row just a bit to slide the last row in when you get to the end. That’s it.
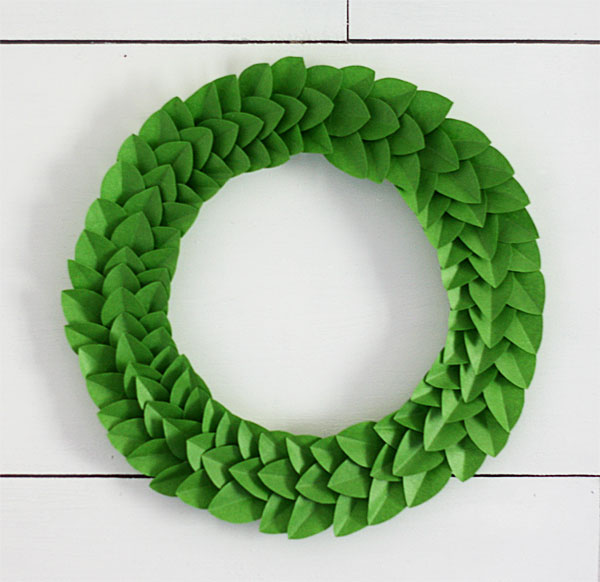 With a $1 foam core board, you can get three forms, plus a small portion of a roll of the tape – not bad for your very own DIY leaf wreath. The best part: you can make them whatever size you need – larger or smaller.
They’re gonna look great for the upcoming Christmas Tour of Homes – and I can’t wait to share the rest of my home.

WOW Gina! This really looks amazing…I mean REALLY!!!! You rocked this right out of the park! I love it and it looks picture perfect plain and on the other side of the coin…some simple berries would be nice too : ) APPLAUSE and APPAWS for this incredibly creative and INSPIRATIONAL wreath…once again…this one gets a WOW…WOW…WOW hugs…
Oh my gosh..this wreath is so awesome and creative….Bravo!!!!….Pinning and FB’ing!!! Have a great weekend!
WOW! What a great idea and a great look! So festive and fun, I love it!
Brillant…just brillant.
Shut the front door, G! That is the most ridiculously awesome wreath ever! Seriously creative!!!!
So creative of you! I love your wreath!!!
I LOVE it. Came to you from thistle wood farms. You and Karianne are very talented. Thank you for sharing. I’m totally making these, they’re the best!
Very nice!!!!!
Wow! Fantastic wreath…
Wreath idea was cute………..but this was supposed to be a pillow zipper tutorial. I believe I know how to do that…….put in the zipper on one side of your pillow before you stitch the other sides…………..however I would have liked to see your idea. Just an fyi
Thanks Rita for the heads up, will get it fixed 🙂