Unless you know me in real life, you’ve never seen the outside of my house. There’s a seriously good reason for that: until a few days ago it was one hot mess. Like the hottest mess to end all hot messes. It was like Ke$ha multiplied by Amanda Bynes, then topped off with some Lindsay Lohan, and some Miley Cyrus for garnish.
Yeah.
But, I’m on a mission to make the outside match the inside – and it’s finally time to give the outside a major makeover. We’re in the process of building all kinds of dreamy things, but before we get to all of that magic, first the windows needed a little lovin’.
Before we look at bringing old windows back to life, let’s all take the oath that you won’t make fun of me… or call me names… or snicker behind my back at the horrible before photos, m’kay?

Alright! Now that you’re a bestie for life, let’s look at the journey we took to get from the sad, old, untrimmed windows to the finished beauty above.
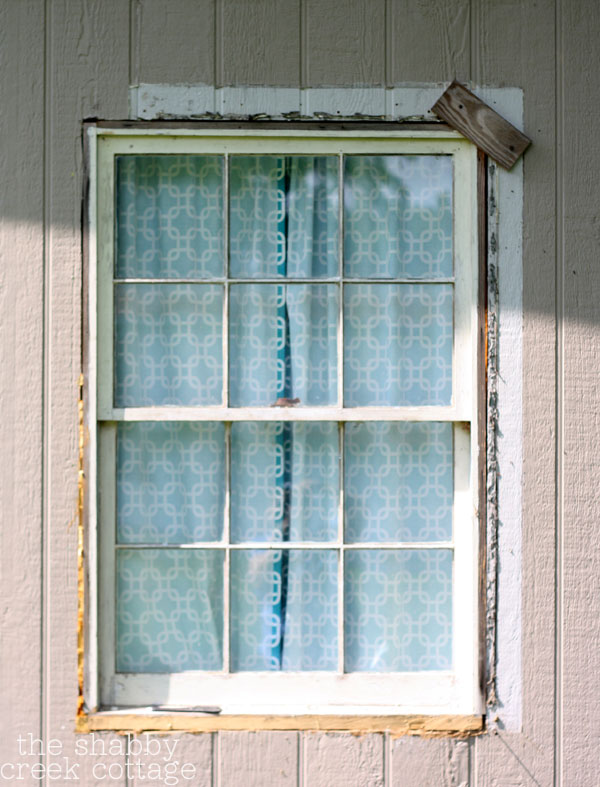
Remember, no laughing! We replaced all of our mobile home standard windows with these gorgeous old 12 pane wood windows from the ReStore. And for $10 a window, they were a steal. Farmhouse charm? They’re oozing in it. Let’s fancy them up and make them shine the way they are destined to be.
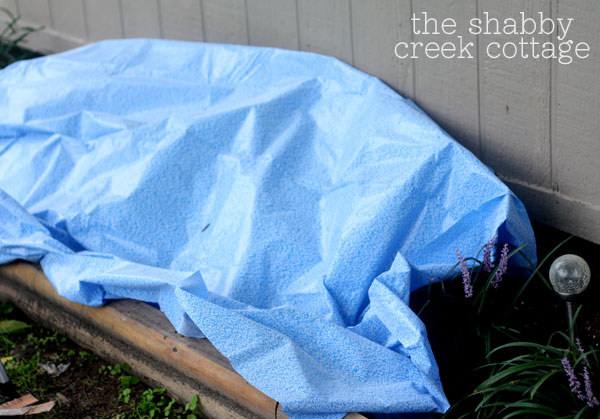
First, I covered up my work area with a ScotchBlue drop cloth to keep my area neat & hopefully keep from destroying my flower bed (which worked – yay!)
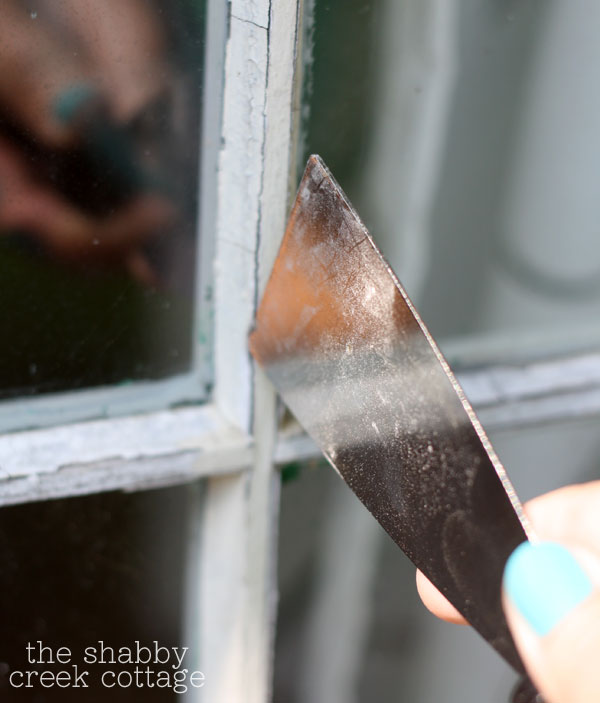
Next, I chipped out all of the old window glazing. A lot of it was old and falling out, some had to be coaxed, but I did get it all out.
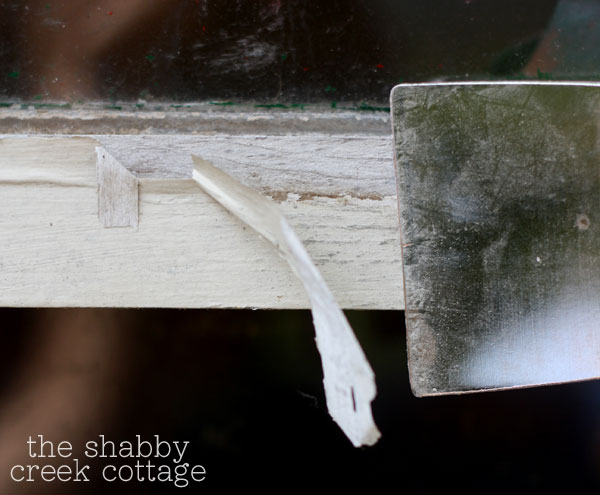
After the glaze was out, I scraped off all of the old, loose paint (which I knew was not lead based).

Then, I used 3M Advanced Abrasives sandpaper to clean all of the wood facing of the window to prep it for painting.
 sandpaper to clean all of the wood facing of the window to prep it for painting.
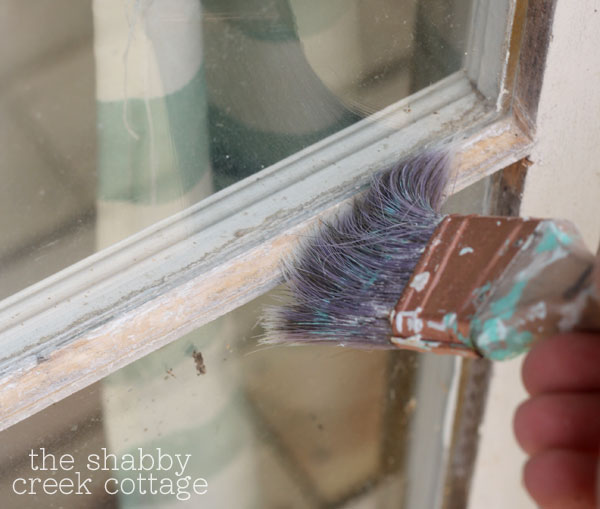
Using a clean, dry brush, I cleaned up all of the dust to get the windows ready for glazing.
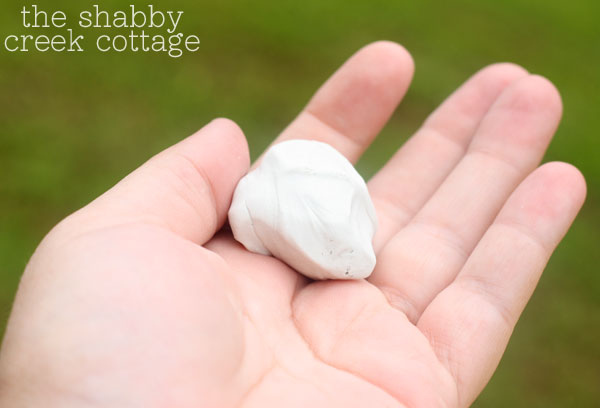
I took the putty style glaze {because the caulk style is awful} and warmed it up in my hand by working it around like a stress ball.
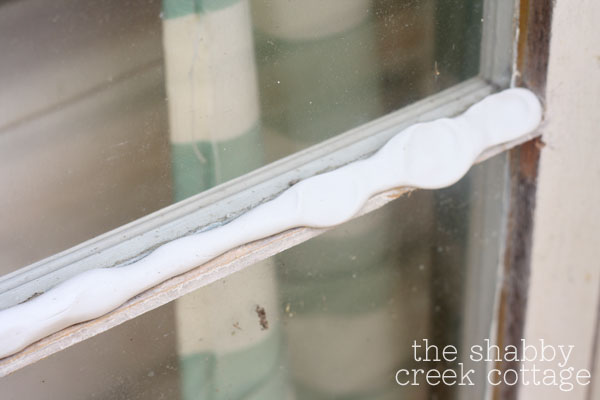
Then I rolled it into a snake and put it into the grove.

Using a putty knife, I squished it into the corner where the glass and wood meets, leaving plenty so I could trim it off after it was full.
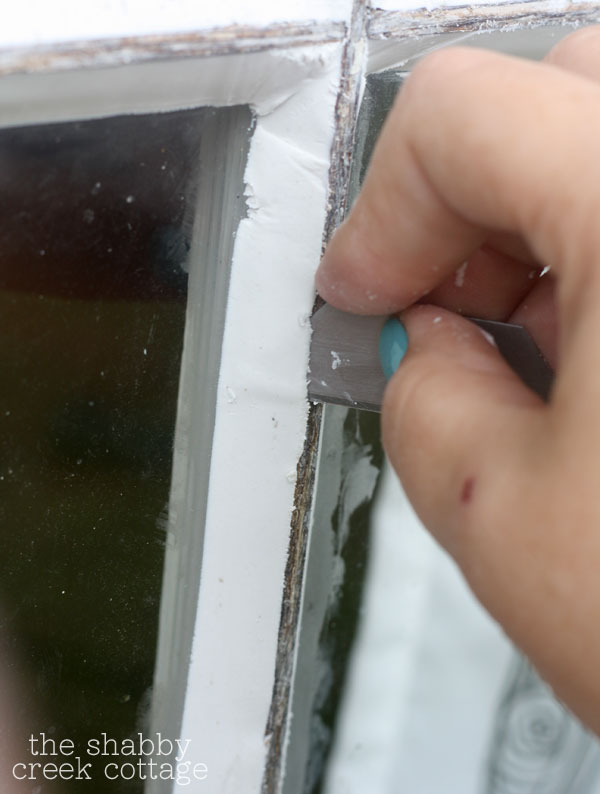
Although you can cut the excess off with a putty knife, I find that a razor blade from a utility knife works better for me, and I use it to cut off the excess glaze.
Putty style glaze takes 7-14 days to cure, so you’ll have to wait to paint it – but we can trim out the windows.

Mr. SCC geared up with some 3M Tekk Safety Glasses and got his saw on! First he measured the windows, then cut 1x6s to use as trim.
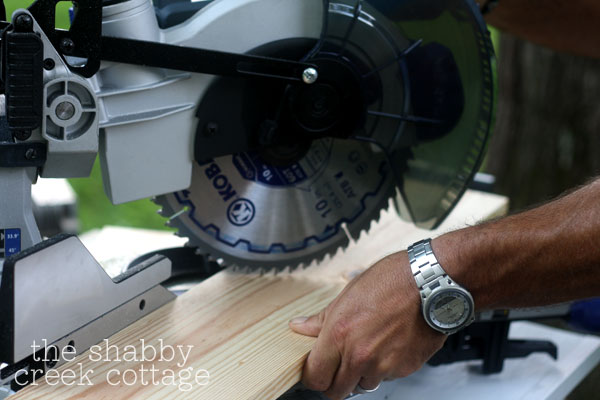
Using a compound miter saw, he cut them on a 45 degree angle, so it would all fit together nicely.
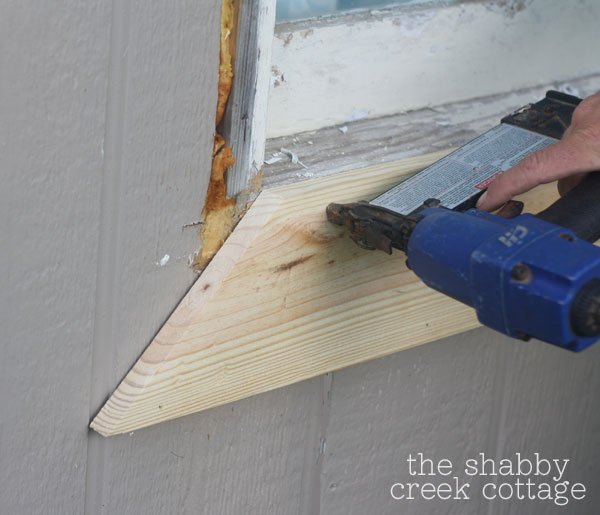
Using a nail gun, he put all of the pieces up for the trim, then caulked out the window so it could all be painted.
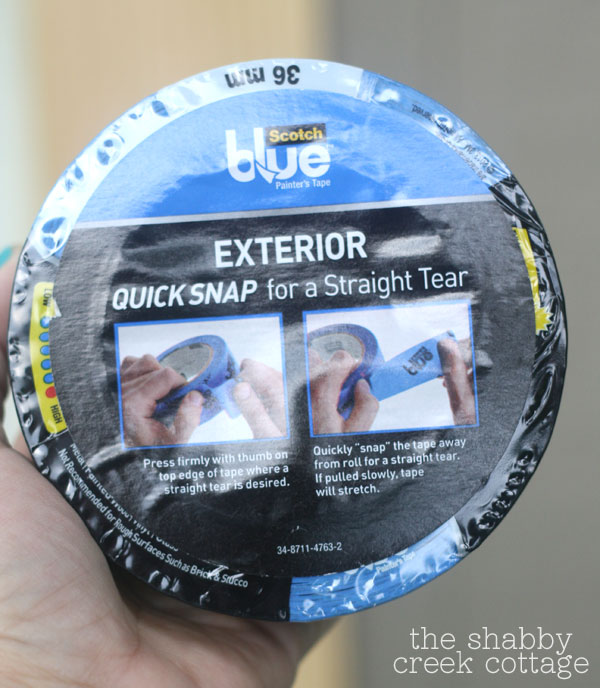
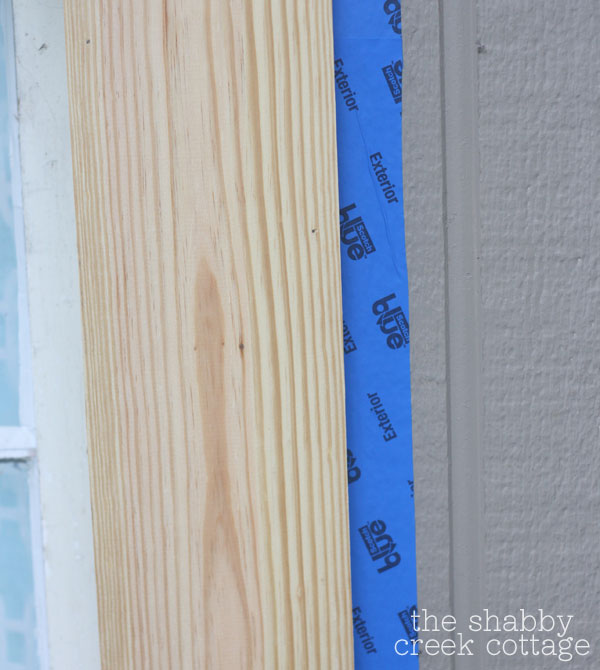
Once the glaze was cured, I went back and used ScotchBlue™ Painter’s Tape for Exteriors to prep for painting. Have you seen this stuff? It snaps off easily to give you a clean end, making it easier to tape windows. Neat, huh? Check it out below:
 for Exteriors to prep for painting. Have you seen this stuff? It snaps off easily to give you a clean end,
*I shared that on Instagram a few days ago*
After it was all taped and painted, the job was complete.
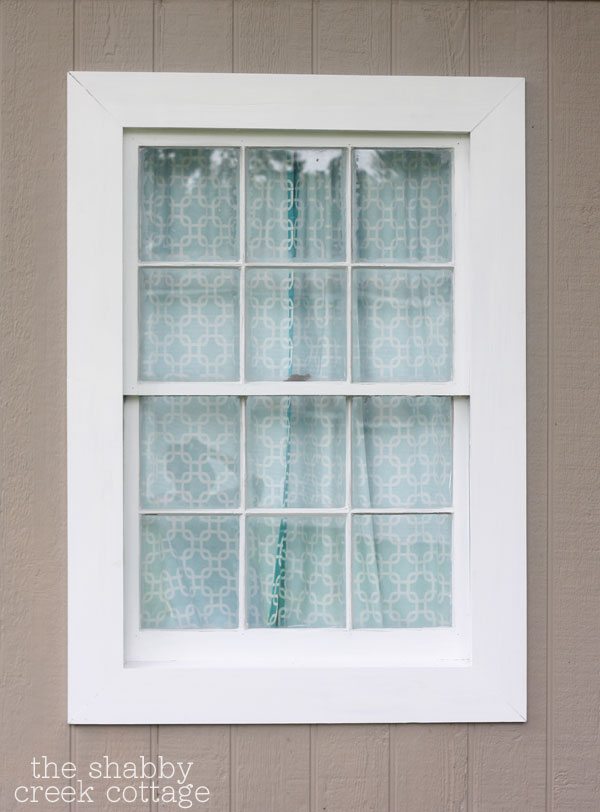
It’s a long process, but totally worth the results, don’t ya think?
Want to see more great projects? There are tons of great ideas here: 3M DIY Facebook Page, 3M DIY Twitter Page, & 3M DIY Pinterest Page.


This post is a collaboration with 3M DIY. To keep up-to-date on projects, products and sampling visit 3MDIY.com.
Your windows look fantastic! Don’t worry I did not make fun of your windows, I was super excited to see the end result!
What a nice job! I’m working on replacing some rotten wood on some of my windows. I used some wood putty and regular caulk, but a few areas probably need the glaze. Is it OK if it gets wet while its curing? Apparently, it’s never going to stop raining around here……
Hi Carla,
Thanks! Yes, it rained like the next day after I did ours and I didn’t see any damage. The caulk style only needs 24 hours, yet the putty needs 2 weeks to dry.
Good luck with your project!
Great tutorial! Your windows are great, and the trim looks really neat! Great job!
Your windows look great, Gina!
You know Gina I so wish you and your oh so handsome hub lived by me. I think we would just be besties for sure! And the Mr. could help with all my handyman stuff. I love love love your windows and the motivation to do all your projects.
Thanks again Gina for the wonderful job of sharing. I love getting up in the morning and visiting with you and all your projects!
Beautiful job! Your window looks like new and I love how you’re salvaging vintage wood windows. 🙂
Awesome job Gina and hubby! It really looks great!
Judy
Love the window and how they look! great job on the trim and the simple white clean look is great. Can’t wait to see what else happens next.
I love the window! Now we’re besties for life…can you show a picture of the outside of your complete house 😉 ? I really would like to see how the windows turned out in the overall look of your house.
It’s coming soon, Judith – pinky promise 🙂
I like your hint on glazing. I have a window that is needing glazed, so this advice helps. Your windows look great.
Blessings,
Audrey Z. @ Timeless Treasures
Wow, Gina, the after looks so good I thought you’d actually REMOVED the windows and replaced them with new! Nice job! Also, that tape is amazing, I’ve got to get me some!
Personal question: your nails look really nice! I’m looking for the perfect aqua/turquoise polish, and am wondering what the brand name and color is of your polish? Thanks in advance!
Best,
Kimberly
Hi Kimberly,
Thanks so much! The color is by Loreal, it’s “Not a Cloud in Sight” and I found it at Target 🙂
THANK YOU for the response, Gina! Guess what’s on my shopping list now? LOL! 😀
Wow! Great Job!!!
Love the windows! I too have standard mobile home windows in my home and hate them! I would love to have them replaced and trimmed out like yours! Are you coming to Tennessee anytime soon? LOL!
It’s looking great!
Bondo can also be used to repair rotten wood. Reglazing old windows then putting up quality combination storm windows will really help you conserve energy also. We have a historic home and have redone all (35!) windows this way. Let’s just say I got really good at glazing!
Gina, I am so glad you posted this because we just bought/moved into a 75 year old Craftsman with windows that need some love. Like: the glazing needs to be scraped off and redone and the mullions need to be repainted and such. I loved finding out about the glazing putty! Thanks!
The windows now look divine!
What an inspiration!
HUGS!
~me
Love your “new” windows. Do you have to caulk the trim so no water gets in behind? Jo @ Let’s Face the Music
That looks amazing! I have seriously been wanting to trade in our plastic shutters for trim just like this.
oh Gina you are very brave and real. what I like most about your blog is its for us real folks that don’t have gobs of money to throw at our homes! what a difference your windows add ,I bet its alot more enjoyable to drive up to the homested now. 😉
Great tutorial and the old windows are beautiful and add so much character. You might want to visit oldhouseguy’s site to read up on redoing old windows and their frames:. the information is astounding. Unfortunately, I can no longer look at windows with “picture framing” without cringing a little. i think it’s some new modern thing which doesn’t protect the windows or house, and people now don’t even know it’s wrong.
I do really like this post, however, so I hope I don’t come off a critical and I think I may stick around to read what other great things you do.
What a super job! Changing the trim makes a wonderful difference.
Thanks for sharing.
I remember my dad doing this when I was a kid! Wish we had these windows again!
You are so smart and so creative. What a great transformation! -Bev 🙂
Looks great.
We just put a roof on our mobile home; doouble wide 22 years old. Looks great and now I’m cleaning and painting the deck and using 1×6 pine to make our 2×4 framed porch look “chunky”.
Just showed my wife your pine floors and we have decided to do that. The windows though, amazing and it’s my big project next spring. Did you have trouble finding windows to fit at restore? Did you blog the process? (is blog the right term???)
Love the siding too; any blog on that?
Thanks
Danno
We got lucky on finding the right amount of windows that we needed. However, they were just slightly larger so we had to do some trimming on the walls to fit them. You can refer back to my windows post to see the process we did it in. just google Shabby Creek window makeover.
Awesome and recycled. Doesn’t get better than that!
I’m here because I’m looking how to trim a window but with vinyl siding! Want to let all readers know, if you have vinyl you cannot just add on wood trim! You HAVE to redo J channeling to properly fit everything or else water can and will get behind everything!
The windows looked better than the did, but just barely. You (and more importantly, the contractor, who should know better) created what is known as a “picture frame” casing around the window. Pictures and photographs deserve picture frame casings, but not windows. Window casings should have a Header. The Header is at the top of the window and should be slightly wider vertically than the casing to the sides of the window. In addition, the Header should extend beyond the side casings by around 2 inches. Finally, the Header should have a drip ledge at the very top (with a tasteful Cornice if you want to get a bit sophisticated). The window casing should also have a Window Sill with an optional Sill Apron. A properly constructed Header, Drip Ledge (and optional Cornice), Window Sill (and optional Sill Apron) will make all the difference in the world on the look of the window and the entire house. They provide incredible shadow lines that give a house depth and the sense of the organic.