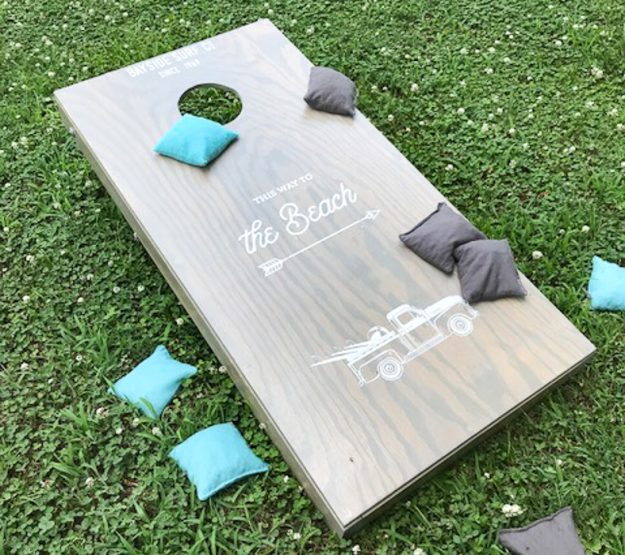
Almost every time we take a trip somewhere, we bring a little inspiration home along with our memories. It’s a fun way that we add in a little of our travels into our everyday lives (which, let’s face it, is sooooo much better than another refrigerator magnet.) Today’s project is one of those memories that took shape in the form of DIYing our own custom cornhole boards. Although I had played a bit here and there, I’d never been really into it… until we went to Topsail Island, NC for a weekend to visit some friends. While we were there we had a date night – which involved, you guessed it, hanging out at a local pub and playing cornhole.
It’s been a while since I’ve felt the itch to make something from scratch, but for this project we pulled out the saws and drills and got to work. And it went surprisingly fast! I expected it to take all day, however after we got all the logistics figured out on how to build the first of our own custom cornhole boards, the second went together in about an hour. So I’m gonna share exactly what we did so you can bypass all the frustrating bits and get yours built in way less than an afternoon.
HOW TO BUILD CUSTOM CORNHOLE BOARDS
*this post contains affiliate links – which means I may get a commission off sales purchased through the links*
For this project, you’ll need a few things:
WOOD
- 2 pieces of 1/4 inch plywood, cut 24 inches by 48 inches (PS – they have this size pre-cut at any lumber store)
- 4 pieces of 2×4 wood cut 48 inches long
- 6 pieces of 2×4 wood cut 21 inches long
- 4 pieces of 2×4 lumber cut 14.25 inches long.
You’ll also need
- 3 inch decking screws
- miter saw
- drill – with driver bit and drill bits (you’ll need 1/8 inch and 1/2 inch bits)
- four 1/2 inch bolts – 4 inches long
- 4 1/2 inch wingnuts
- eight 1/2 inch washers
- jigsaw
- palm sander
- sandpaper
- wood stain (I used my favorite color – DRIFTWOOD – find it on Amazon)
- outdoor polyurethane
- optional: I embellished with transfers from my independent Chalk Couture shop
- bean bags (I HIGHLY recommend these from Amazon)
Now that we’ve got it all together, let’s get to building!
Start by setting up the frame. You’ll use 2 of the 48 inch 2x4s on the outsides and the 3 pieces of 21 inch 2x4s on the inside. One on each end and one in the middle. Predrill your holes with the 1/8 inch bit and attach with decking screws. You’ll do this twice, one for each frame.
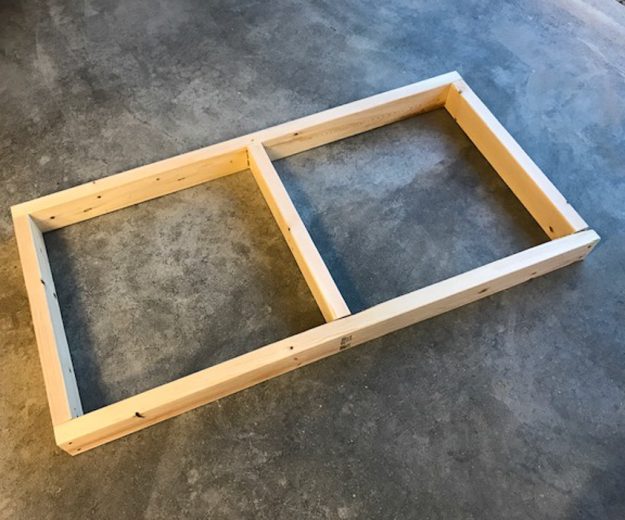
Once you get it together, it’ll look like this.
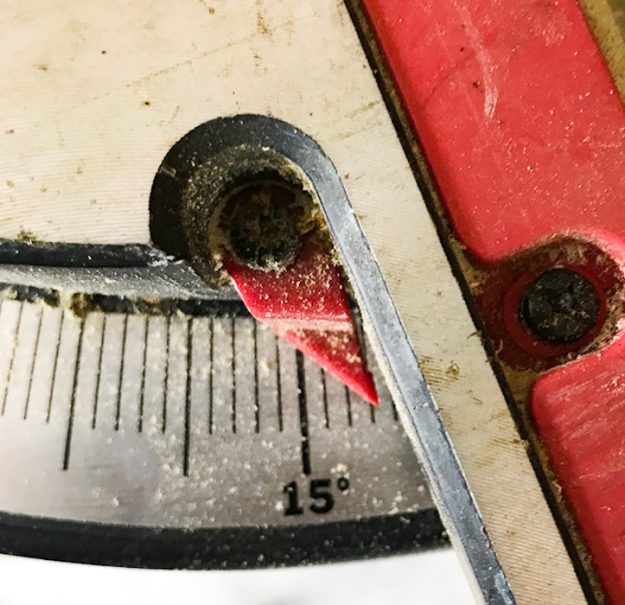
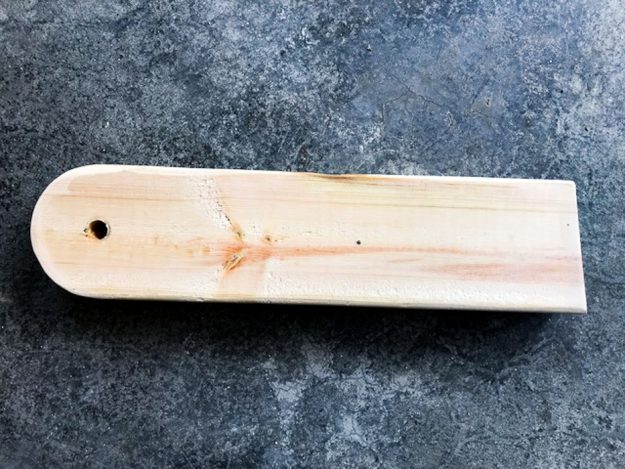
Next, take the short pieces (that’s the 14.25 inch ones) and cut one end with an 18 degree angle. Just one end though. The other end you’ll need to use a compass and make it rounded (ps – a quart paint can works great here, too.) Use your jigsaw and cut it out to be rounded on the top.
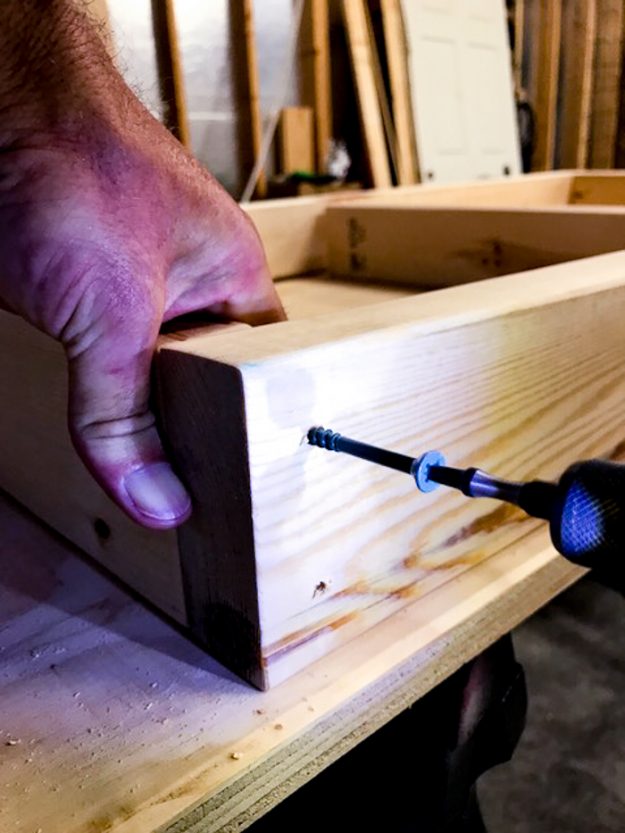
After your legs are cut, hold them up to one end of the frame, making sure the angled side is going the same direction (so it will sit evenly on the ground) and then pre-drill through the leg with the 1/8 inch bit into the frame so you will have it match up easily.
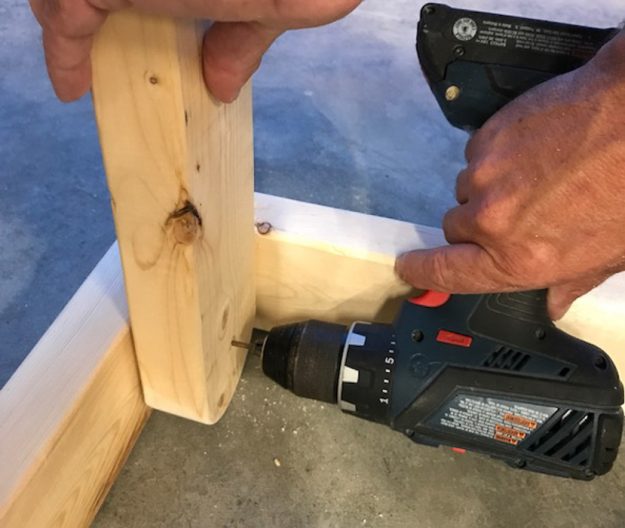
Once it has been predrilled, then use that as your center mark and drill it out with the 1/2 inch bit, both on the leg and the frame. (Pro tip: go half way through on each side, then go in from the other half to prevent massive splintering from blowout.)
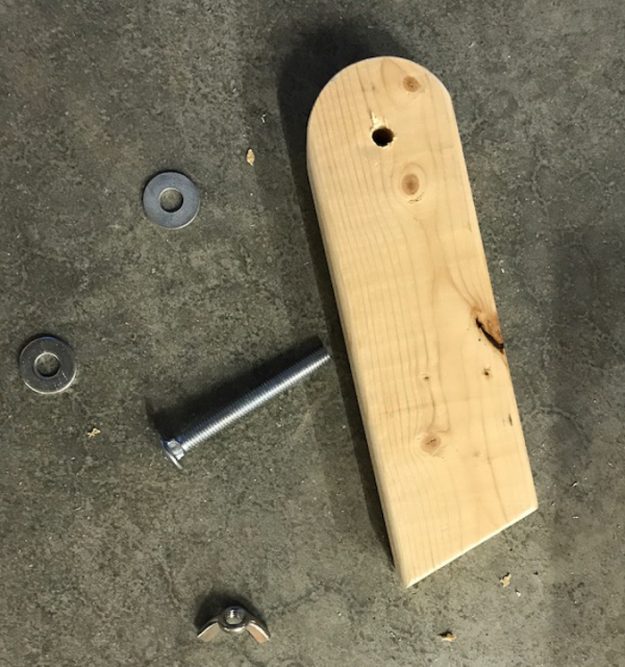 After your legs and frame are both drilled (you did both sides, right), then attach the legs with the bolts. Put a washer on either side of the leg, and use the wing nut to secure it.
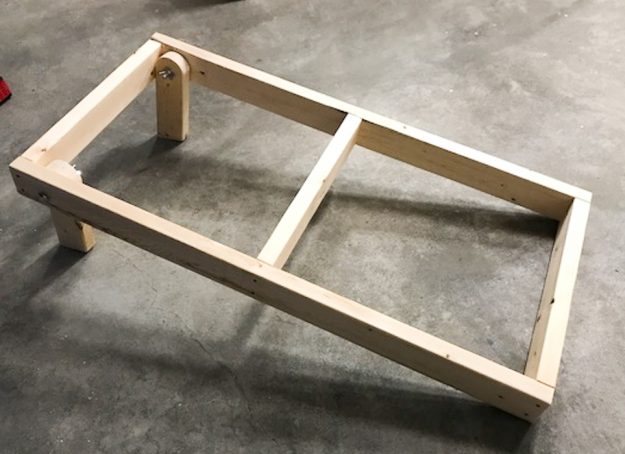
Nice, huh? Now your legs will fold up so the boards will store flat when not in use. Alright, let’s top it!
First, pre-drill the edge of your custom cornhole boards all the way around, then attach with decking screws. We screwed it down every 12 inches or so – and make sure you do the middle brace, too.
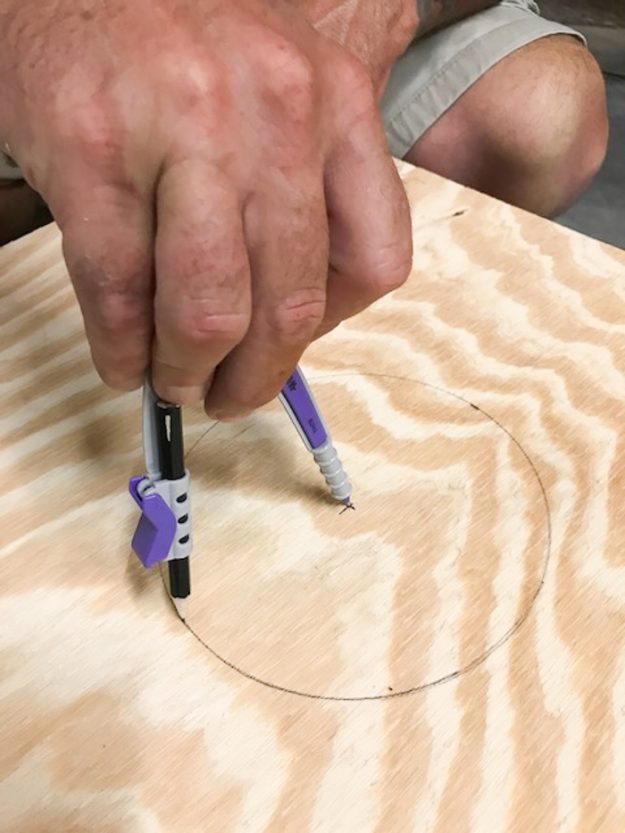
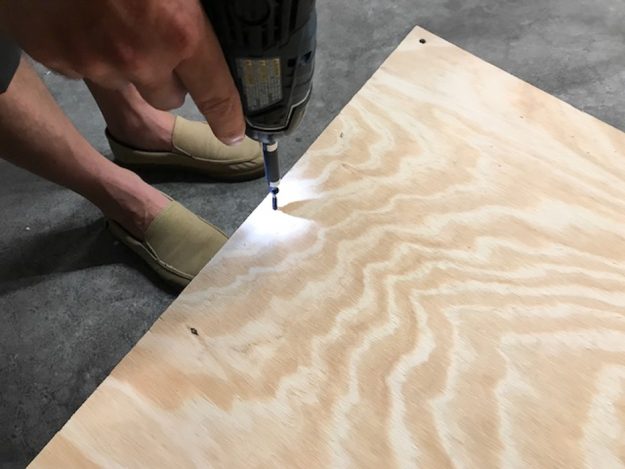
But they’re not really “custom cornhole boards” without the holes. Mark the center of the circle 12 inches from the top (centering up from side to side), then make a 6 inch circle with a compass.
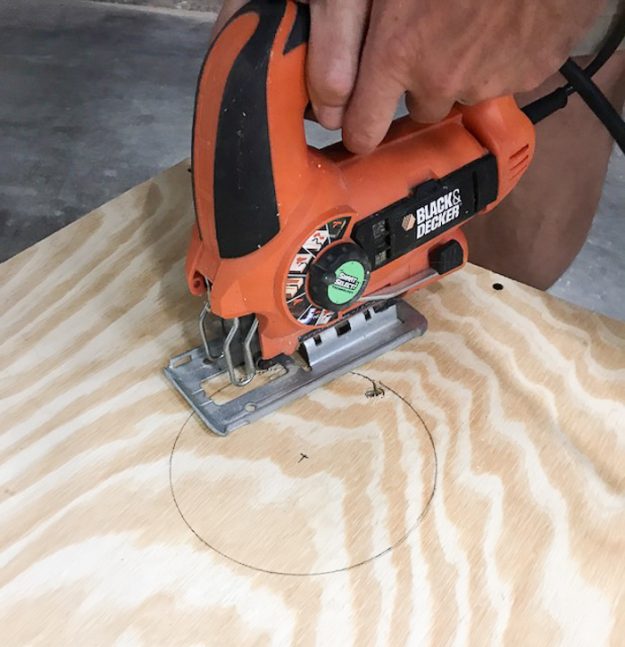
Use the 1/2 inch drill bit to drill a hole right on the inside edge of the circle, then cut it out with a jigsaw.
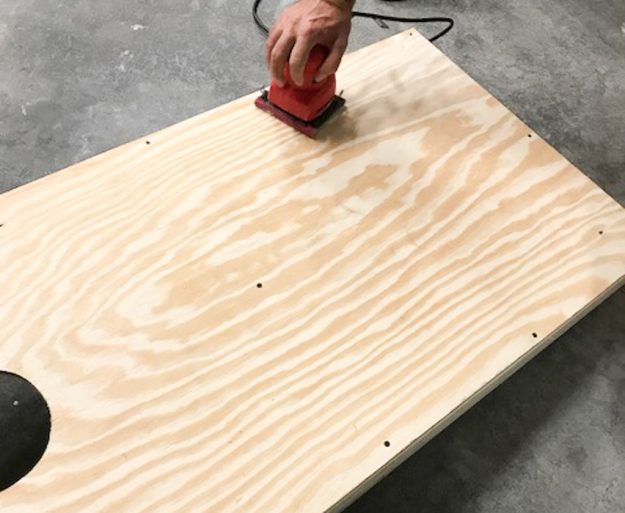
After your holes are cut, then sand the entire board – frames and all – with 120 grit sand paper. Make sure you get the inside rim of those holes, too! After this step we filled in all the screws with wood filler, then after it was dry we sanded it down, too. I have no idea why I didn’t photograph that part – but make sure you do it, ok?
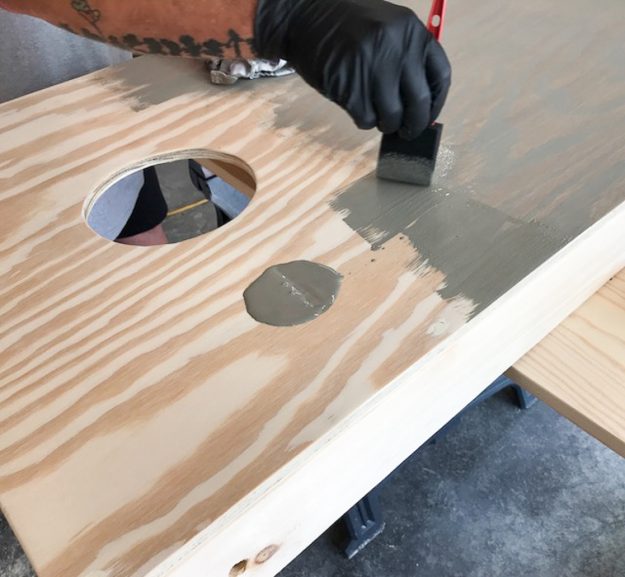
Next, we stained the whole thing with my favorite driftwood pickling wash. He brushed it on, then I immediately wiped it off. It makes fast work and since it’s waterbased it dries fast, so that’s a win/win.
Once it was dry, we applied two coats of outdoor poly (again, no photos, sorry) with a spray gun.

Then I embellished with some of my favorite Chalk Couture transfers from my shop (you can learn how to do that in my Chalk Couture for beginners post.) Once it was finished, then we sprayed one final coat of poly to seal it all up.

And that’s it! They’re pretty simple to make. Total side note: I made custom bean bags to go along with our custom cornhole boards – but they tore up the first use (womp – womp.) So I ordered a set from Amazon for less than $20 and they’ve been through SO many games it’s insane. Totally worth the investment.


Love this tutorial! Do you by any chance have the link to buy the cornhole bags? Thanks!
Yes Joann 🙂 Here you go, https://amzn.to/2NSoM3f Have fun!
What if I want To paint over some of the Stain? Should I stain and poly the whole thing and then paint on top of it? Did you stain and poly the underside?
You don’t have to stain it if you are going to paint it and no we did not do the underside. Good luck!
About how much did it cost you for the supplies?
About $100.00 Megan 🙂
Sorry if I have missed something here but why do we need to make 2 frames?
Thanks for the easy to follow instructions.
Hey David, because you usually make 2 Corn hole games and throw back and forth 🙂
You say the 6″ hole centre is 12″ from the top but official boards have the hole only 9″ from the top.