Handmade gifts hold a special place in my heart. I love getting them and giving them, so I try to stock up by making a few here and there for everyone on my list. Occasionally I find that I need a hostess gift, and my wood cheese tray with a chalkboard accent is the perfect solution. They’re so easy to make you can knock out quite a few of them in an afternoon, so you have a supply of super easy gift ideas that can you can stack up easily and pull out when you need it.
Because this is a monthly Lowe’s challenge, I picked up a plank of premium pine boards, which were about $5 each for a 4 ft. board (which I cut in half for this project). While I was there I also grabbed a quart tin of chalkboard paint, painter’s tape and some foam brushes.
After you cut them in half,then sand them down. I found that my Rockwell Orbital Sander worked best for this project, it was faster and they were completely smooth, including the ends.
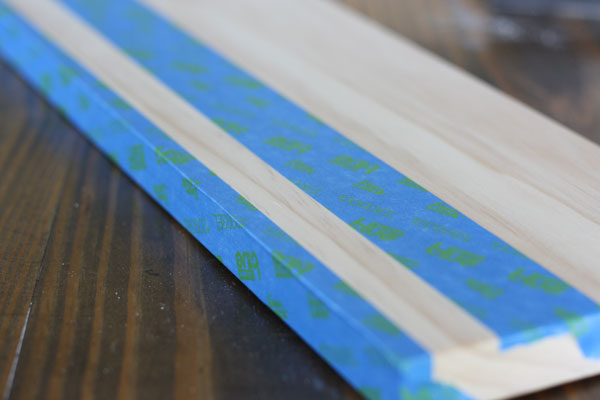
Then tape off a strip on the bottom, about 3/4 of an inch or so wide, down the length on one side.
 Take a small piece of painter’s tape, fold in half and snip on a diagonal to get a point in the middle.
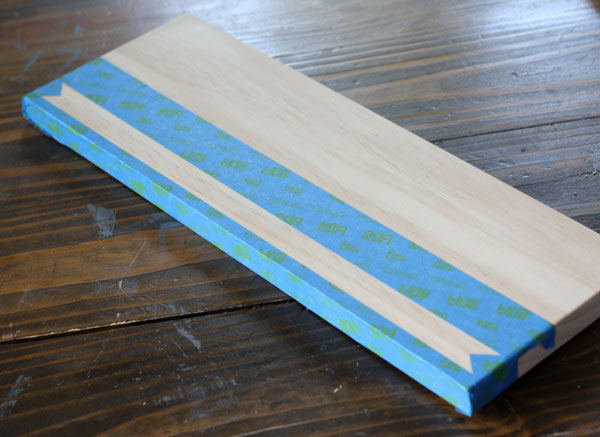 Put the points on the ends so you create a ribbon effect.
 Burnish all the edges down by rubbing the tape into the wood really well with your fingernail. You want to create a good seal, so the paint will not seep under.
 After the tape is ready, paint the taped off ribbon with three coats of chalkboard paint, waiting between each coat according to the directions on the can. Three good coats should be enough to give you a solid coat.
 After it’s all dry, peel off the tape and you’re ready to seal!
 Starting around the chalkboard ribbon, use a cotton swab and butcher block sealer to seal the wood.
 Seal the entire board, front and back, with two coats. You’ll need dry time in between coats, according to the directions on your can.
 Then 24 hours later, you’ll want to cure the chalkboard paint by rubbing chalk over the top, then cleaning it off – and you’re done! Sealing both sides of the board means it can be used on either side – and you could make these any size you’d like. I kept mine pretty small since they’re hostess gifts, but these could be gorgeous if they were longer for a huge buffet. The sky’s the limit!
 Now I have a few DIY cheese trays in my gift closet for the perfect easy hostess gift.
See more fun DIY ideas at Lowe’s Creative Ideas, follow Lowe’s on Instagram, Pinterest and sign up for the Creative Ideas magazine and app.
Thanks to Lowe’s and Rockwell Tools for partnering with me on this post. All ideas, words & opinions are 100% my own.
As a member of the Lowe’s Creative Ideas Creators and Influencers network, I received a Lowe’s gift card to complete this project challenge, however the tutorial images, instructions and opinions are my own.

What a great idea! I love it. Thanks for the great inspiration.
I adore this idea and I will for sure be giving some of these for holiday and hostess gifts. Thanks again!
Very nice. Thanks!
How wide were the board you picked? Pretty cool craft! I could see doing something similar using circles of chalkboard paint instead of a ribbon.. along the bottom too!
That looks pretty easy! I LOVE the plate you have in the background – do you remember where you got it??
What a simple yet completely elegant gift idea! I love it Gina!
Smart idea … nicely done. Great gift idea and cute enough to impress anyone.
Blessings,
Audrey Z. @ Timeless Treasures
Such a cute and easy hostess gift! Thank you for sharing.
Do you know if the polyurethane is food safe?
Also, don’t use a foam brush to apply polyurethane – it can leave bubbles in your finish.
I don’t know if poly is food safe, I used butcher block sealer, which is a food safe oil used in wood counters and on butcher blocks. The foam brush works great for it, because it all soaks into the wood.
Thanks for reading!
What a fantastic idea! And cheap! I love that you can cut the wood into different shapes and sizes. I might pass these out to my friends for Christmas. Thanks for sharing.
You’re (always) a genius! I was trying to think of something to make my beautiful aunt who has everything, and THIS IS IT! She is hostessing Thanksgiving, and she loves homemade gifts.
Hi. Love your project so cute. I want to use pine for some
Planks for serving food. But have read so much about it not being
great for it. Absorbs bacteria. Do you have any info on that
Thank you for including the product information!
My pleasure Phyllis 🙂