After all the great feedback on the How to Paint Furniture post, I’ve invited my good buddy Thea to share her DIY rustic glam paint finish with you <3
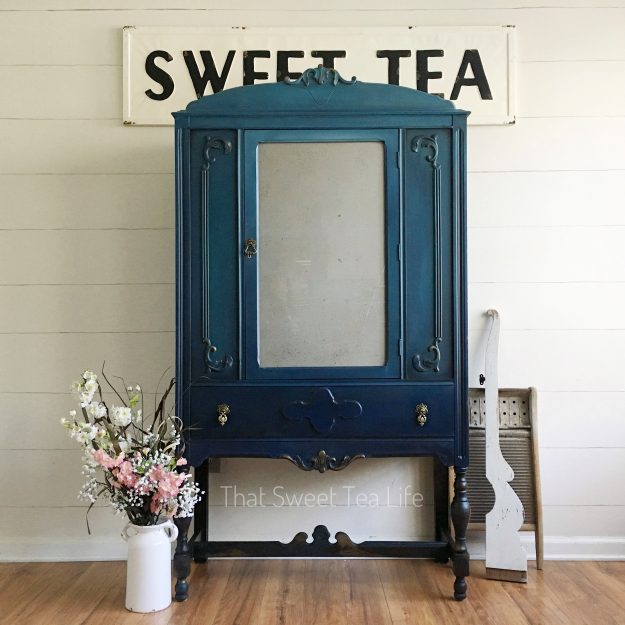
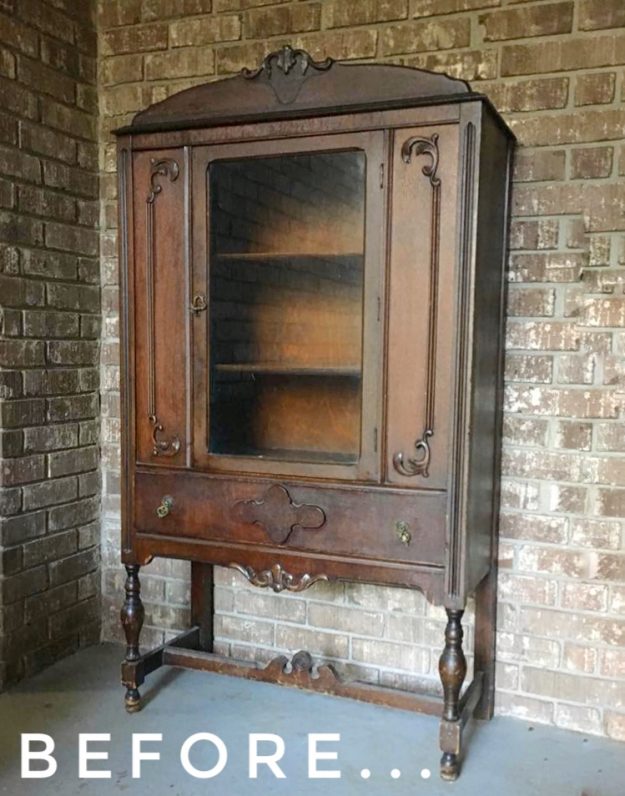 Hey guys! Thea here from That Sweet Tea Life and Im just stopping in to share with you DIY Rustic Decor you will LOVE! Some of us have a hard time working DIY Rustic Decor into our space but with just the right balance of color and a touch of glam, you can really make it the perfect statement with an old piece of forgotten furniture! Que this really old handed down linen cabinet
I decided I wanted to get really get a blue punch of color that is lovely yet, worn and perfectly subdued. Here is what I would use in my plan of attack:
You can purchase them here and be sure to use this special code just for Shabby Creek Cottage Readers! SHABBY10

Then we have the


The first thing is prep of course. I would use a gentle approach so I could keep all the lovely texture intact!
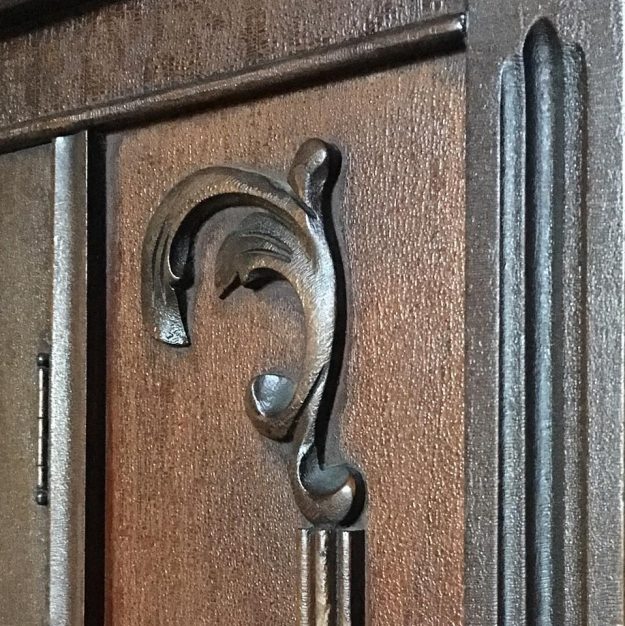
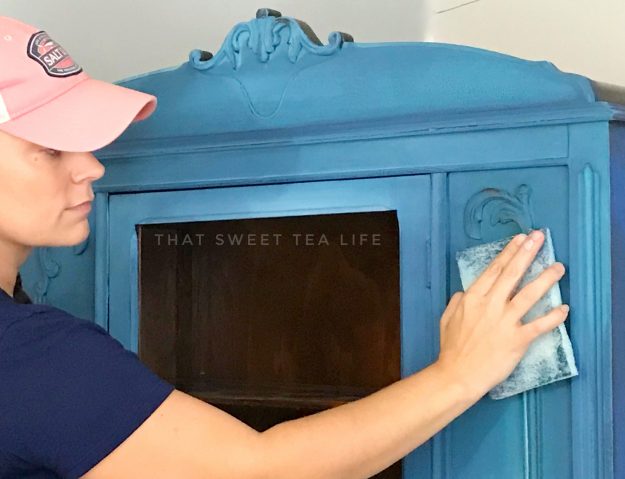
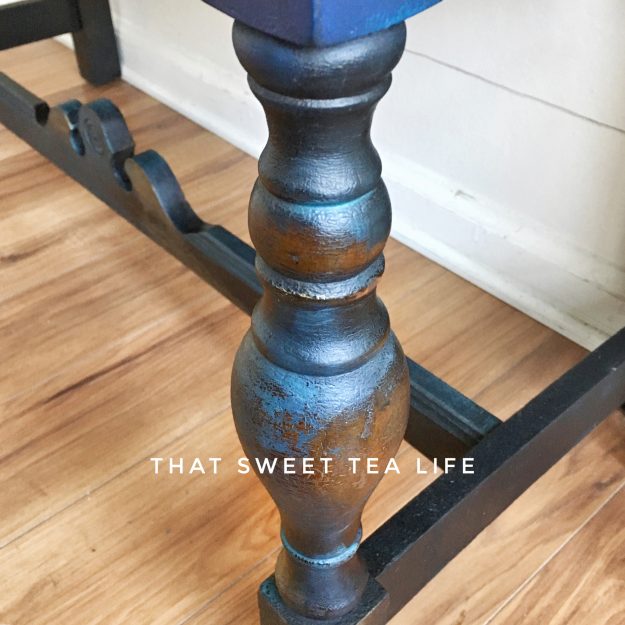
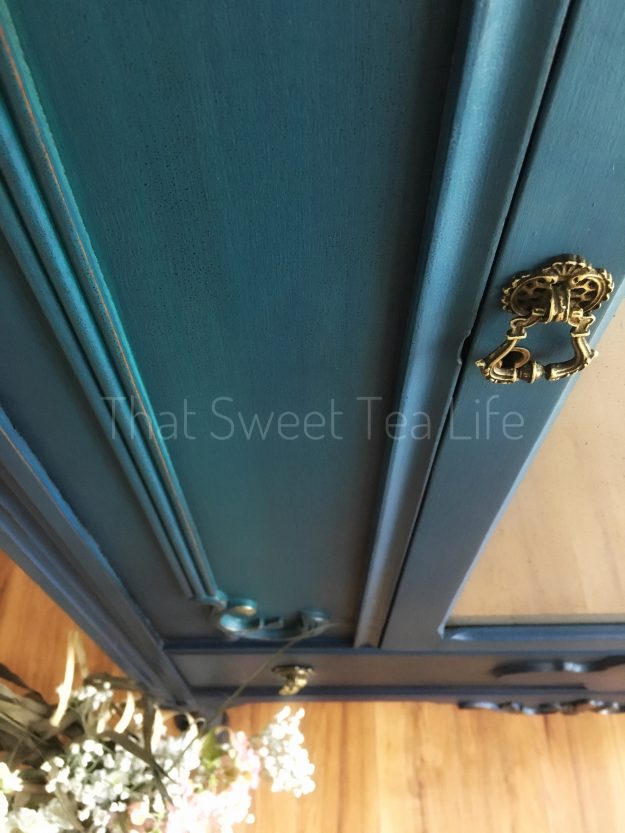
I sealed everything up with a few layers of sprayed shellac and moved on to painting! First painting Deep Turquoise for the base or as I call it the “crumb coat” then blending Mermaid Kiss, Deep Turquoise, Anchor and even a little Antique Villa over that. Using a scrubby pad I would begin removing a little of the paint from the details as I worked along. I would leave the legs alone so I could play with them later..
Once all the BOLD was added, it was time to create some Gold. Here I would use the Liquid Leaf to begin accenting different areas of the cabinet.
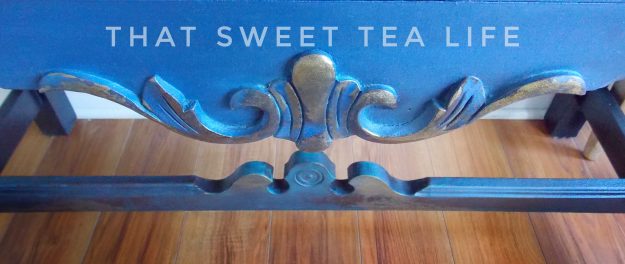
After placing the bits of gold I had to remove the finish here and there to evenly wear the finish.. then the entire piece would receive a color wash. Using black I would go over everything to give an antiqued effect to the paint, the revealed wood, and the gold.. after washing over a clean rag would be used to gently remove any excess.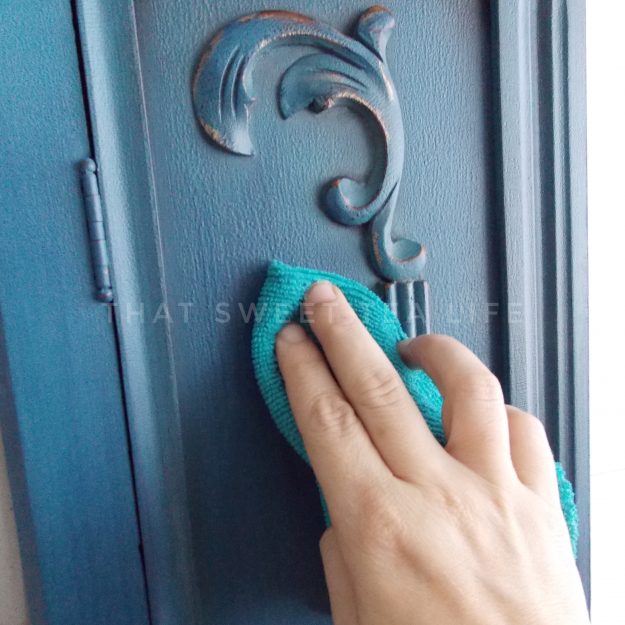
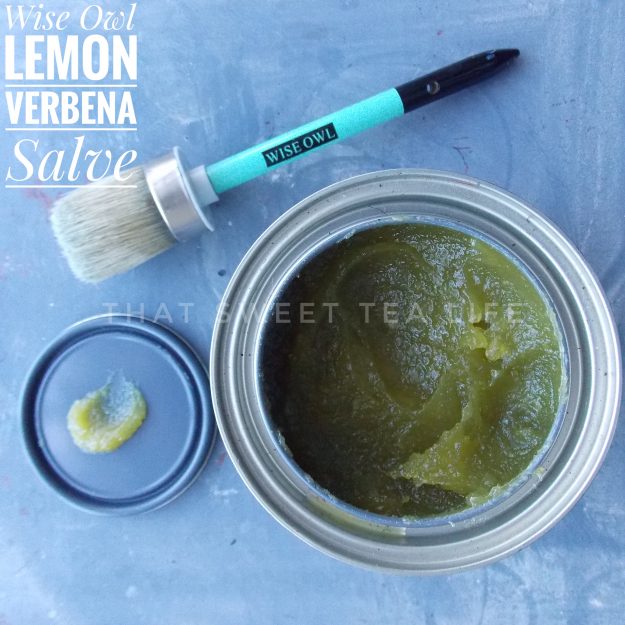
Now this is where I would typically varnish my piece, however this guy is completely vertical and I don’t have any concerns of high use. Instead I would skip over to using my lovely Lemon Verbena Furniture Salve. Using a nice large natural brush I applied the salve over everything then took the time to wipe away the excess. Furniture Salve is so soft and easy to use, simply moisturizing the piece then gaining hardness for a lovely sealed DIY Rustic Painted painted piece.
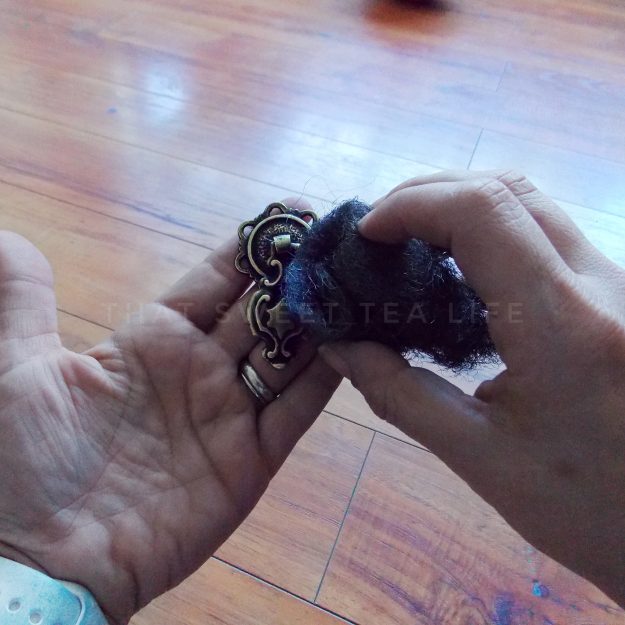
After sealing everything I then used the salve to clean up the hardware and give it the perfect amount of bling and luster.
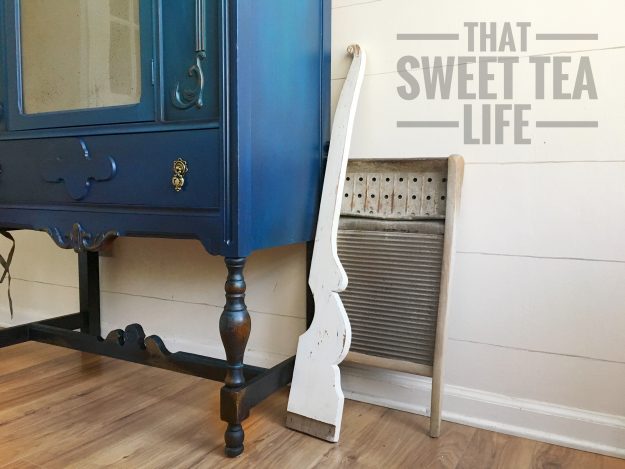
And now this may be my favorite yet the most short lived part… assembling and admiring. The perfect DIY Rustic Decor has some Bold, some Gold, and made to look perfectly Old…
I had hoped to marry all the colors in just such a way that the piece looked like it had actually been painted long long ago,.. and then maybe even sat in the corner and miraculously survived a fire! That smokey sense just lingering over the entire piece…
 I wanted something to “pop” in the white backdrop of farmhouse decor that would still look like it belonged.
You should be able to notice just a very light subtle ombre… 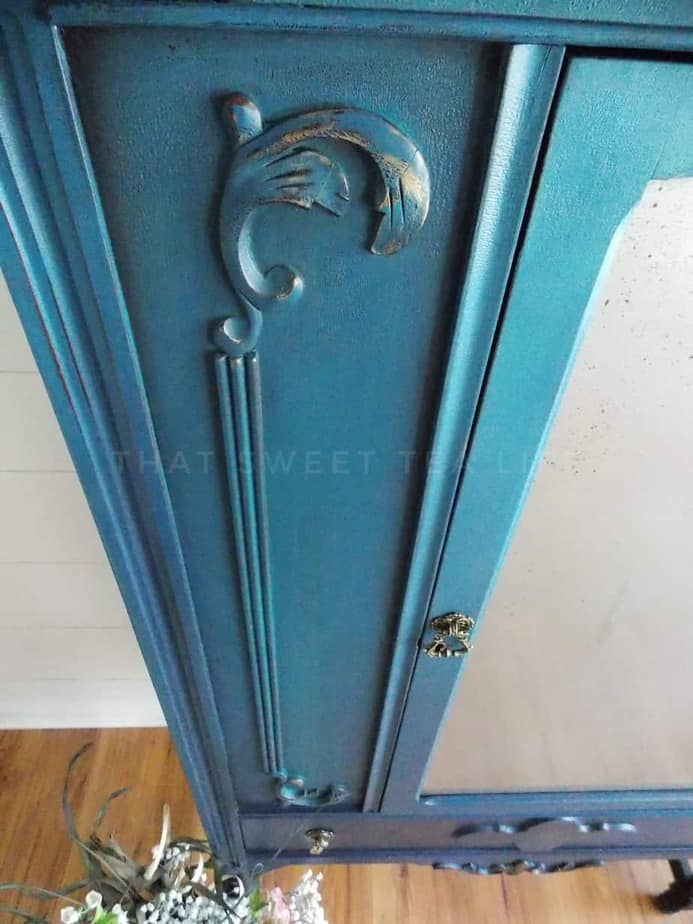
Still maintaining the perfect amount of smokey black over the entire cabinet. And it’s easier than you think! With the right direction you can do it with whatever color scheme you would like.
This entire teaching series is available now to members of “Up Close and Painting with Thea” If you would like to join an encouraging group where I coach members through specific techniques and add easy to follow content to strengthen your creativity,.. come join us! You even have the opportunity to preview the group during a 2 week trial! Leave any time… but you wont want to!
 Thank you so much for having me! I hope you enjoyed and are ready to tackle your OWN DIY Rustic Decor!

Gina,
I love your Halloween mantel. I intend to put a lot of your ideas together for my home. Love the weird “scary” skeleton pix and the crows sitting on candlesticks. The paper garland is super cool! Thanks for sharing.
I would say this is one of the nicest jobs of giving a vintage piece new life I have ever come across! What an artist!!
Thanks so much Patti 🙂
Just curious – why and what exactly did she shellac – the entire piece? Just wondering what the purpose is to doing this before painting?
Absolutely beautiful!
Thanks Janet, yes, she said she did shellac the entire piece to keep the lovely texture intact 🙂
What did she do to ‘smoke’ the glass?? I love it!
She didn’t mention doing anything to the glass Jane, I think they were originally that way.
This is totally amazing!! I recently inherited a white china hutch, just like this one. It’s a bit shabby’d up and worn. Not sure if I’m going to keep it white or repaint it. Painting is a bit intimidating for me.
You can do it! Once you get started and see the transformation you will be hooked! Have fun with it and trust in yourself 🙂
Hi Gina, This turned out to be a Gorgeous piece. I finally did my secretary in chalk paint. I sealed it with two coats primer and it was bleeding through badly. Later I learned I should have used the shellac. But I am fine with it as the bleed through actually kind of aged and softened the paint. BUT is I were to paint mahogany again I would shellac first then age it as I choose not as it chooses. LOL I am a bit of a control freak. Hahahaha I was so hesitant to paint this beauty and as I was cleaning it up to paint I really started seeing all the flaws of this piece that yes gives character but also told me I was ok and not ruining a fabulously antique piece.
Link to the picture of it is here..
https://www.flickr.com/photos/50185661@N03/45139032321/in/dateposted/
It was really fun to do and I am for sure planning on doing more pieces in chalk paint. I was also watching Jamie Ray vintage and they have some amazing transfers. I might give them a try too on some of my more plain pieces or even just on the really flat surfaces.
Chris
Wow!! Chris it turned out beautiful!! I love the finish, you did a great job 🙂