Learning how to build your own kitchen island is a super simple project that almost anyone can make. With just a few power tools and a few hours, you can build this DIY project for around $150. It’s so simple, in fact, that I built it all by myself (no Mr. SCC involved!) And y’all know if I can do it, you can do it, too!

You’re going to need a few supplies from the hardware store (I found all of mine at Lowe’s)
- 4 kitchen island height legs (or use table legs for table height)
- 2 1x4s
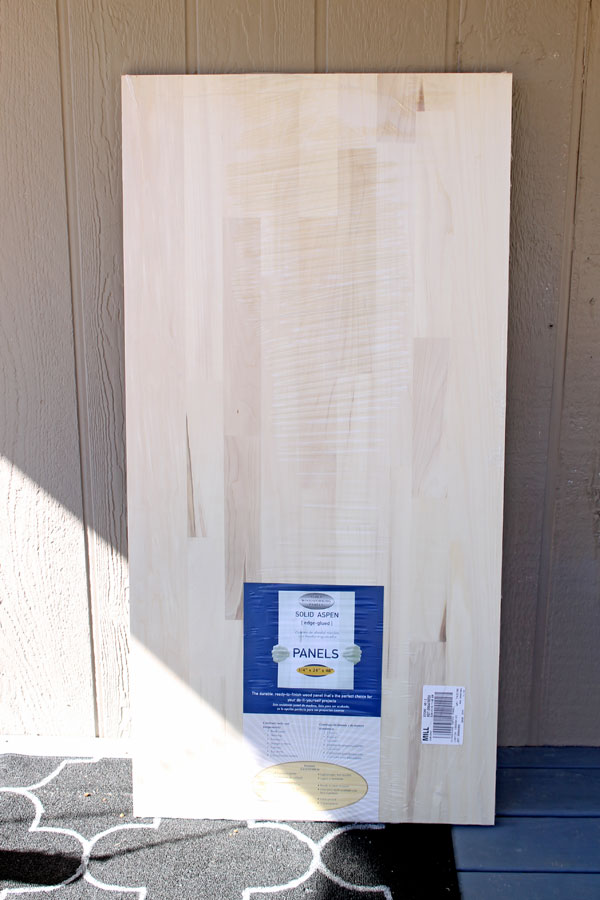
- an Aspen solid 24×48 panel (as shown above)
- poly acrylic sealer
- 1 1/4 inch Kreg Jig screws
- 2 1/2 inch Kreg Jig screws
- paint
- wood glue
- fine grit sand paper
- tack cloth
And you’ll need a few tools:
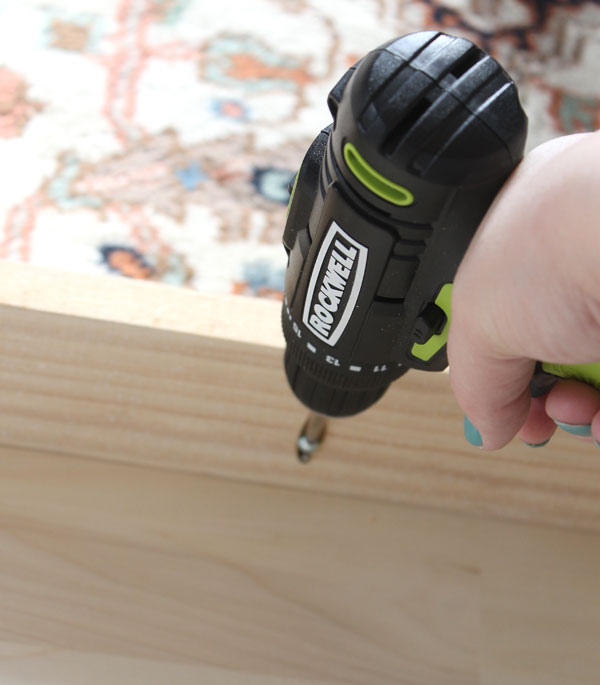
- drill (my favorite is my Rockwell)
- sander
- Kreg Jig pocket hole jig, drill bit and screw driver bit
- (optional – miter saw – OR you can get the pieces cut at Lowe’s)
- HomeRight Finish Max paint sprayer
- paint brush for poly
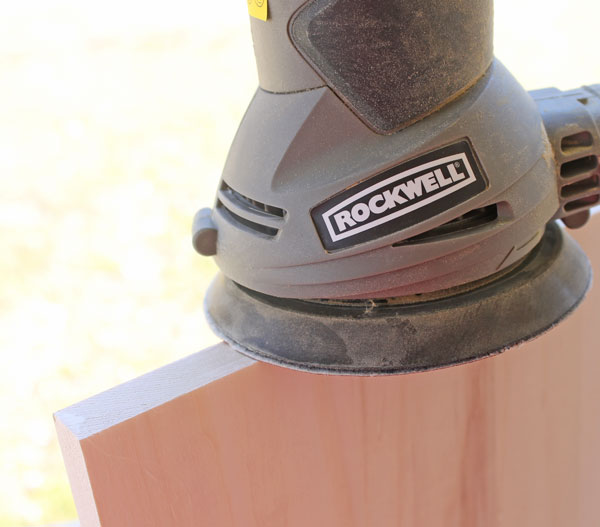
Start with the top, because it’s going to need a lot of dry time. Sand all of the edges all the way around, and the top with a fine grit sand paper. Use a tack cloth and completely clean off all of the saw dust so it’s ready to seal.
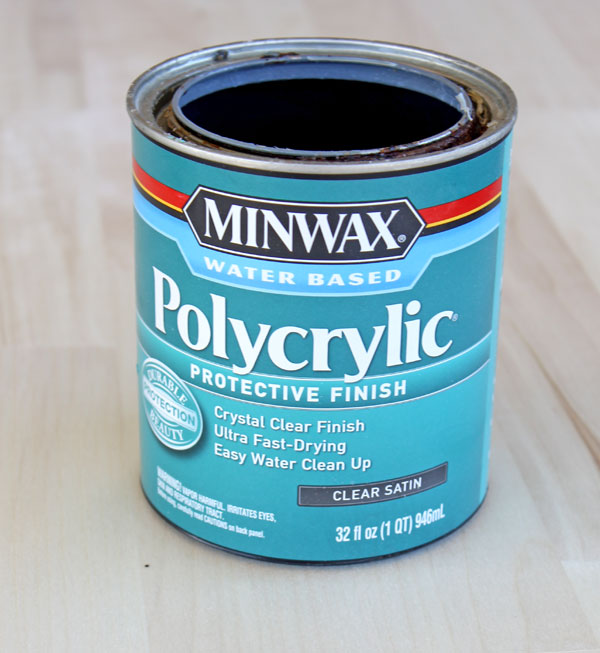
Apply a coat of poly to all the edges and the top. You’re going to do three coats total, so do a coat, let it dry for a few hours while you build the base, then lightly sand with fine grit sand paper, give a second coat. Let it dry, lightly sand again, then one final coat. It’s gonna take a while. The rest of the island will be finished before this part is complete, so start it first to cut down on wait time.
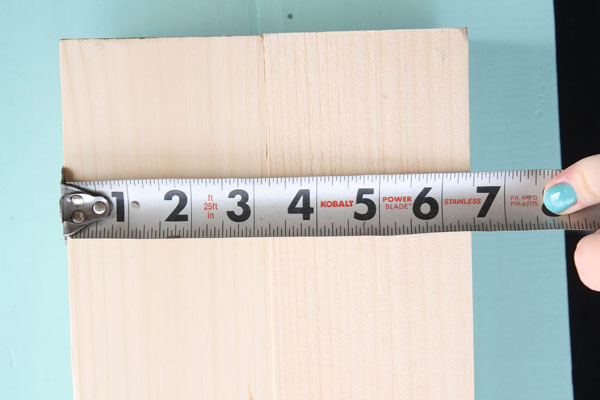
Alright, let’s build the base! Measure the top of your legs by putting two of them side by side and measure them together to get your measurement. To get a one inch lip (recess) all the way around the top, take your top measurements (24 inches by 48 inches) and take two inches off. Then subtract your leg span, and you’ll have the measurements for the skirt pieces. For this exact dimension, you’ll need two pieces cut 15 1/2 inches long and two pieces cut 39 1/2 inches long from the 1x4s.
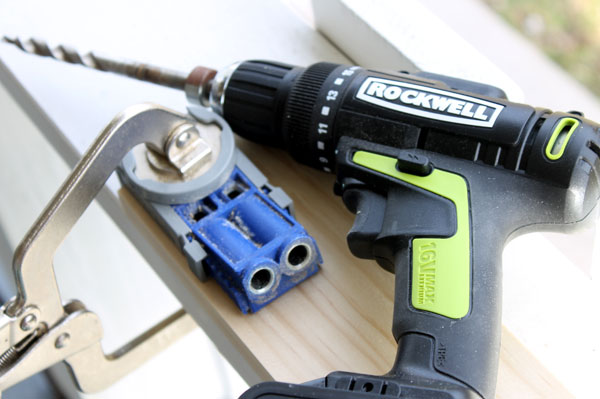
After you have your skirt pieces cut, then in the back side of the boards, use the Kreg Jig to cut pocket holes on each end. Next, sand the boards where you cut the edges to get it all good and smooth.
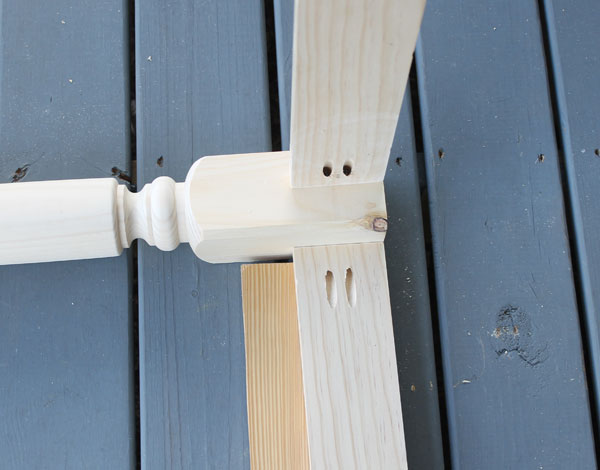
Using the 2 1/2 inch screws, run a thin bead of wood glue on the edge of the skirt board, then attach it to the legs. Make sure to use a scrap 1x board underneath the skirt board so you get a recess in the board and insure the screw has plenty of room to grab in and hold securely.
Put the long pieces in on each set of two legs (you’ll have two sand alone sets) and then attach them with the shorter pieces.
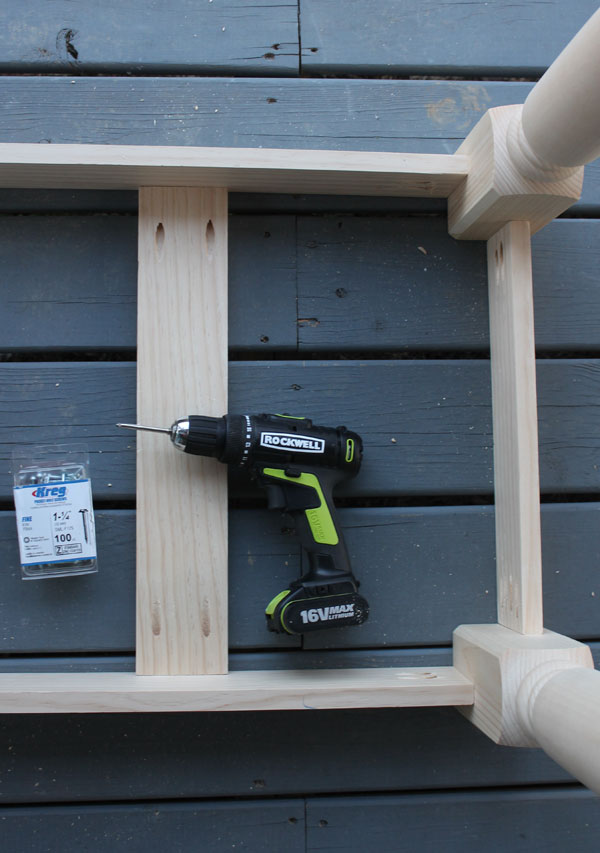
After your skirt is all attached, measure the inside distance between the skirts (mine was 19 inches) then cut two pieces of 1×4, add pocket holes, then use 1 1/4 inch Kreg Jig screws to attach it to the skirt for stability and to help secure the top.
Before moving on, wipe down the entire base with a tack cloth to get off all dust.
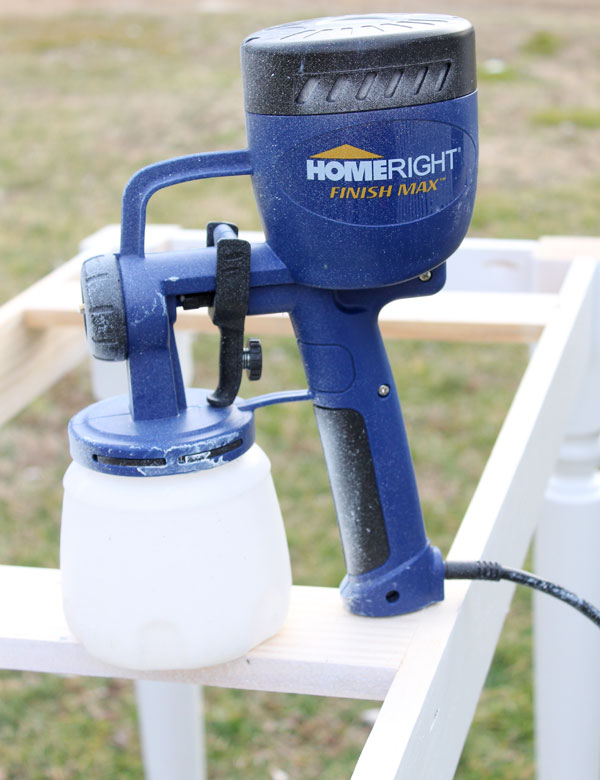
Now the fun part – PAINT! Normally painting turned legs is a pain in the… well you know. But, using my HomeRight Finish Max Sprayer, it’s a breeze! I painted the entire base in about 5 minutes. Just be sure to thin the paint down to about the consistency of buttermilk before spraying. Use it just like spray paint, using a few coats to cover it all. After the first coat I sanded the rough spots lightly with fine grit sand paper to smooth (because you are painting raw wood, after all.) A few coats and a couple of hours later, it’s time to put the top on.
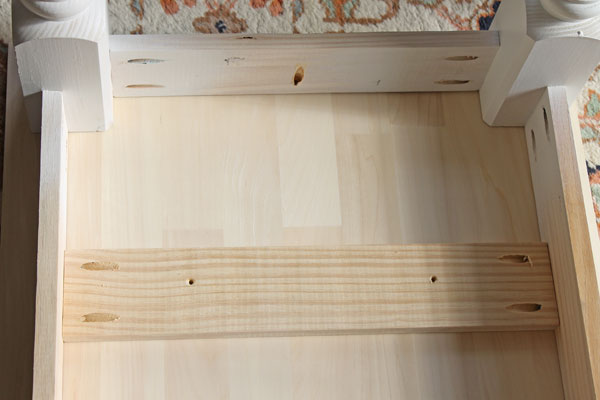
See the pocket hole in the middle of the board pointing towards the table top? Yeah, you wanna put one of those in the short pieces and two in the long pieces before you put it all together. I forgot and had to do it after painting. But, it’s all good – just make sure you have them in there. Then drill pilot holes in the cross/brace pieces.
With the top flipped upside down, center the base on the top. Use 1 1/4 inch Kreg Jig screws to attach the top in all of those holes and attach the finished and dried top to the table. Then your island is complete.
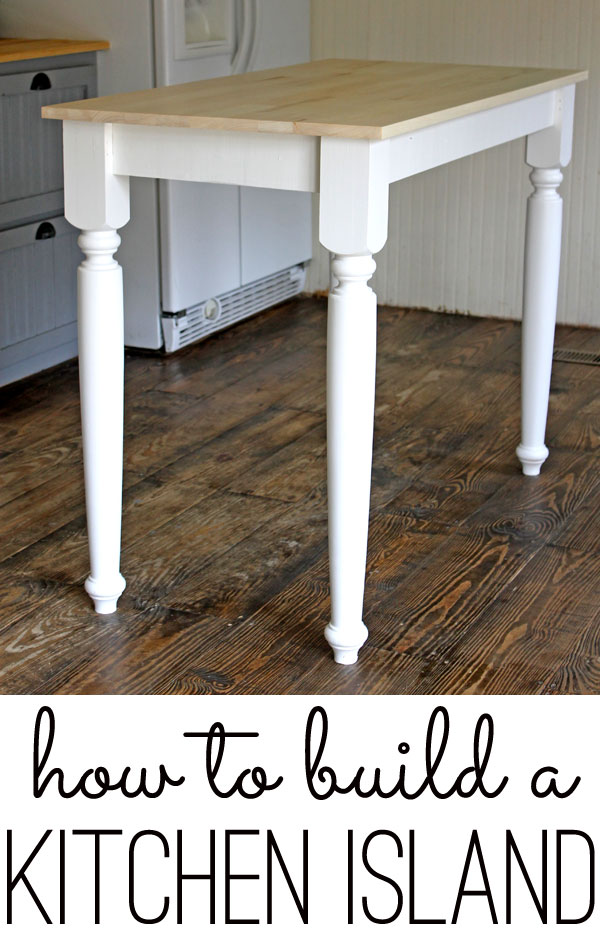
I was kinda shocked that I figured out how to build a kitchen island by myself, but it was seriously easy.
Have questions? Drop them in the comments and I’ll do my best to get them answered!
Thanks to HomeRight for partnering with me on this post! All ideas, projects, photos, words & opinions are 100% my own.

You did a very nice job. Simple, but beautiful. Now I want to see it with a huge basket of lavender underneath and flour spilled all over the top!
Looks great! Very proud of you! Power tools intimidate me!
Wow! This is a great project. I am still trying to master one of your smaller furniture projects from a couple of weeks ago. Maybe, I will try this project for my art studio, in the future. Thanks, for the great inspiration, Gina!
Your instructions are great! Crisp clear and with an itemized list of supplier. Well Done. I must admit, however, that I was disappointed in the project. I assumed from the title and the image that you were taking a table and making it into an island (with shelves and/or storage items). The table is nice. It is. An island it is not. Please consider adding the word “table” to your description. It would avoid misconceptions.
It’s island height, so it works perfectly as a kitchen island. I’m sorry if you feel mislead, but it does work really well as an island for us.
MoniqueDC, I believe a kitchen island, by definition, is just an unattached “counter” surface in the kitchen. It is not required to have storage or shelving (I even checked a few definitions online to confirm :)).
Gina, this kitchen island is EXACTLY what I’ve been looking for in my kitchen. I need the surface area for prep and place that could be used to sit and eat at. However, I don’t have a lot of spare floor space, so I really needed an island that would allow me to tuck the stools completely under it when not in use. I’ve been looking for something like this for months! It still may be out of my skill and price range, but at least I have a starting point now. Thanks!
You are so talented, I am amazed that you built a kitchen island all by yourself. It looks great!
Thanks for using the HomeRight Finish Max Sprayer.
G’day!
Our universes have finally aligned!
Whilst on a quest for new inspiring jewellery making projects and tutes, somehow I stumbled across your fantabulous project❤️
At the moment this particular project couldn’t come at a better time!
Don’t cha just luv when that happens!
You’ve surely found a new follower/ subscriber!
I can tell this is going to be a long night sifting through your awe inspiring creativeness!!
Huge kudos for a well laid out project, I can wait to post pics of mine!
Hugs,
Kyra (from down here in oz!)
Wow! These instructions are simple! Looks great. I can’t wait to try this on my own.
I love your island! I would like to make one as a kitchen table in my small lake cottage. Do you think it would be a problem making it 30 inches wide 4 feet long and counter height? My kitchen is 10 by 11,no dining room, so this size is what I need. Any help would be greatly appreciated.
Thank you, Penny
Sure! You can make it almost any size, I’d suggest going to Lowe’s to find a top first then work from there (or you could use an old top from another table if you have one.)
I do not have the paint sprayer or money to buy one. What kind of paint do I need and the color? I have a round 36 inch round unfinished. Have been looking for a way to finish it. Love this. Thank you.
Thanks Carole! You don’t need a sprayer, it makes it a quicker project but you will get the same results from the standard brush method 🙂 I actually just used some left over paint I had on hand so do not remember the name. Any good brand will work fine, some now come as paint and primer all in one which also saves time 🙂 Good luck!