Learn how to paint furniture to give old pieces new life. This step by step guide will walk you through everything you need to know.

Hey friends, Kimm from Reinvented here! I couldn’t be happier; it’s finally I can paint stuff outside season spring here in Ohio. I’m thrilled to be here for our monthly date, and to share my best how to paint furniture tips.
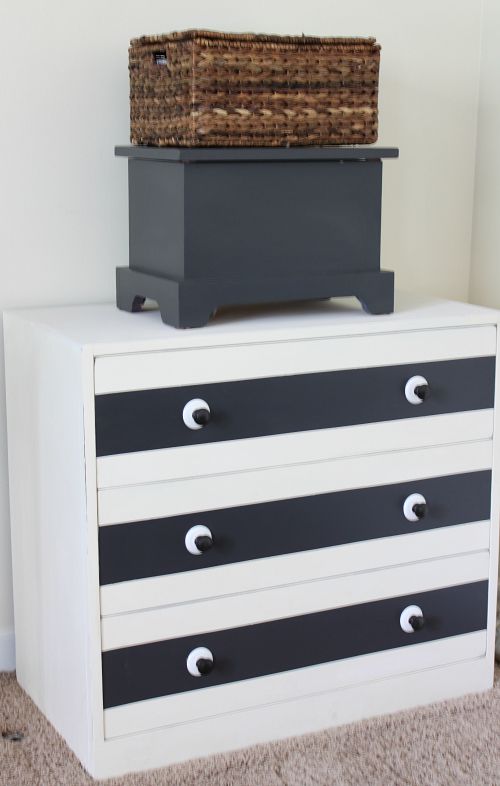
Restyling a piece of furniture with paint is always one of the most satisfying projects on my to do list. I love it so much that sometimes I make over a piece over and over again. 😉 Like this dresser. It was given to us by one of my husband’s coworkers with a poorly executed black paint finish. I painted it a lovely off white during my paint everything off white phase. Then I added a stripe and new hardware during my stripe everything phase.
P.S. For a family of six, stacked storage is a must.
Whether the object of your affection has been previously painted, or is still in its natural wood state, my step by step how to paint furniture process will help you achieve the look you want every time.
STEP ONE always includes a rag and a little elbow grease. Every dresser, table, and cabinet requires some cleaning prep before you get out the paint. I use a mild dish soap and water to scrub off the dust, dirt, and greasy fingerprints. Paint won’t stick to a dirty, greasy surface. Don’t ask me how I know.
STEP TWO is the sanding step. There are a few “no prep” style paints available (my favorite chalky finish paint is one), but if your furniture currently has a glossy finish, a little sanding will give the new paint something to stick to. Use a fine grit sandpaper (180-220) for this job, you only need a little friction. If you are working on an unfinished wood piece, or an antique with surface damage, start with a coarser grit, like 120 to smooth the flaws, then finish with the finer grit to perfectly prep for paint.
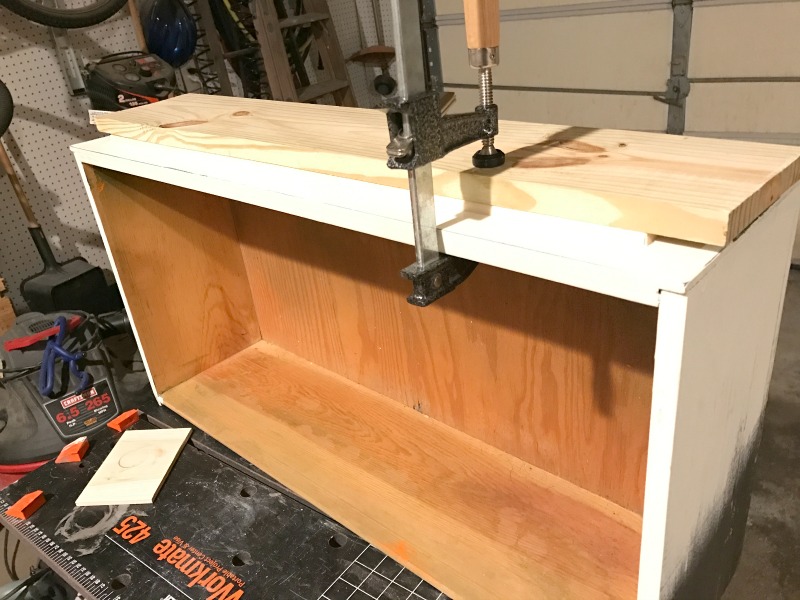
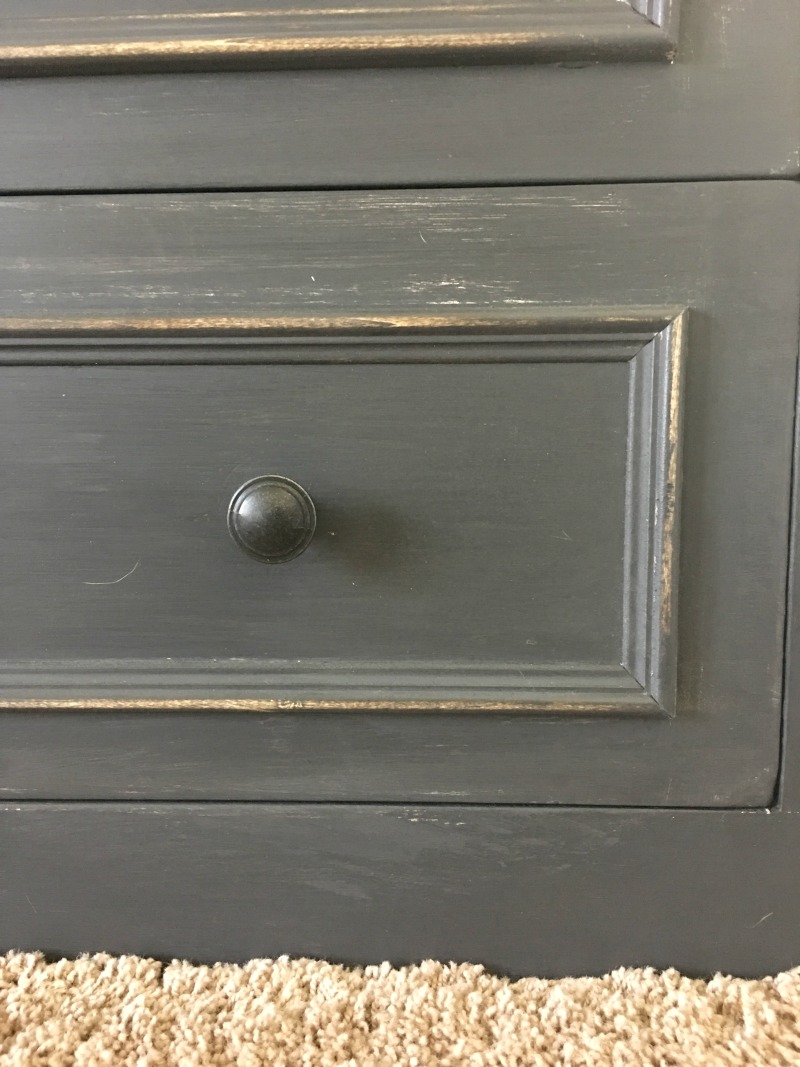
Since I had painted this dresser with chalk type paint, then painted the stripes with satin latex, I sanded the drawer fronts well to take the sheen off the satin and remove any ridges from the edges of the stripes. I also sweet talked my husband in to adding some cute molding to the drawer fronts to add some character.

He wanted to be sure I showed you his genius clamp idea. Glue the molding down, add a board large enough to cover all four pieces, then clamp while the glue dries for a strong hold.
STEP FOUR A note about primer. Primer is not always necessary, but if you are using latex paint on stained wood, your finish will be more durable and you’ll achieve better coverage if you prime first.
I don’t recommend using primer if you plan to distress the finish; aint’ nobody wants to see the primer layer; it’s like wearing those cool holey jeans only to have your white granny panties show through the holes.
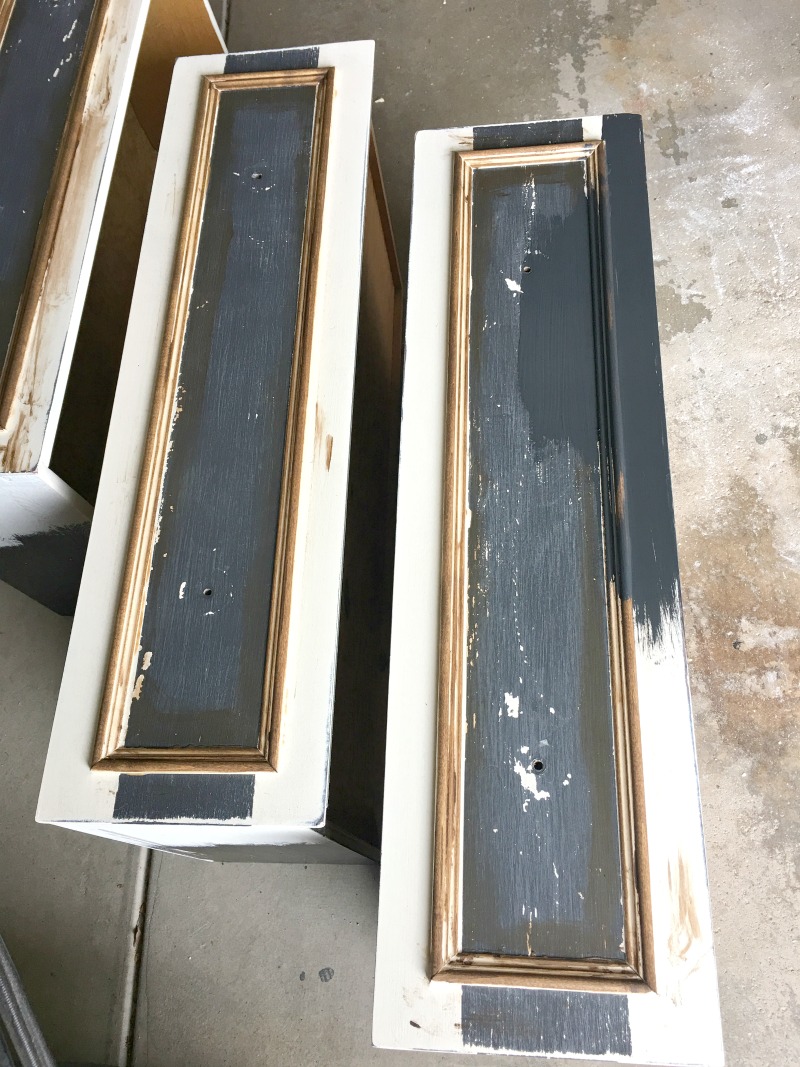
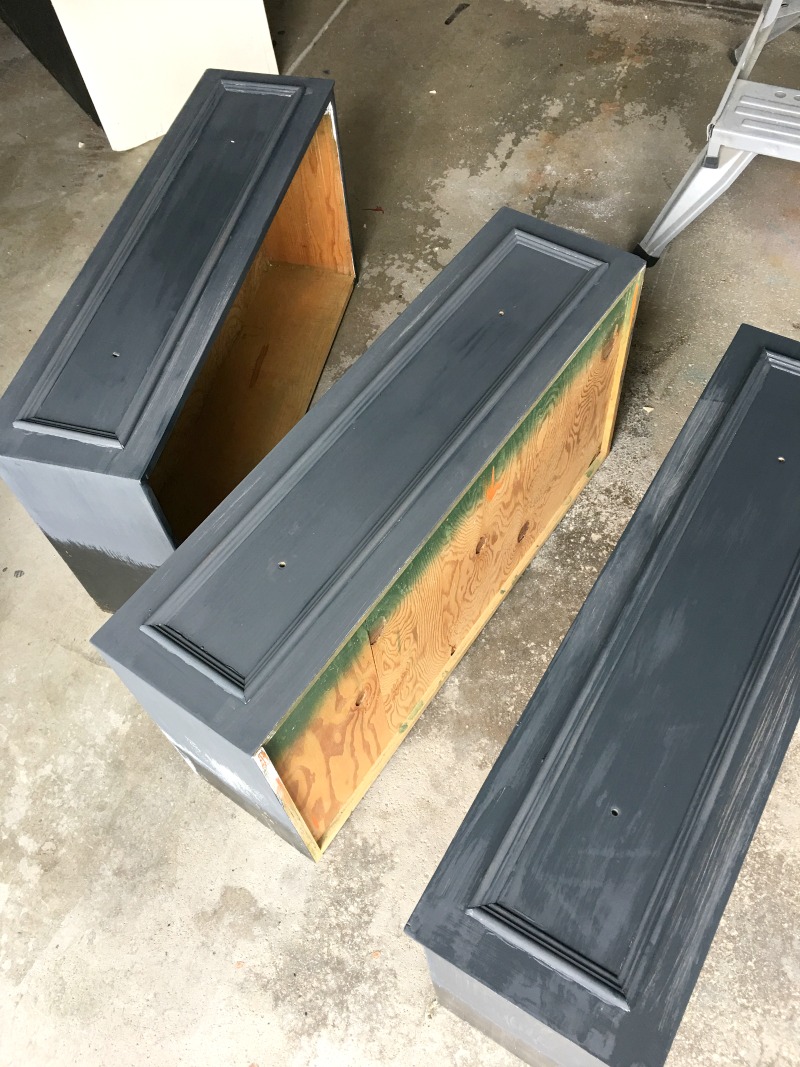
STEP FIVE Paint! I used Rustoleum’s Chalky Paint in Charcoal for the first time on this dresser, and my oh my, I loved this easy on the budget option. It goes on smooth and covers well. I was planning to distress a little, so I painted two coats on the areas I didn’t plan to distress (the previously painted white parts), and one coat on the areas I did (the moulding). Remember, before you distress, make sure that the base color is actually a color you want to see peeking through. For this dresser, I didn’t want to see raw wood after distressing the new moulding, so I stained them first. Sort of. I didn’t try to be neat since I would be painting over it anyway.
I once sanded and re-stained an ugly table before I painted it just so a pretty stain shade would show through my final sanding. #thestruggleisreal
It’s best to paint on two light coats of paint with 24 hours of drying time in between. If you paint on one heavy coat, it will take much longer for the paint to dry all the way through. This is especially true if you are going for a smooth modern finish with latex paint. For more tips on achieving a durable surface with latex paint, you must read the tale of the painted table top trouble.
STEP SIX Now we’re back to sanding. After chalk paint has dried, a light sanding with a fine grit sandpaper will leave you with a beautiful buttery finish, and the right amount of distress.
STEP SEVEN The top coat. Protect your piece with a light coat of furniture wax, OR a coat of polyacrylic. I would recommend poly for a “high traffic” piece. This dresser stores movies, candles, and blankets in our family room, and doesn’t get a ton of touch traffic so I chose wax. After the top coat is cured, your piece is complete.
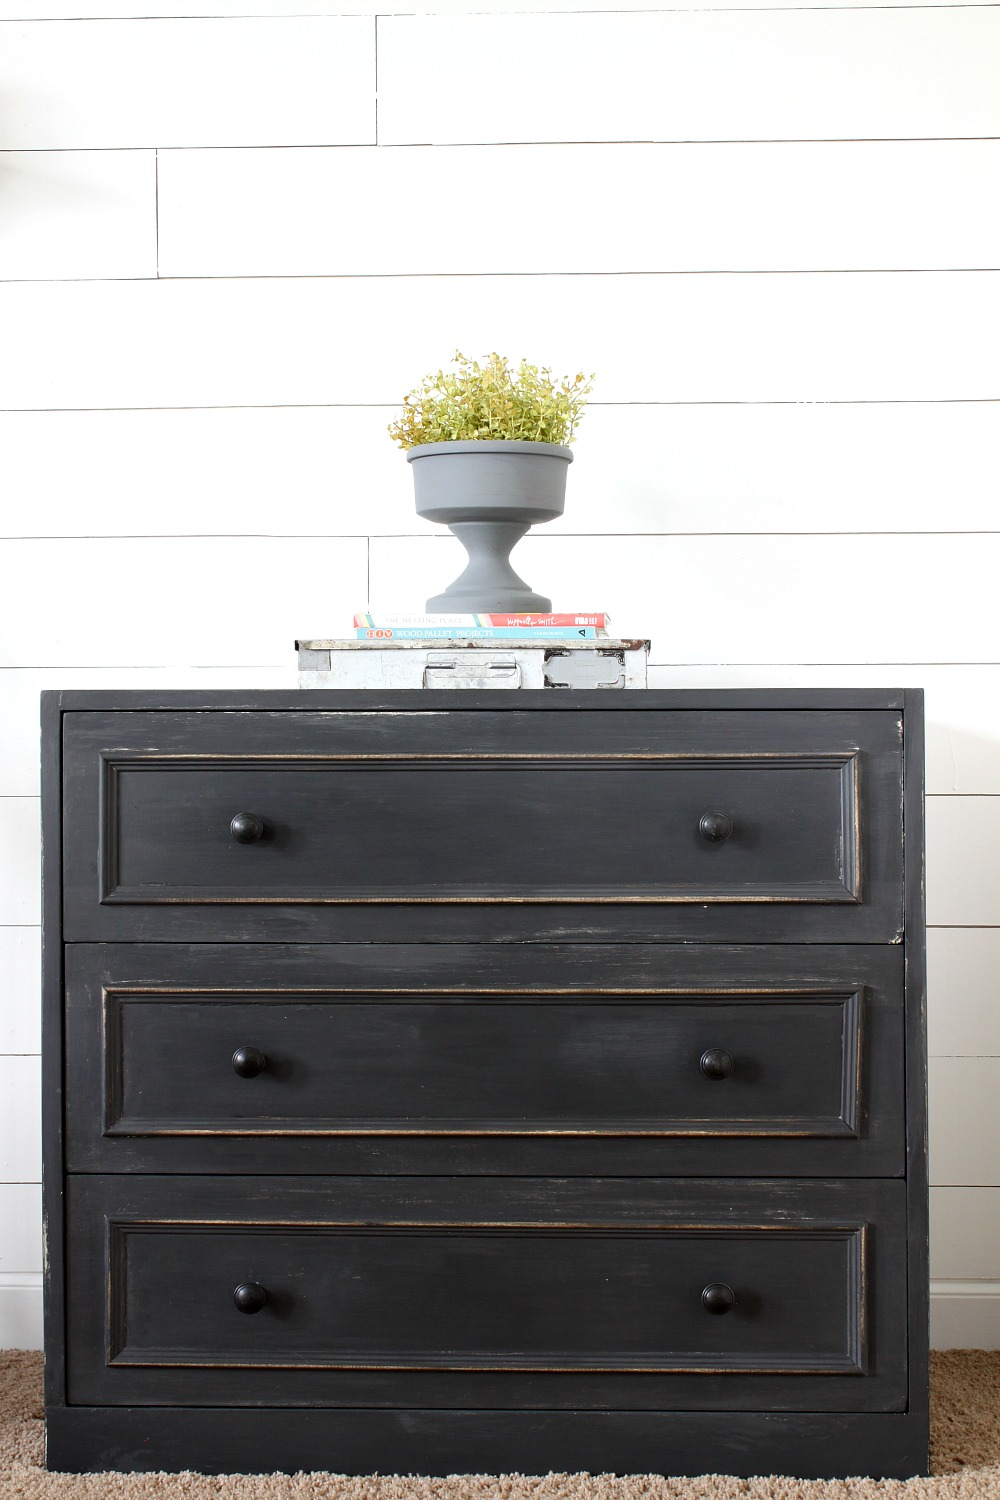
Doesn’t it look great with our faux shiplap wall?
Changing up a tired piece of furniture is my favorite way to update a room. There are so many neglected dressers, and buffets, and armoires, and so many pretty colors; my job will never be done. AND I hear that Gina has an amazing homemade chalk paint recipe, so there’s that.
I hope you enjoyed my how to paint furniture tips and that you’ll use them to go boldly in pursuit of your colored furniture dreams.
Great tutorial Kimm. I loved the way you compared distressed primer to seeing our white bloomers (do you also call them bloomers in the States?) Too funny but so true. The dresser looks lovely know, the stripes were cool too 😉
Thanks Michelle! We do say bloomers, but usually in a joking sort of way…it’s fun to say 🙂
Haha, thanks sweet Michelle! We don’t use the word bloomers in Ohio but I love it! 😉
Haha, thanks sweet Michelle! We don’t use the word bloomers in Ohio but I love it!
I love every thing you do. I live in Mexico and it’s a pleasure and so good seeing your job
Thank you Gina
Thanks so much Maite!
Love this color!
Painting furniture is not an easy task, it needs finishing to get it done properly. Nice tutorial.
Tell your husband the clamping arrangement is awesome.
Thanks Dan, he will be thrilled you noticed 🙂
Thank you for all your tips. This are great tip!
Thanks for sharing. I really enjoy your posts.
Thanks so much Colette!
Dresser looks great! Was planning to spray paint a dresser and end table for my daughters new apartment. Can you tell me if you used rollers or brushes as well as recommend what kind?
I use brushes for furniture as well as spray paint. Go to Home Depot or Lowes and they will give you good advice on decent brushes. You don’t have to spend a fortune but you don’t want to buy too cheap either. Good luck!