Looking for an EASY Ikea Rast Hack? This post shows you how to take a basic Ikea Rast dresser and turn it into a beach cottage style beauty!
Hello again Shabby Creek readers! I’m back this month with a new DIY project – an easy Ikea Last Hack. Incase you missed my upcycle project from last month, my name is Maria and I blog over at Pastels and Macarons where I share Home Ideas, Easy DIY’s and Home Tips.

Today I’m sharing with you this Ikea Rast Hack I did for my sons nursery. Let me tell you the story behind this Ikea Rast Chest. I found this guy on a second hand buyers Facebook group for $10. This Rast chest is pretty inexpensive as it is, but I was not complaining when I found it for less. I desperately needed some extra storage for the kids toys and this chest floated around the house for months before I decided to finally give it new life and put it in my sons nursery. Meanwhile this poor chest was getting a beating from the kids and they also drew on it a few too many times when I wasn’t watching. It started looking pretty terrible.
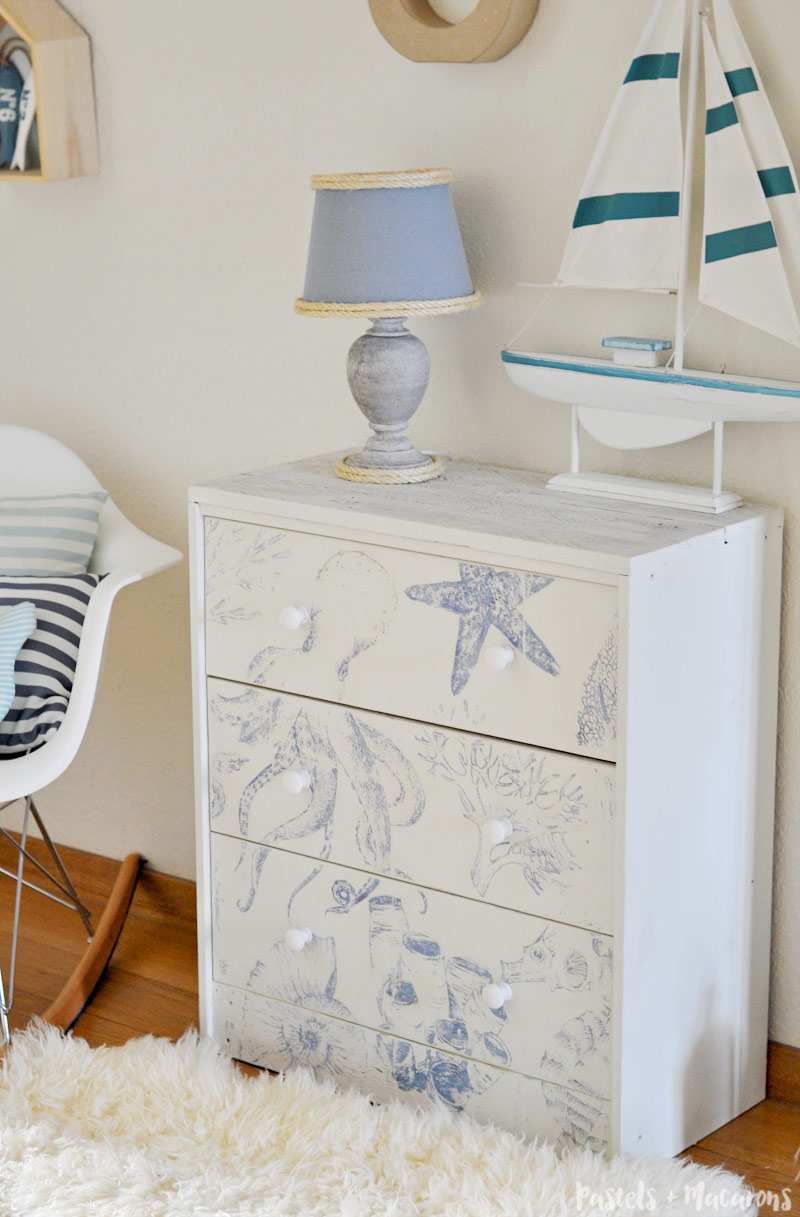
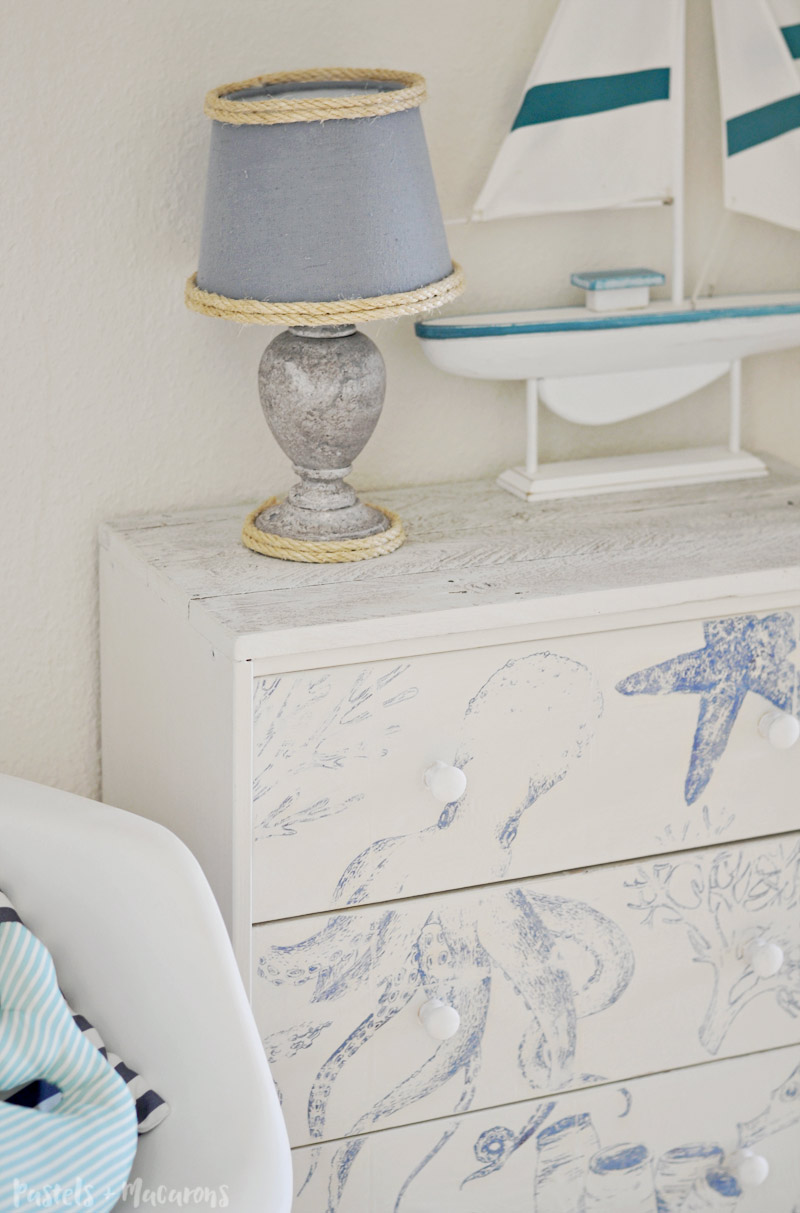
I chose to go with a nautical theme for my sons nursery. It’s a fairly small room so I needed something on the small scale to pop in there and this chest was perfect. I have found items I like over time to add to his nursery like the lamp on the chest. I gave it a quick 10 minute makeover and turned it into a cute nautical lamp to go with the rest of the room.
Read on as I will show you exactly how to recreate this look!
To recreate this Ikea Rast Hack you will need:
Supplies and Tools for Ikea Rast Hack:
1 x Ikea Rast Chest
Old or new palette wood boards – Mine where free from a neighbour.
Handheld Electric Sander
Electric Jigsaw
Hand Saw
Wood Glue
White Chalk Paint of your choice (I used Annie Sloan Chalk Paint but there are cheaper options)
Finishing Wax of your choice (I used Annie Sloan Clear Wax but there are cheaper options)
Paint Brush
Nails
Hammer
Clean, lint free cloth
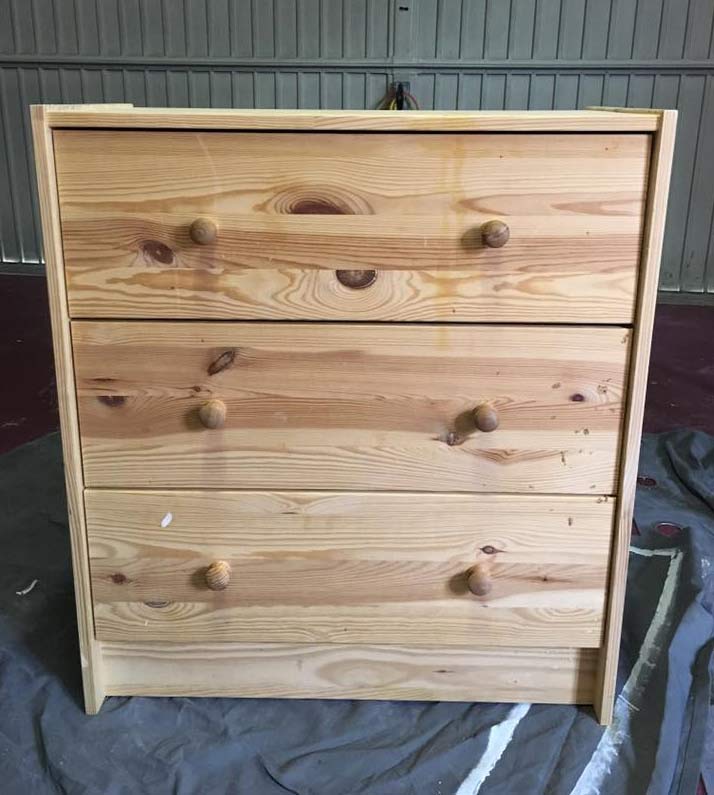
Here’s the before:
Before we begin allow me to show you this Ikea Rast Chest in all its former glory… not fabulous at all. It was sad and needed serious love. I think I see some food on it also. Thanks kids!
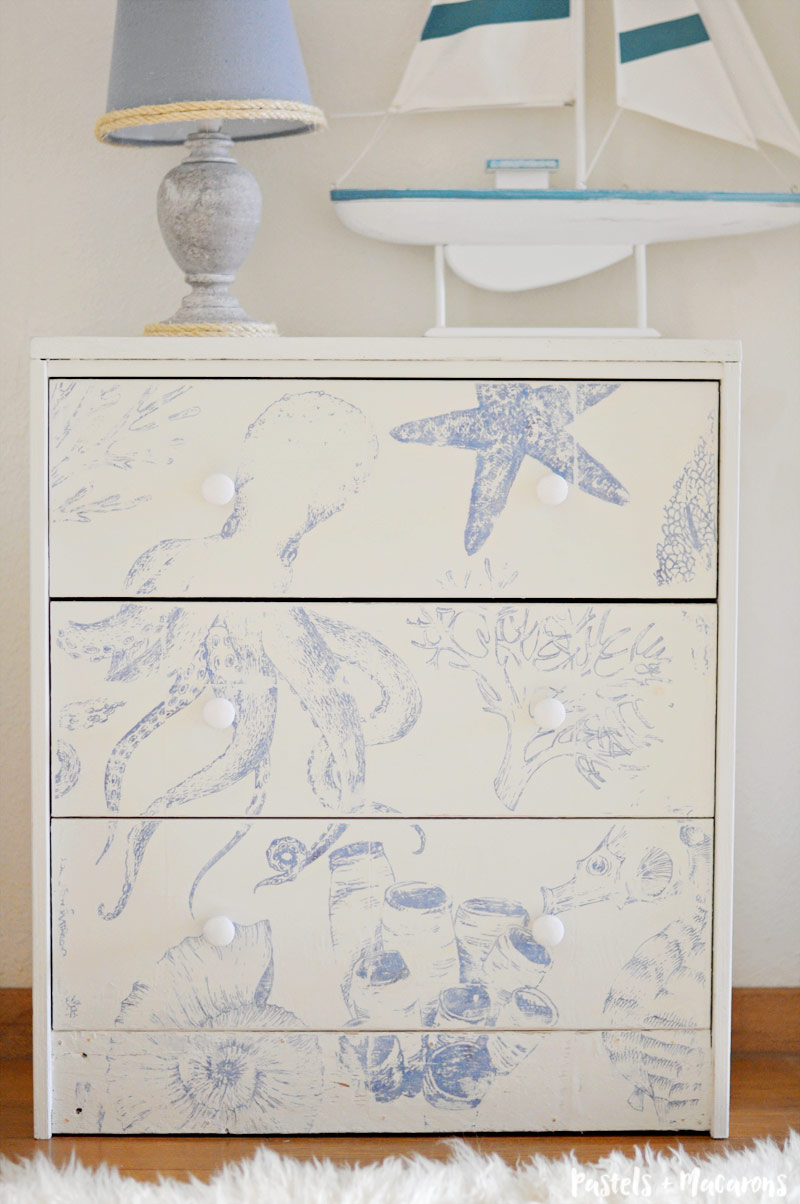
I started by removing the draws from the chest and removing the hardware. For this project I kept the original knobs because I felt the design I chose to put on the draws was enough, I didn’t want anything taking attention away from the pretty sea creatures I applied to it.
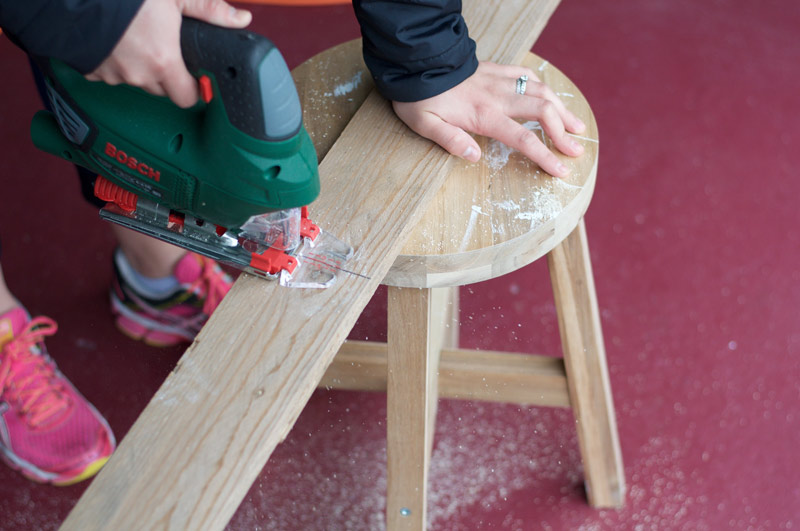
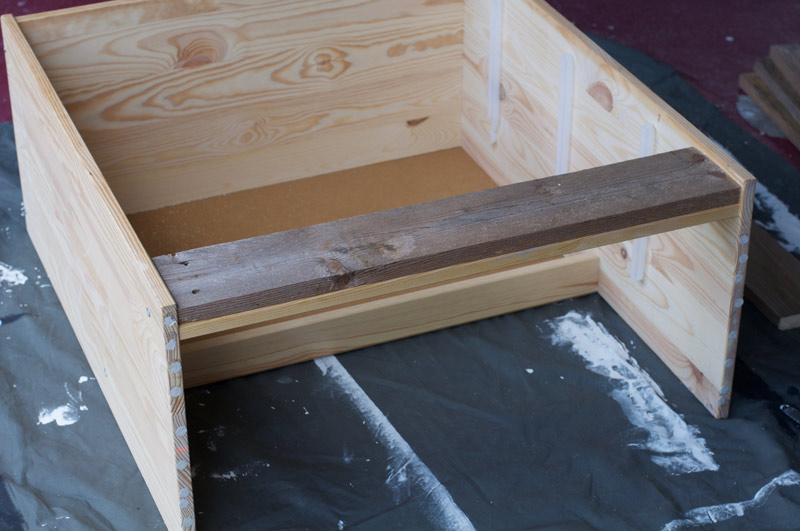
To recreate this look start by measuring the top of the chest in length and cutting your wood with an electric saw. It’s a small chest so it doesn’t require much wood. I was able to fit three and a half pieces of palette wood on the top of the chest. I also added a piece of wood to the bottom of the chest so that I could take the images all the way to the bottom of the chest. Set your pre-cut pieces of palette wood aside.
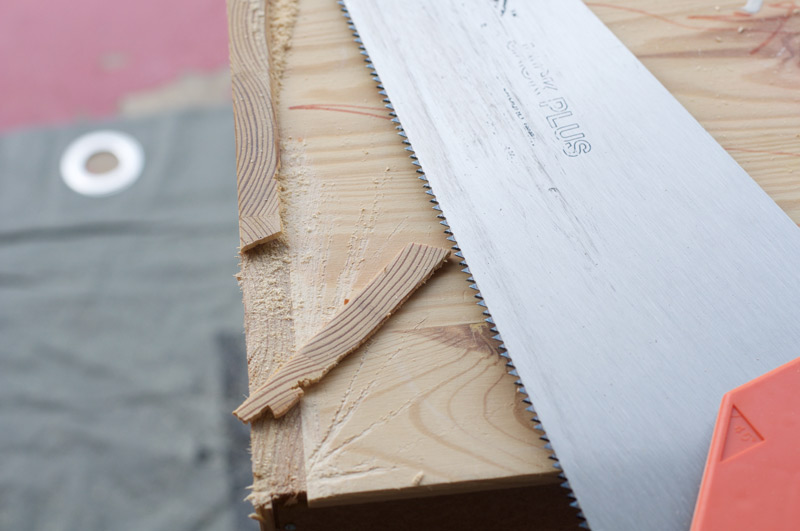
You will notice on a Rast Chest that you will find the top surface is not even. The sides slightly rise above the rest of the surface making it difficult to place on any other surface over the top without a gap becoming visible. I got rid of this obstacle by using a handsaw and gently removing these little extra pieces of wood. I was too scared of using my electric jigsaw incase I accidentally started sawing into the actual chest. I can be a bit clumsy that way! haha. Once removed I quickly gave a light sand to the area.

Now we are ready to attach the palette wood to this Ikea Rast hack! This is so simple. Put a good amount of wood glue over the surface then place the palette wood on the top of the chest, use nails and a hammer and start hammering away. I don’t recall how many nails I used but the beauty of a project like this is that you don’t have to make it perfect or hide the nails. Just place enough to secure down the wood. I made sure to keep a very small space between the pieces of wood. Once I secured the wood to the top of the chest I cut the excess wood off with my electric jigsaw.
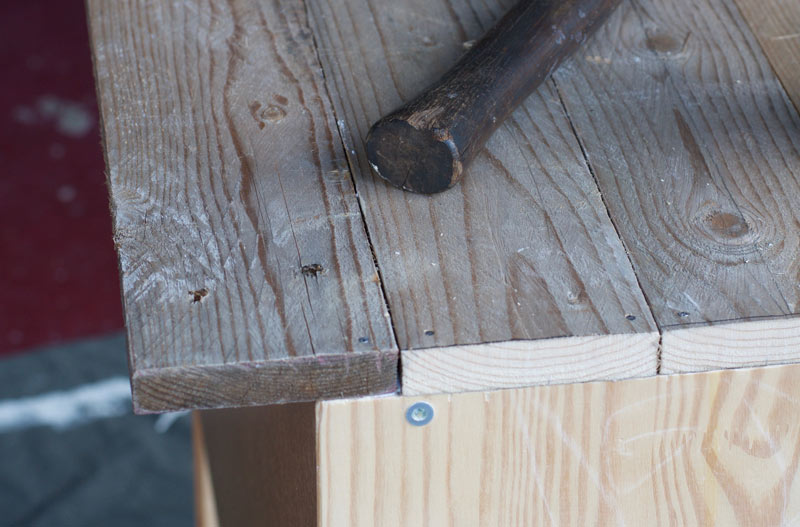
Nail the last piece of palette wood to the bottom of the chest.
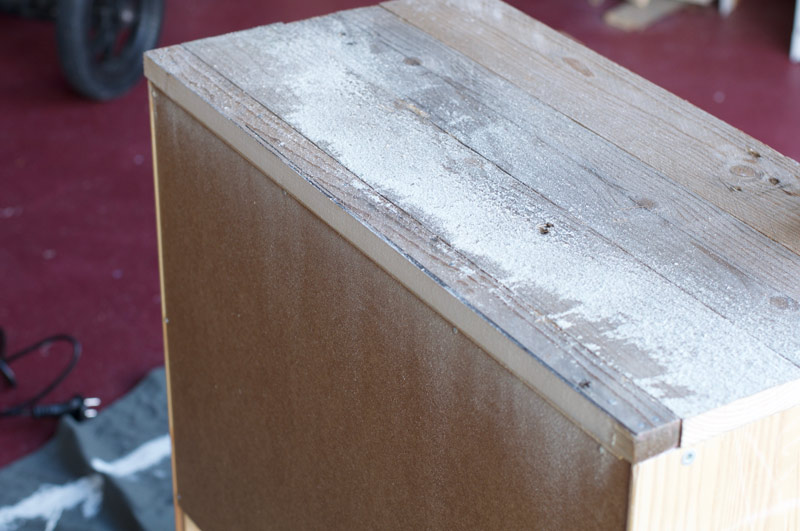
Give the entire chest and draws a quick sand using an electric sander, sanding block or sanding paper. Note that sanding is not required when painting with chalk paint but because we added the wood to the chest it is important to buff down the rough edges. Brush off saw dust, ready for painting.
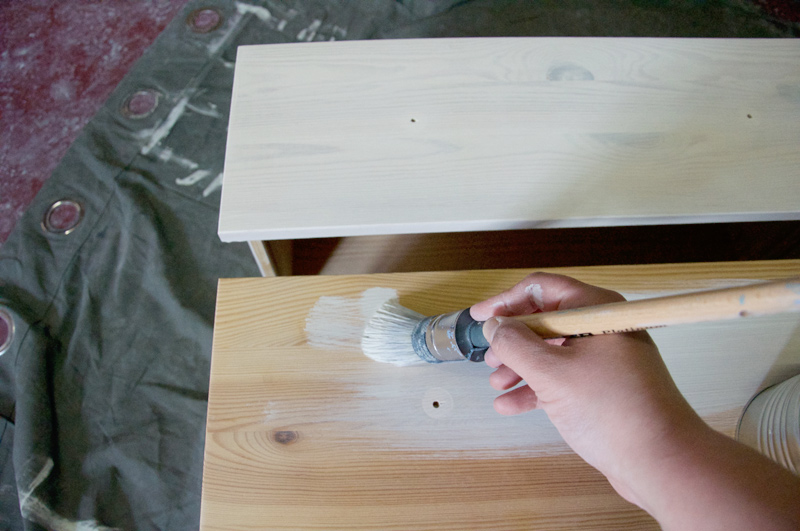
I gave the entire chest two coats of paint. I didn’t completely cover the palette wood on the top as I wanted some of the wood texture to show through for a more coastal feel.
Allow 5-10 minutes between coats. I love chalk paint for this reason, the drying time is very fast, so you can get things done quickly. Perfect for busy moms! Don’t forget to paint the knobs unless you want them to stay their natural pine color. After I finished painting the chest, I did an image transfer of the sea creatures you see on the chest. See below for more information on this technique.
Once you have painted, transferred image and are happy with your project. All you need to do is get a clean white rag cloth that is lint free and buff on the clear/finishing wax over the entire thing. This step is vital to keep the paint on the chest protected. I didn’t want an aged look but if you like the aged look you can also use a tiny bit of dark wax in certain spots to give it a vintage finish.
HOW TO ADD THE SEA LIFE IMAGES TO THE IKEA RAST HACK?
Because Nautical is what I was going for, I thought it would be fun to add some nice images to the front of the chest. I wanted some beautiful images of sea life that where more realistic and I wanted to distress it to make it look a little worn. I found some beautiful illustrations on a website called Creative Market where you can purchase vector images that you can then transfer into Photoshop or Illustrator and create cool art prints or whatever else you want.
If you don’t have the time or skills required to do this and you like the exact images I put together then you can download a free printable PDF over on my blog.
To see the exact method I used to transfer the marine life images to the chest, you can read my image transfer technique post with a step-by-step guide on how to do this technique.
So there you have it for another month guys! What do you think of my Ikea Rast Hack?

Great work Maria it looks fab! And also had no idea about the image transfer technique – thanks for sharing 🙂
So simple and looks seriously awesome
The link on your transfer tutorial isn’t working. Beautiful design!
Hi Julie,
This was a guest post,thanks for the heads up 🙂 Do you mean the link to the printable? Here is a link to the download, https://www.dropbox.com/sh/orq3p61afywm9s9/AAB-xV4fBsCfD_MVubGfqWbga/Rasterbation-3-%20FINAL.pdf?dl=0
Absolutely adorable! We are remodeling our mobile home, trying to make it look like a beach cottage on the inside and outside. We are retired on small pensions so instead of selling and buying a house, we decided we would have to use what we have and make it into our forever home. We are in our early 60’s and we are trying to do the work ourselves. Yikes! I LOVE this idea and will use it for a console table I want to redo. Thanks so much for the idea and instructions. QUESTION: Did you make the sailboat?I have been wanting to try to make one. Any advice? Love everything! Lamp, boat, chest. Thanks!
Thanks so much Deb! No, the sailboat was a purchase but if you have the talent to make one I say go for it!!! Good luck with your remodel I am sure it will be adorable!