Hi Shabby Creek readers! I’m Laura, and I am thrilled to be here sharing a fun upcycle craft with you today. When I’m not shooting photos, transporting teens, or avoiding laundry, you can often find me blogging at Left on Peninsula Road.
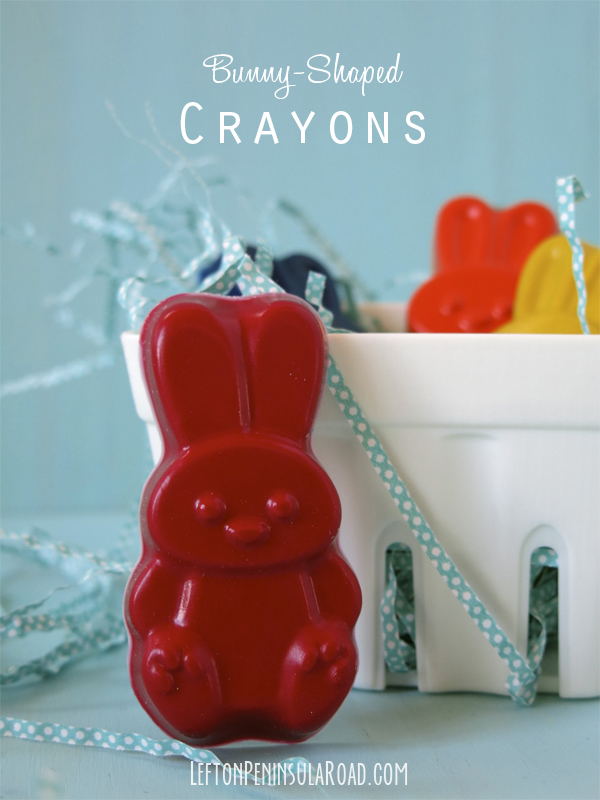
Last spring I made some fun egg-shaped crayons for Easter. So, last week when I spotted the cutest Bunny cookie pan, I knew I wanted to try some more crayons! (I bake occasionally, but I’ll admit that I’m much more likely to be thinking of a crafty use when I spot a pan like this.) Shaped crayons are a fun and easy way to upcycle broken or dull crayons. Or, if you’ve got a particular color scheme in mind, watch for crayons on sale or clearance especially after back-to-school time.

To make your own bunny-shaped crayons, you will need a shaped cookie pan and assorted crayon pieces. I found my pan at Target. It is a Wilton 6-cavity cookie pan – you can find it here on Amazon (affiliate link). You might also want to recruit some help! Except for the melting/baking, this is a great activity to get the kids involved.
Start by removing the paper wrappers from your crayons. (I found that it took the equivalent of 5 crayons to fill each bunny shape.) I chose to sort my crayon pieces by color and make solid-color bunnies. Color-sorting is a good learning activity, so get the kids to help on this step too:)
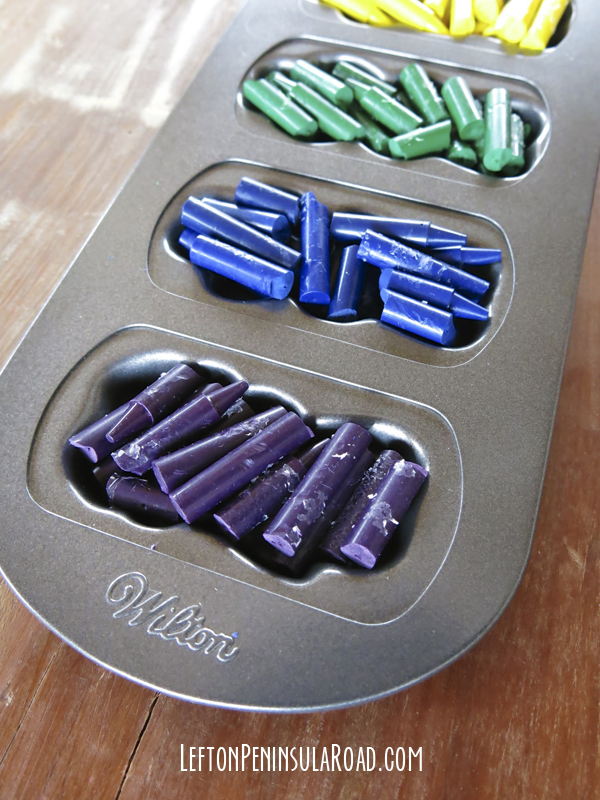
Pile broken crayon pieces into each cavity. Place the pan in a 250 degree oven for about 10 minutes, or until completely melted. Once melted, remove from the oven and let cool. The crayons usually release from the pan pretty easily once they’re cool. If not, I usually resort to the same trick I use to get melted candle wax out of votive holders, the freezer. (Actually in Minnesota, I just stick them out on the porch!)
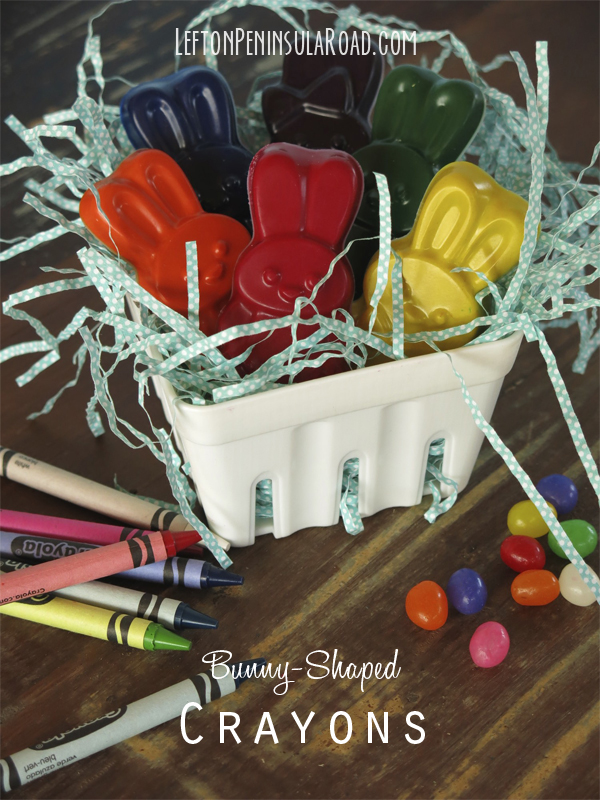
Remove the crayons from the pan. Aren’t they cute? (Ooooh and aaah a little if you’d like.) Wouldn’t these bunny-shaped crayons would make great non-candy basket fillers or fun favors for the kids’ holiday table?
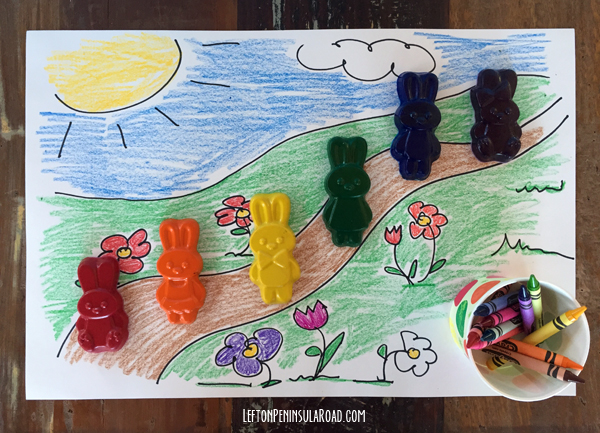
For even more fun, try covering the kids’ table with butcher paper or use white drawing paper as placemats. Fun, right? You could even add your own bunny trails with a black Sharpie and let the kids go to town coloring in the scene before and after dinner.
That’s all there is to it! Thanks for having me here today, Gina!
If you enjoyed this post, I hope you’ll stop by my blog or catch up with me on Instagram.

Thanks Gina, I’m going to make some for my 3 yr. Old granddaughter’s Easter basket. They are adorable. I first thought the pan was a chocolate mold pan. I guess you could use a choc. mold if you had one. You didn’t grease the pan first, did you ? 😀 Well thanks again, i can’t wait to start 😀 Have a great day. Sincerely, Diena