*thanks to Yankee Candle for partnering with me on this post*
Fall decorating around my house has to be dead simple. Like plop a few pumpkins down, light a few candles, maybe some rescued branches from the yard and call it done. Halloween? I’m all over that one. I can decorate for Halloween with the best of them. But the fall decor that lasts until Christmas comes out is a whole different story. Yeah, I’m a lazy fall decorator. Of course, that might be because all of our major projects outdoors tend to happen in the cooler months of the season – and right now I’m too busy building a porch to do a whole lot of fall decorating. But I did do a little to celebrate progress on the porch.

Those velvet pumpkins? They’re my fave. Because… A) I don’t have to remember to go to the store to buy pumpkins. B) I don’t have to stroll around wondering what kind of pumpkins to buy, how many, what sizes, then spend a fortune on ones that will rot. C) I don’t have to remember to dispose of them before they rot and make a mess. Because believe me, I forget nearly every ding, dang year.
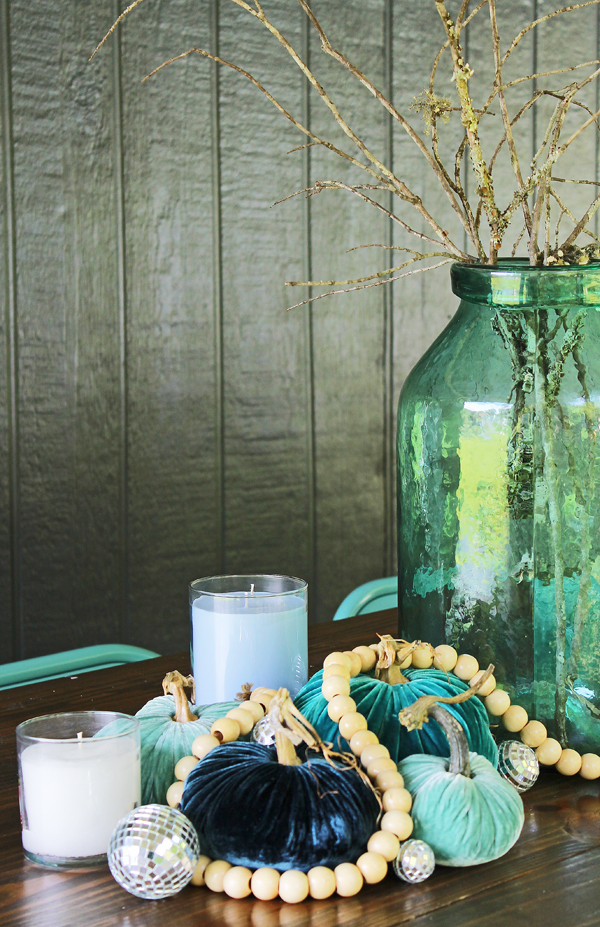
But candles? I can always remember candles. Even without pumpkins or disco balls or wood bead garland – I can just throw out a bunch of candles.
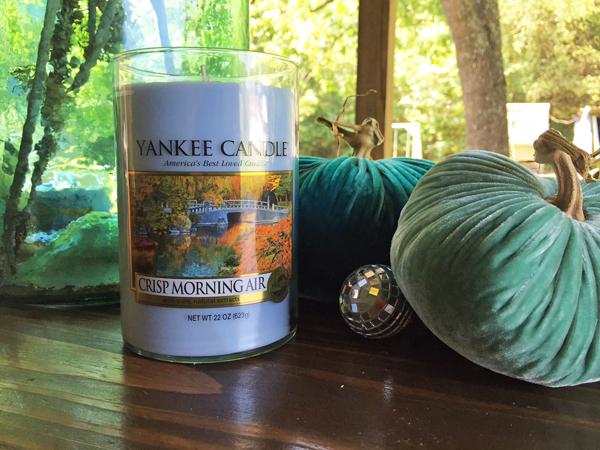
Like my favorite from the summer collection, White Chocolate Apple , and my favorite from the fall collection, Crisp Morning Air from Yankee Candle. But really, all their new fall scents are strong contenders.
 Whether you’re big time in to fall decorating at your house, or kind of pass by it with a nod and a wink on your way to other seasons, my advice is to keep it simple. And it doesn’t get much easier than plopping down some pumpkins (whether real or not) and lighting a few candles.
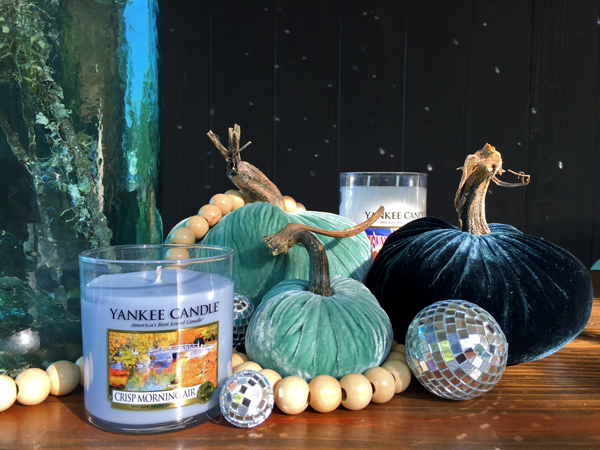
Disco balls optional. But they do add a little sumpin, sumpin in the afternoon sunlight…
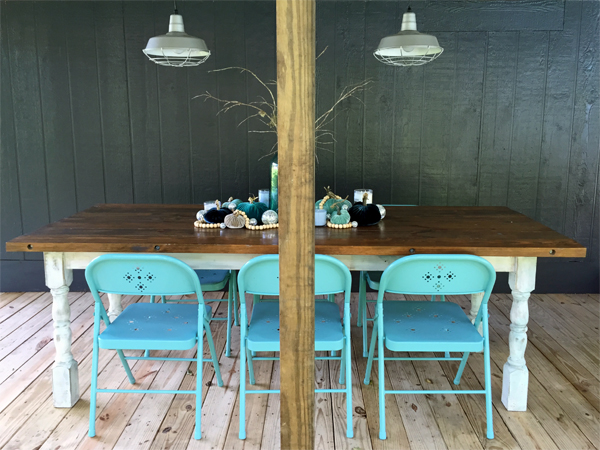
Because the less time I spend on decorating, the more time I have to spend on building new furniture for the 40 ft long back porch. Or painting it. Or enjoying it. Know what I mean?
Thanks again to Yankee Candle for partnering with me on this post. All ideas, words, photos and opinions are 100% my own.

I love your approach to decorating and writing about it! we speak the same language, friend. 🙂 I especially like the colors you have chosen. They are not the traditional “Fall” colors and the velvet texture adds “a little sumpin, sumpin” that I really like, too! I love the traditional earth tones of Fall, but could see these as a wonderful contrast, as well. Where did you get the pumpkins, or did you make them yourself??
Nothing but Gorgeous!!!
This is a really beautiful decor for fall! Love the color and texture of pumpkins. I think that the mixture between velvet and wood is very sophisticated, so lovely!! Good job my friend!!
I love the simplicity.