*This post is partnered by Cedar Safe Closets*
One of the best parts of DIY is seeing the difference in the before and after. In every space we makeover in our home, each and every project is a DIY, because a) I’m a control freak – b) budgets prefer DIY – and c) it’s a great feeling to know that you built that with your own two hands. Our closet makeover is one of those moments. It was the last space in our home that hasn’t been touched, because honestly with a whole house to makeover you really don’t think much about the closets. Now that it’s done, I wish we would have done it sooner….
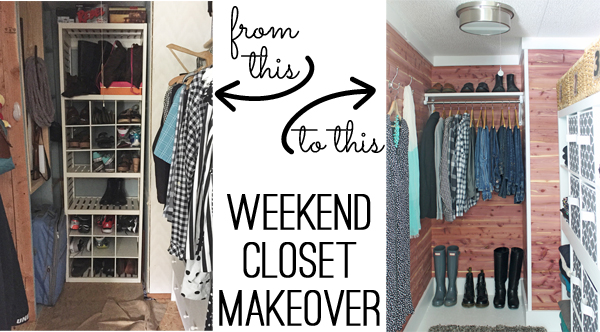
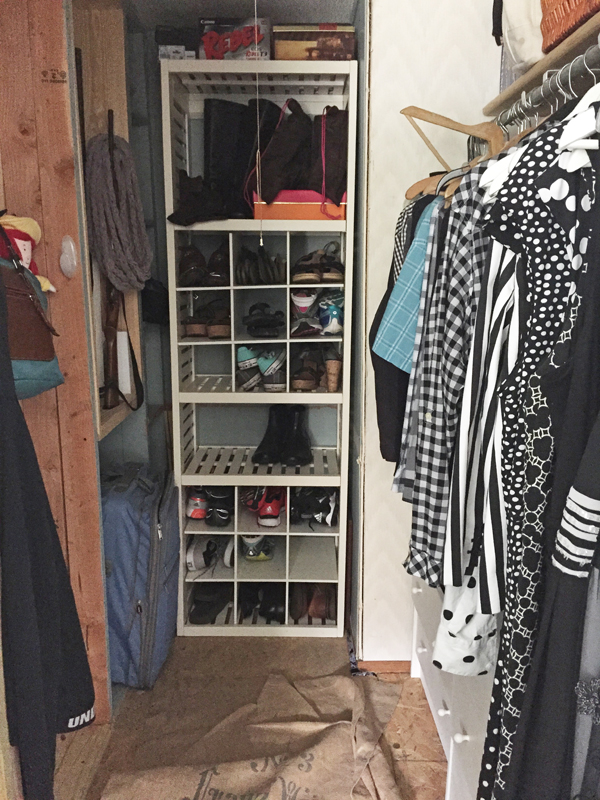
This is where we started. It wasn’t pretty. And it was barely functional.
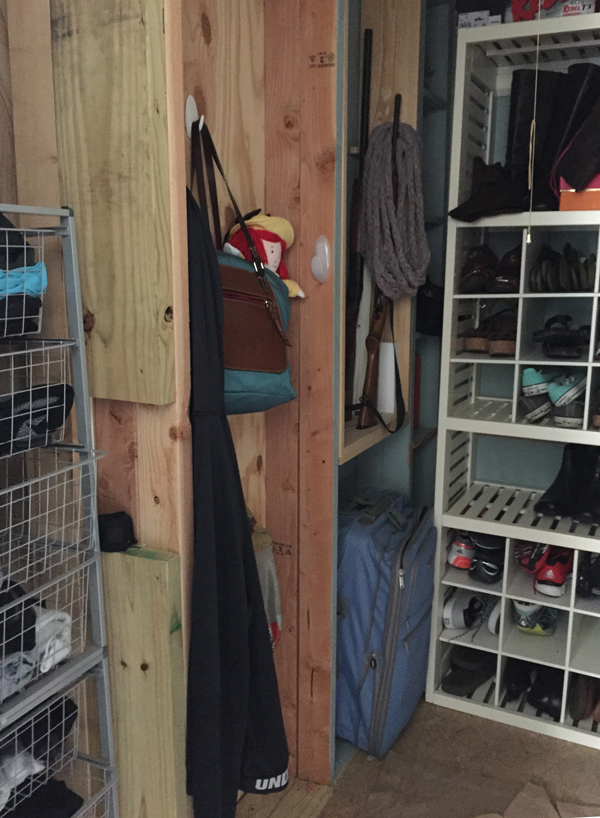
Stud walls – exposed subfloors – wonky storage. Let’s fix it!
But before it started to get better we had to rip it all out. So we cleared it all out and decided to use Cedar Safe Closet Liners (available at Home Depot.) They are planks of real cedar, which was a great option for a few reasons. One, it’s easy to DIY. Two, we don’t drywall (both of us pretty much suck at it) and it was cost effective in comparison to hiring out someone to do drywall. Three, it went very quickly – in about six hours – plus it saved hours and budget for buying more paint plus time to paint the walls. Truly a win/win/win.
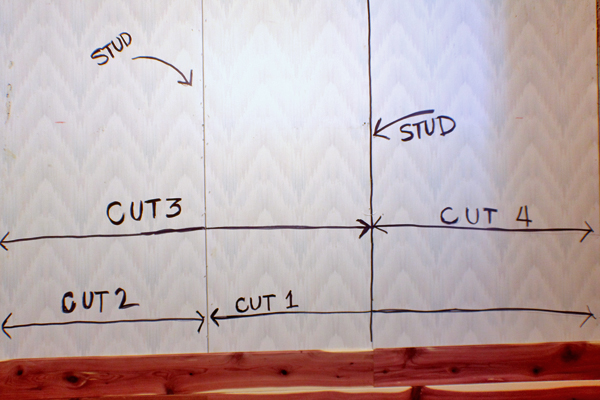
To install cedar planks, first you have to find your measurements. Locate the studs on the wall – my wall was short so we only had two cuts each direction. If your wall is longer, then you want to measure to find the longest run of studs that will fit onto a 4 ft board, then cut it and measure to the next stud, cut then measure, all the way to the end of the wall. Going the other direction, do the exact same thing. As you can see above (don’t you love my fancy Sharpie on wall photo?) we had 4 different sizes on this wall.
And because our walls are so wonky, we measured each row one by one. If you measure your walls from side to side and the floor, in the middle and then at the top and you get the same each place, you’re probably going to have the same cuts. Our walls were 1 inch off from top to bottom… so we had a lot of measuring.
On narrow walls under 4 ft wide, we just planked top to bottom without a stagger line – just straight cuts top to bottom.

The planks come tongue and grove, with ends that click together. If we were more patient, then we would have installed it the correct way. However after getting it wrong 5-6 times, I started trimming off the clicky ends. Just barely trimming them meant the boards fit together nicely on the ends. (I’m not telling you to do it this way – but if you have problems it’s a good solution.)
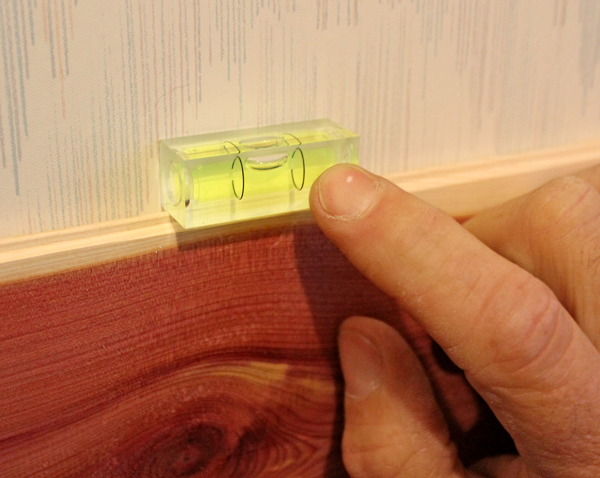
But the first row down and make sure it’s level.
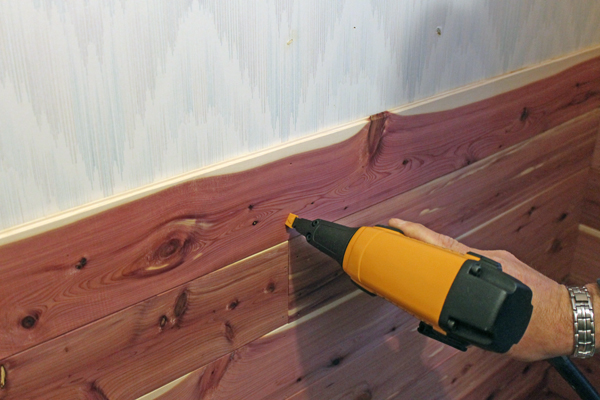
Then use a brad nailer to nail it in each of the studs.

When you put the next row on top, if you have problems getting it to fit, use a scrap to tap it in with a hammer if needed – just be sure you have it lined up properly.

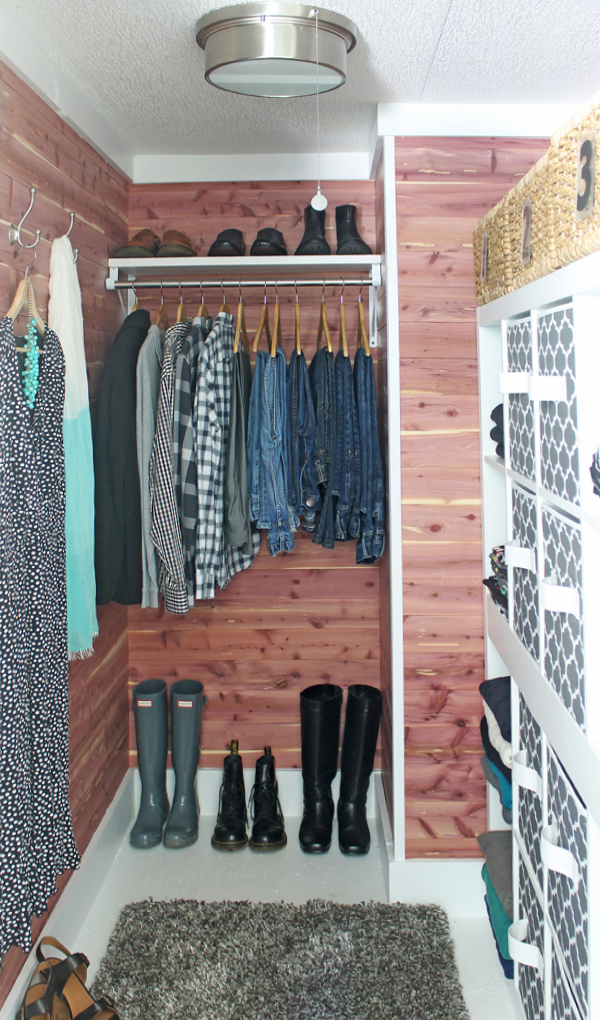
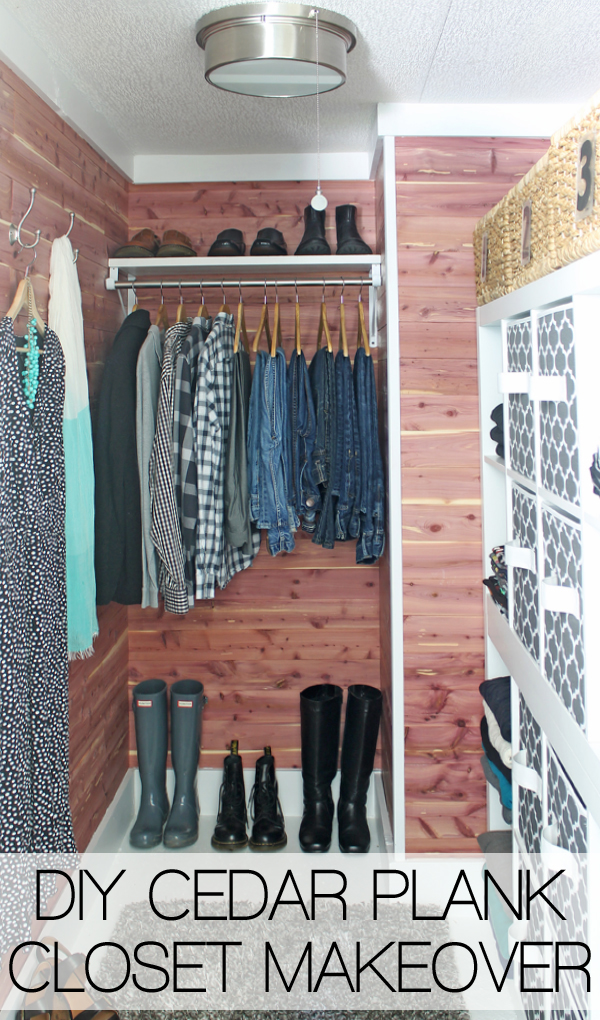
After all the planking was finished, we trimmed it with 1x4s for crown and 1x6s for baseboard. We taped it all off with painter’s tape and painted it plus the ceiling and the subfloor with Sherwin Williams Extra White.
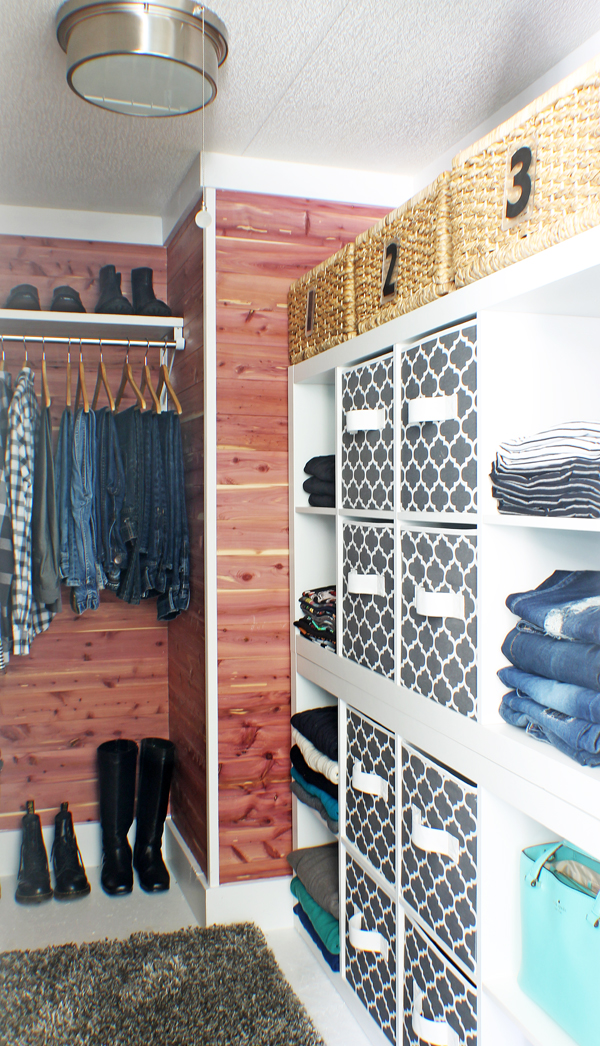
We installed a new light (tutorial coming soon!) and added in new shelving with bins for storage.
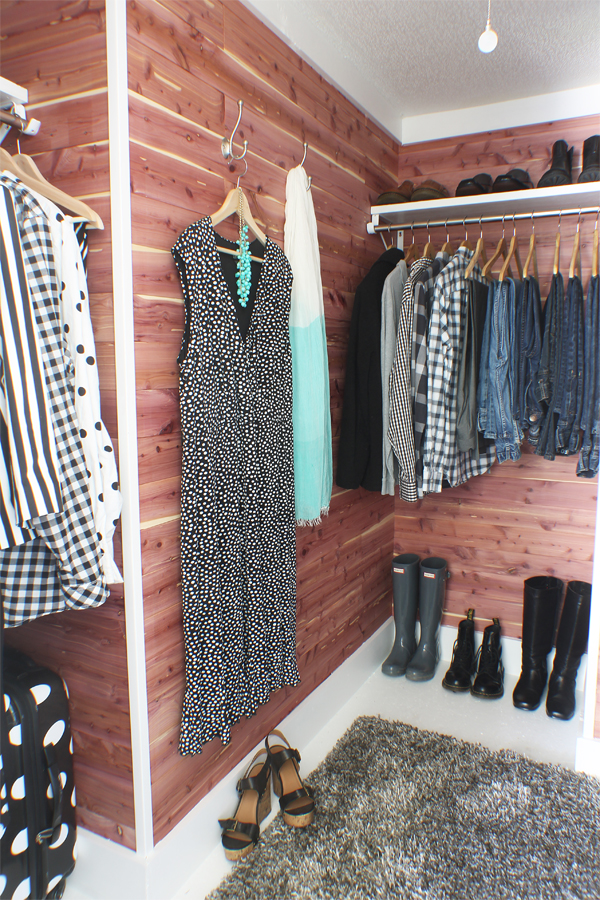
A fresh rug and some hanging storage and it was complete.
 If you’ve never done a DIY project before and want to get started – closets are the perfect space to try. The more you do it the better you develop your skills, so it’s a great way to get your DIY on without it being in the main living spaces of your home where mistakes might be more evident.
*Thanks to Cedar Safe for partnering with me on this post. All ideas, words, opinions and photos are 100% my own.*

So nice! We are thinking about a remodel to give me a studio for my quilting/craft area. It will include some large closet/storage areas. I think cedar may be a good consideration. Thank you for sharing!
This looks great Gina! Love it!
I love this closet!!! It turned out great.!! You have got my wheels rolling for this!!!!
Amazing!! Our closets are last on the list here too…but maybe we should be moving them up to the head of the list!
Looks fantastic!
Look Great !! I bet it smells wonderful too!!
That turned out GREAT, Gina!! Please send your Hubs to help us install ours!! lol
Looks fantastic – I love the smell of fresh cedar too.
Oh my goodness I am so in love! And cursing the fact that I’m in an apartment and can’t do this myself. This is so beautiful!