• Blog
  • Home
  • Soft Life Society
  • Privacy Policy
    • Facebook
    • Instagram
    • Pinterest
    • Twitter

The Shabby Creek Cottage

the art of making life magical

  • illumine magazine
  • classes
  • join the newsletter

How to make a burlap wreath

Hello there, Janine here, from Happy Happy Nester, and I’m thrilled to be a monthly contributor here on Shabby Creek Cottage. Burlap is quite popular these days, and so, I thought it would be fun to create a DIY burlap wreath that is versatile and simple to style for your home. Let’s get started on making a the wreath.

How to make the classic burlap wreath. Best tutorial I've seen, clear instructions with step by step photos.

How to make the classic burlap wreath. Best tutorial I've seen, clear instructions with step by step photos.DIY Burlap Wreath

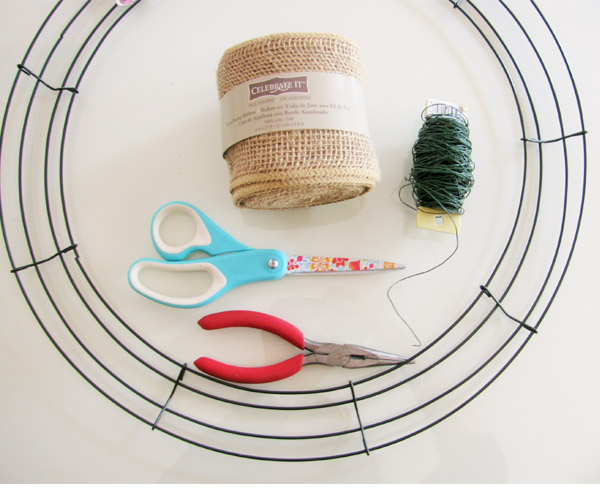
The great thing about this wreath is how few items it requires.

The following post contains Amazon Affiliates links.

Supplies

  • 1 Wire wreath (12 inches)
  • 1  4-inch roll of Burlap ribbon (10 yards)
  • Scissors
  • Wire
  • Instructions

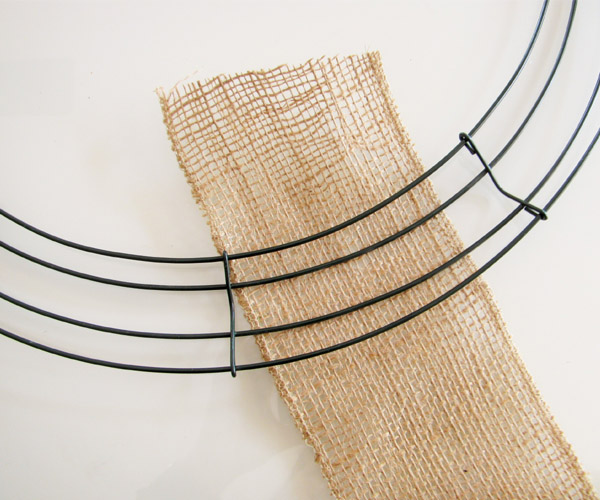
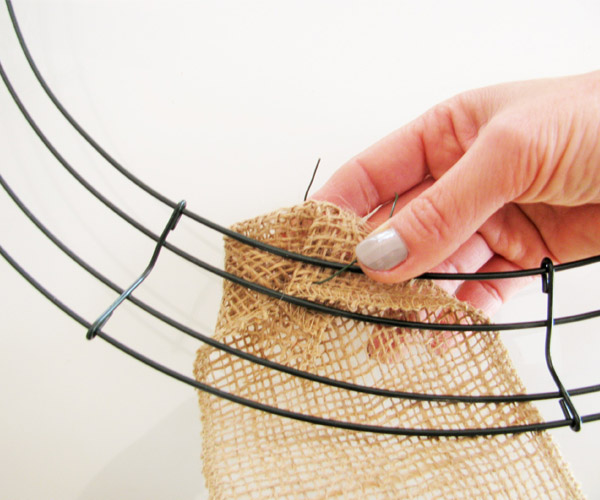
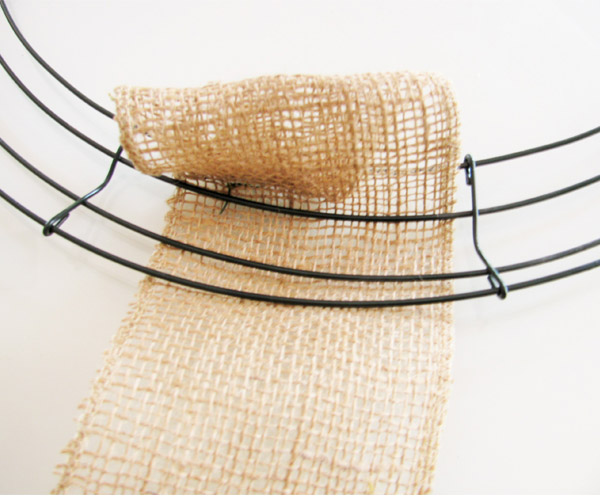
How to make the classic burlap wreath. Best tutorial I've seen, clear instructions with step by step photos. 1. Place the Burlap ribbon underneath the wire wreath. Now here is an important step, make sure the burlap is perpendicular to the circular frame. The ribbon (and the roll) should be pointing in the direction of the outer circle.
How to make the classic burlap wreath. Best tutorial I've seen, clear instructions with step by step photos.
2. Wrap the ribbon around the inside ring. Then thread the a piece of wire through the burlap and twist around the wreath structure.
How to make the classic burlap wreath. Best tutorial I've seen, clear instructions with step by step photos.
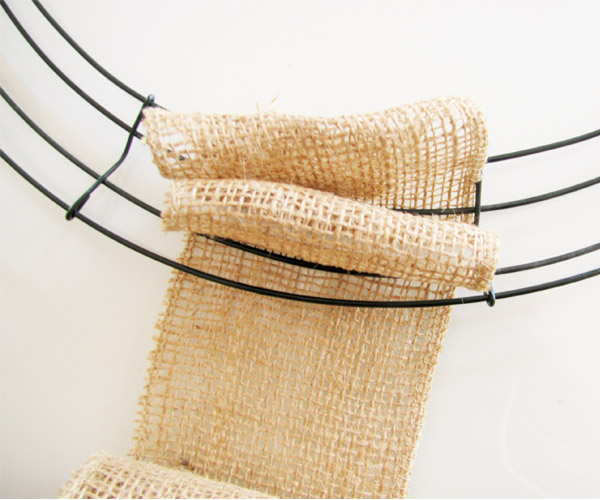
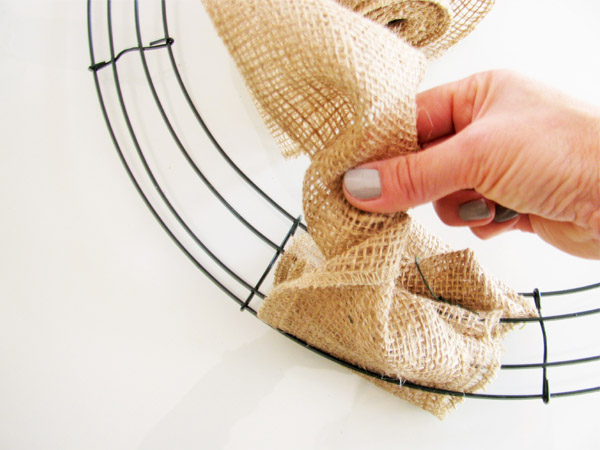
3. Next, working from the inside out, bring up ribbon through the open space. Make a 1 1/2 inch loop. 
  How to make the classic burlap wreath. Best tutorial I've seen, clear instructions with step by step photos.

4. Move to the next area and make another loop the same length. 

How to make the classic burlap wreath. Best tutorial I've seen, clear instructions with step by step photos.

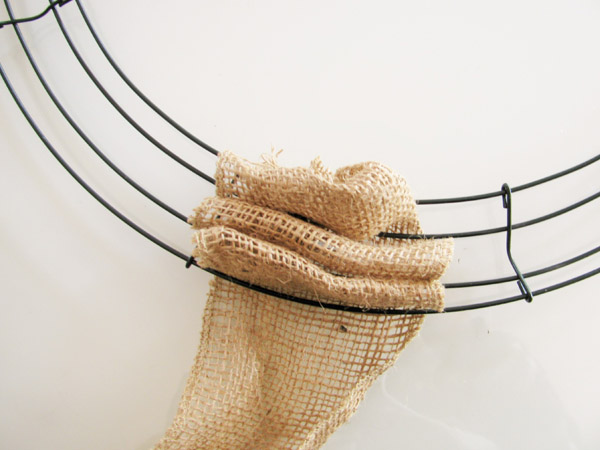
5. Continue the same for the final outer space. At this point, you will have three loops of ribbon.
How to make the classic burlap wreath. Best tutorial I've seen, clear instructions with step by step photos.

5. Turn your wreath over. Grab ahold of the burlap and twist it two times. The twisted section will act as a knot and secure the burlap.
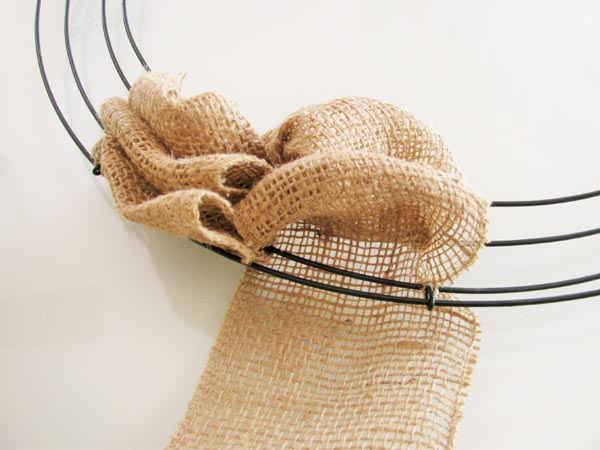
How to make the classic burlap wreath. Best tutorial I've seen, clear instructions with step by step photos.

6. Here is the next tricky step. Flip the wreath over to the front side. The ribbon should still be on the backside of the wreath. Bring the ribbon to the inner circle right next to the last row. Again, make sure the ribbon is facing perpendicular to the structure just like in step 3. Repeat step 4, making another row of loops.

7. Repeat step 5 through 6 and keep repeating till you have gone all the way around the wreath. At the final row, twist the burlap around the outer backside of the wreath and tie down with wire. Fluff and arrange the burlap until it’s exactly how you’d like it.

8. With the wire, make a loop for hanging.
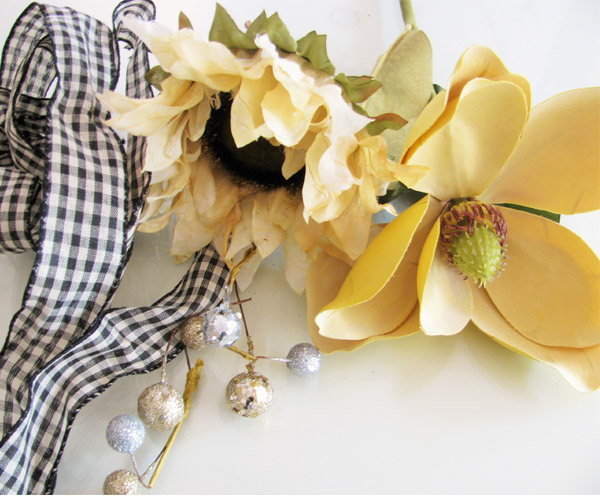
How to make the classic burlap wreath. Best tutorial I've seen, clear instructions with step by step photos.

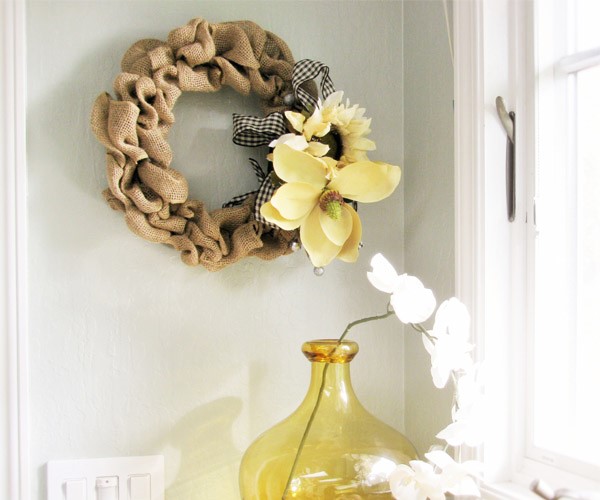
9. Decorate your wreath with additional ribbon, silk or dried flowers and any decor. And if you want you can change the style throughout the seasons. Swap out the flowers and the decorative ribbon and you’ll have a whole new look!
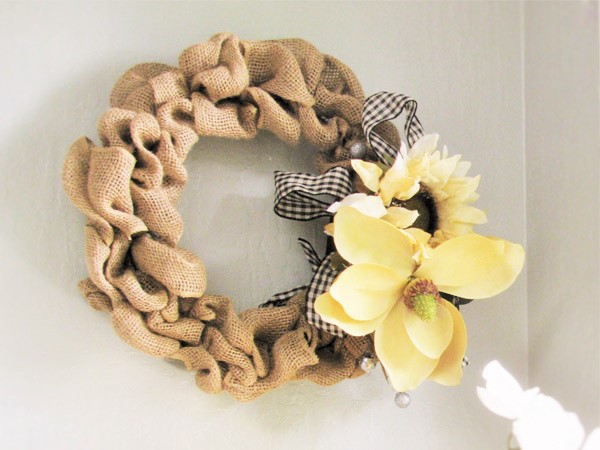
How to make the classic burlap wreath. Best tutorial I've seen, clear instructions with step by step photos.

Thanks for visiting and I hope I’ve inspired you to create this burlap wreath. Enjoy decorating it with your style to fit your home’s decor. If you like to make wreaths, here is another one of my projects that may interest you. bay leaf wreath

See you next month,

Janine
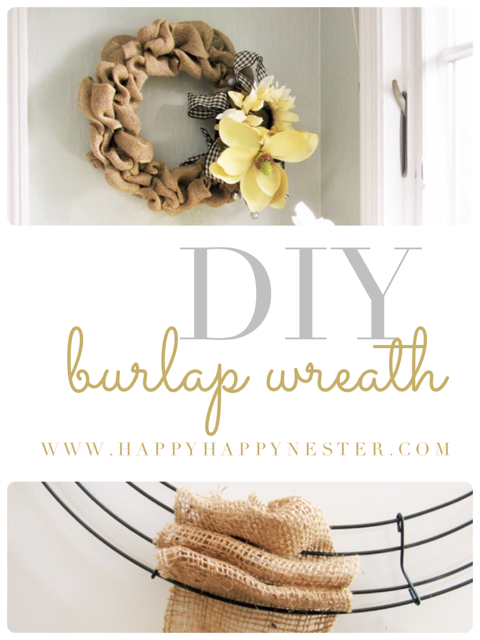
Happy Happy Nester

How to make the classic burlap wreath. Best tutorial I've seen, clear instructions with step by step photos.

Filed Under: DIY Tagged With: burlap, farmhouse decor, wreath

About Gina Luker

Hey there, I'm Gina Luker. I'm an artist, author and founder of The Soft Life Society. I am proudly a wild, witchy woman on a mission to make life magical. Alongside my husband Mitch, we are remodeling a 200 year old home we call The Enchanted Manor. I'm obsessed with estate sale shopping, Instagram, Practical Magic, disco balls, margaritas and doing whatever makes me insanely happy in any given moment.

« Caramel Apple Vodka Recipe
Slow Cooker Buffalo Wings »

Comments

  1. Dawn says

    January 13, 2016 at 8:05 am

    What a cute and inexpensive craft idea.

    Reply
  2. Happy Happy Nester says

    January 13, 2016 at 12:46 pm

    Gina,

    Thanks for the guest post! Totally enjoyed creating the wreath!

    Reply

Leave a Reply Cancel reply

Your email address will not be published. Required fields are marked *

Recipe Rating


Hey there, I’m Gina!

I believe in the magic of soft living, finding joy in every day moments, and building a magical life from the inside out. I’ve spent the last 15+ years sharing my story online – through creativity, healing, and a little rebellious sparkle.

I’m a writer, dreamer, and witchy woman who believes your everyday life should feel enchanting.

Most days you’ll find me with paint on my hands, dirt under my nails, and a journal full of big dreams. I’m so glad you’re here.

Privacy Policy & Disclosure Statement

Searching For Something?

Copyright © 2026 · Divine theme by Restored 316

Copyright © 2026 The Shabby Creek Cottage Log in