I think I’ve made about 234,984 pillows with my Silhouette machine, and I’ve probably blogged about 234,981 of them. I make them a lot because I have this undescribable need to constantly have new pillows (probably blamed on my decorating ADD) and they’re so easy to make that I can whip one up in just a few minutes. Instead of showing you *yet another* pillow tutorial, instead I wanted to share how to cut graphics you make yourself, because I know it’s a little complicated if you’ve never done it before. So that’s what we’re talking about today: how to use Silhouette software to cut your own graphics.
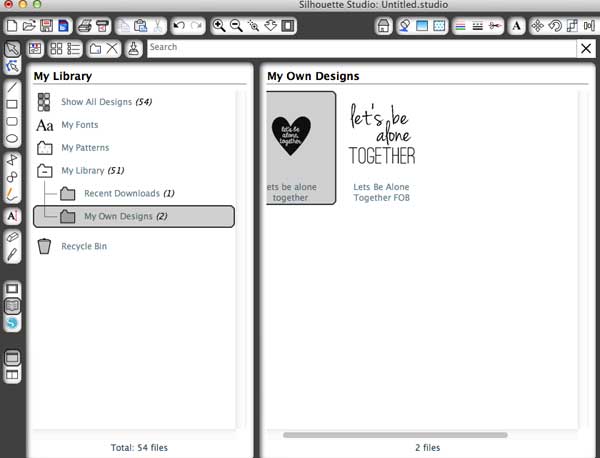
 First you’re going to start by making the graphic. Or you can use this one above by clicking on it to open it in a new window, save it to your computer and then following the next steps. (But if you’re not a 40 year old Fall Out Boy fan girl, do your own thing, m’kay?)

So now that you’ve got the graphic made/downloaded, you need to import it into your Silhouette Software Library. Do that by selecting FILE – then Import to My Library, then find the graphic in the pop up window and select it. Once you’ve done that, it will then be in your Silhouette Library.
Click on the little book icon on the side, then it will open up your library. If you select the MY OWN DESIGNS folder, the graphic you just imported in will be there. Double click the image you want and it will open up onto your template.

The easiest way to use your own graphic is with iron on vinyl adhesive, and you can get your first sheet FREE from my buddies at Happy Crafters if you visit their website!* But, especially if you’re using words – you must flip it horizontally before cutting. So, to flip it, you want to select OBJECT, then TRANSFORM, then FLIP HORIZONTALLY. And boom, it’s done.
 Don’t give up just yet, we’re about to get to the cutting part. I know, it’s a lot, but you can do it! So now let’s trace that image! Start by selecting the trace button – it looks like a little blue sandwich with a yellow crust. Click on that, then we’ll talk about the settings.
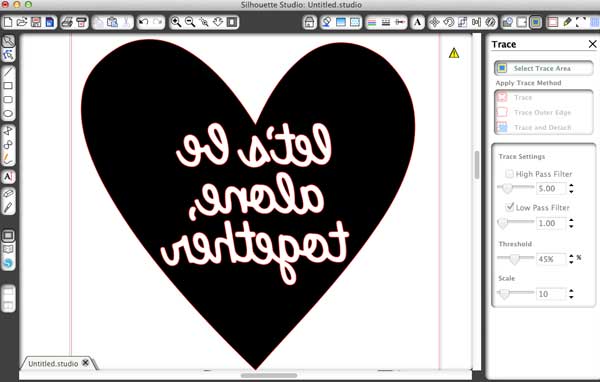
To get the trace right, unclick HIGH PASS FILTER, click on LOW PASS FILTER, set it to 1.00, set THRESHOLD to 45%, and SCALE to 10.
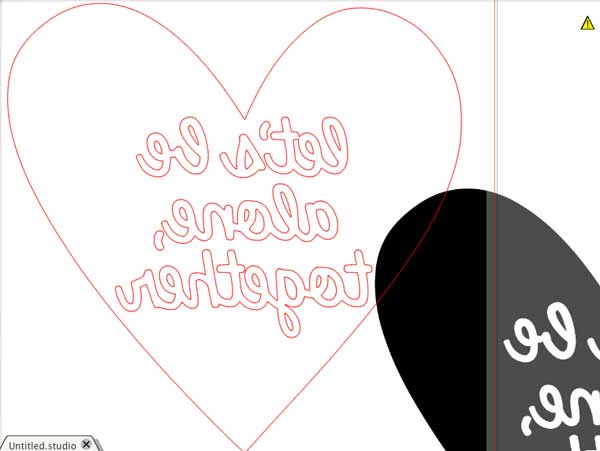
Once it’s selected, then click on the black area (your original graphic) and drag it off, then delete it out because you want the red outline for cutting purposes.
 After that, you can use the same steps that I used to make the Hello Pillow and iron on the adhesive vinyl and you’ve got yourself a new pillow in just a few minutes. Which means that I really should have time to clean that window behind my bed, but, ummm… nah.
Don’t forget to order your completely free vinyl – and if you make this project I’d love for you to share it with me by tagging me on Instagram (@ShabbyCreek) or use the hashtag #RockThatDIY and let me see how you work your own kinda magic!
*Thanks to Happy Crafters for partnering with me on this post. All ideas, words, images and ideas are 100% my own, yo!*

How darling. I use my silhouette so little that I have to call the company every time and have them walk me through what to do, which they always do. Great customer support.
Great tutorial and I love the pillow.
Hi Gina…love the help. I need lots o help with my machine and how to use. Shared this out on my FB page yesterday. Thanks.
Thank you Gina! I also rarely use my silhouette because I’m scared of messing up. I have to depend on my teenage daughter to do it for me or attempt to show me. I think I am confident to try my luck on some pillows I just made.
I don’t own a silhouette machine…how can I create stencils ?
I sent you an email already Bev, but to recap, you can buy already made stencils at any craft store 🙂 Have fun!!
I really want to stencil some farmhouse|shabby style signs but do not own a silhouette machine. Are there other options?
You can buy stencils at any craft store. I know Michaels has a great supply of Farmhouse type stencils, Hobby Lobby and Walmart may as well 🙂