Craving a glass of good, fresh homemade lemonade? All you need is one lemon to make the best lemonade ever (and it’s SO easy!)
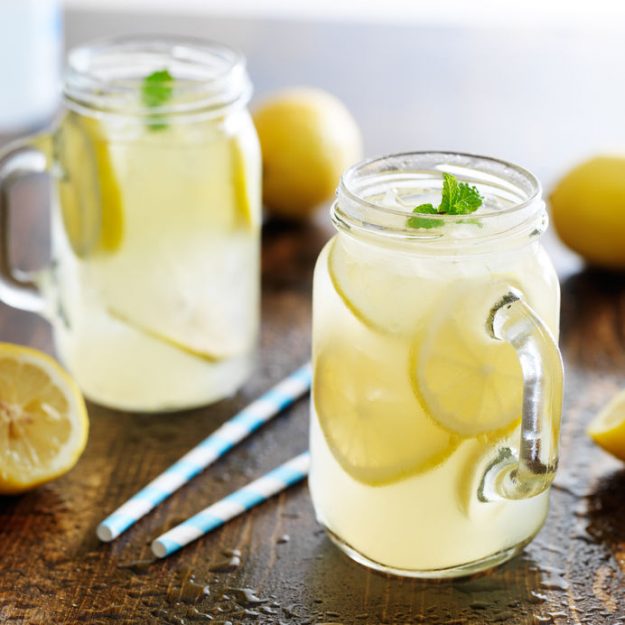
Would summer be the same without a good glass of cold, fresh, homemade lemonade? Yeah… probably not. There’s just something so quintessential about sipping the sweet and sour goodness. And throw it in a mason jar? Yeahhhh…. that’s summer in a glass right there.
But fresh homemade lemonade always seemed so messy to me. All the cutting and squeezing. Don’t get me wrong, it’s not difficult, just somewhat messy. I always compared it to this one vendor at our county fair who makes THE BEST lemonade, and mine never seemed to stack up.
Until now.
This was one of those “what if” moments that worked out beautifully. So if you’ve only got one lemon, don’t fret. That’s all you need to make the absolute best fresh homemade lemonade you’ll ever try.
Fresh Homemade Lemonade Recipe
Ingredients:
- 1 whole lemon
- 1 1/4 cups of granulated sugar (a bit more or less according to your preferences)
- 6 cups of water
Directions:
- Cut the lemon in quarters, then put it (yes, the whole lemon) into a blender with the sugar and 2 cups of water.
- Put the rest of the water into a large pitcher.
- Blend for 60 seconds or completely blended.
- Strain the mixture with a fine mesh strainer and pour it into the pitcher of water.
- Stir well & serve over ice.
At first I expected the lemonade to be bitter from the pith, but I found that only using one lemon was the trick to making it perfect every single time.
So the next time you find that life hands you lemons, make lemonade! (Sorry, I couldn’t help myself – haha!)

How to Make the Best (and Easiest) Fresh Homemade Lemonade
Ingredients
- 1 whole lemon
- 1 1/4 cups of granulated sugar a bit more or less according to your preferences
- 6 cups of water
Instructions
-
Cut the lemon in quarters, then put it (yes, the whole lemon) into a blender with the sugar and 2 cups of water.
-
Put the rest of the water into a large pitcher.
-
Blend for 60 seconds or completely blended.
-
Strain the mixture with a fine mesh strainer and pour it into the pitcher of water.
-
Stir well & serve over ice.
![]()
Be sure to visit my friends to find more ideas for summer in jars:
The Country Chic Cottage, Yesterday On Tuesday
The Cottage Market and Mad In Crafts
This sounds amazing!!! I know what we will be drinking this weekend : ) Hugs…
What a great way to make lemonade! I am going to have to give this a try.
Yea! I hope you love it 🙂
Just so I completely understand….. cut the lemon in fourths…..peel and seeds??.
Hi Sherry, yes, the whole lemon, kin, seeds and all, I know, sounds crazy but it is yummy!