Just about every other day at my house, my husband has the pleasure of hearing me say, “I think I have a crazy idea. I know it probably can’t be done, but what if…” Today’s project was a crazy idea. I was obsessed with a high end, very minimalist, white headboard. I knew, deep down, I could figure out how to make a king size headboard, and I was also fairly sure I could do it with a hollow core door.
It took me a good two weeks to convince my husband that I could, in fact, make a headboard out of a hollow core door. He kept saying smart things like, “Gina, they’re hollow. They’re too weak. It’s NOT a good idea.” I didn’t listen. I kept the idea roll around in my head, trying my best to figure out how to make it work.
Ya’ll know I’m persistent, right?
So, while we were standing in Lowe’s (aka, our date night destination), I threw out about a dozen horrible ideas that involved things like Velcro. Or hot glue. Maybe even duct tape. Don’t judge, they were fabulous stepping stones that finally led me to my brilliant solution. Because, of course, I did in fact figure out how to make a headboard from a hollow core door.
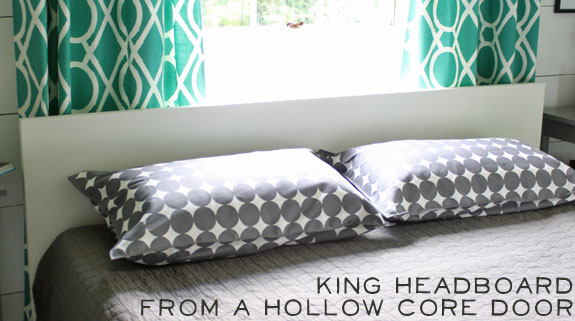
For this project, you will need:
A hollow core door (I used a 36 inch wide door)
Paint
Two 1x4s, 8 ft long
Wood Screws
Four 3 1/2 inch bolts, with nuts
You will also need:
A saw (or get the store to cut it for you)
A drill
Painting supplies
So here’s the thing: If you wanted to mount it to a wall, this would be super, duper simple. Buy a door, paint it, then use hangers to put it on a wall. Because my life is never that easy, my headboard needed to be in front of a window, and a good few inches out from said window so my curtains wouldn’t be crushed. It’s all good, I’m gonna show you how to do it, too!
Start by painting the door. I used some satin sheen white paint I had on hand, with a sponge roller. It took about four coats to go from wood to solid white – so be patient! If you want a modern look, use high gloss paint and it would look smashing!
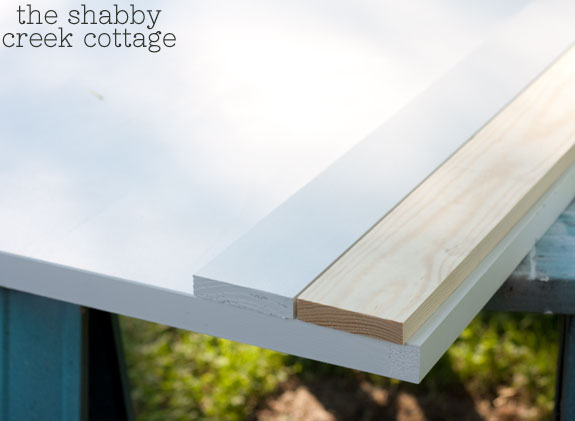
After it was all painted (well, one side was), then my sweet (now convinced) husband cut the 1x4s to the length of the door. For this tutorial, I only painted one side of the door and one of the boards – just so you can see front versus back. If you make this (and you totally should!), then please paint everything, m’kay. (I seriously did after the tutorial photos were all done.
Alright, now your pieces are cut to the length of the door, now let’s do some measuring.
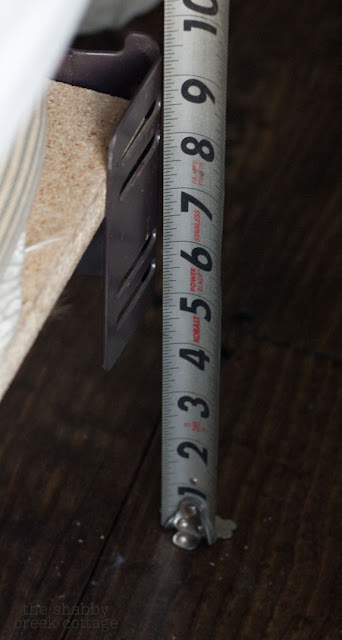
With your frame all set up and in place, measure from the floor to where the mounting plate is on the frame. You need to know where it starts and ends, top to bottom.
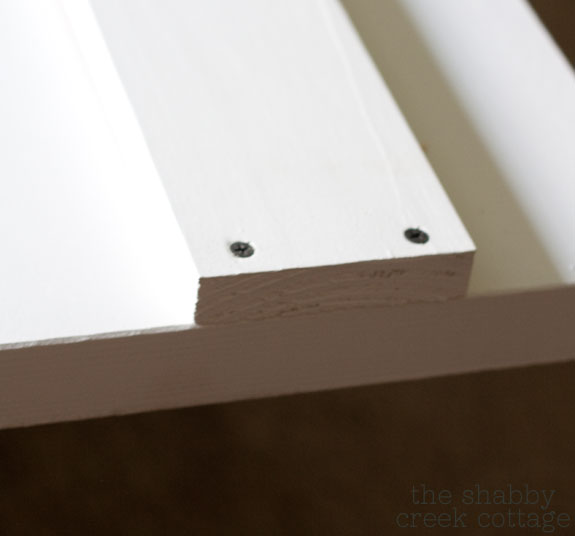
Measuring up from the bottom of the door, install the first board on one side. Here’s the tricky part: You only have about 1 1/2 inches all the way around the edge of the door to make it mount securely. Pre-drill your holes and screw it into the door right on the edge (maybe 1/2 inch in from the edge) so you are catching the frame of the door. The rest of the inside is hollow (which is why it’s called a hollow core door – but you already knew that…)
OH! And make sure to screw it onto the door on both ends.
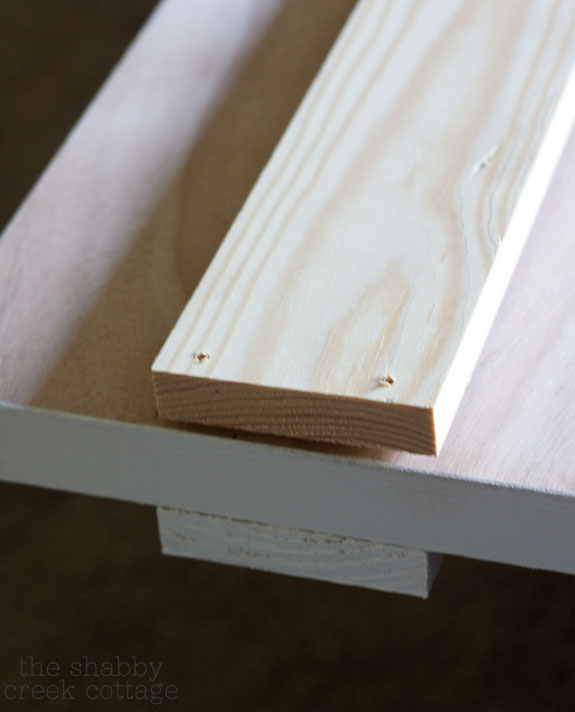
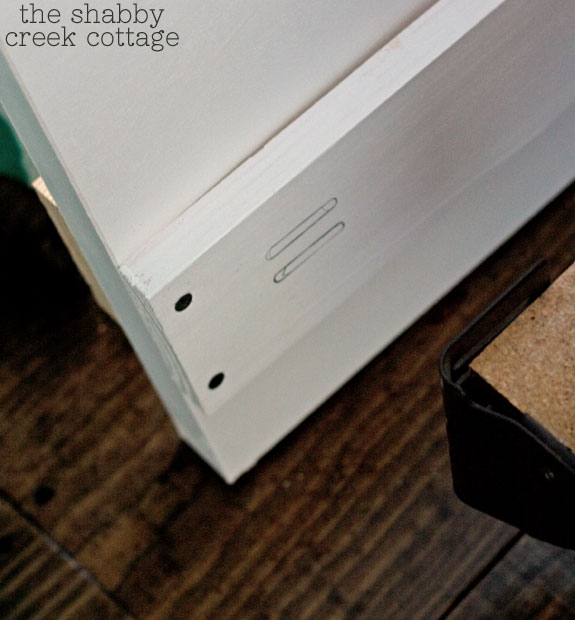
Ok, now flip it all over and match up the board on the back side to match the first one you installed. Now you’ve got a door sandwich. Sweet!
Now let’s do the door hokey pokey. Put your headboard in place, mark the holes where your mounting plates on the frame match up, then take it out.
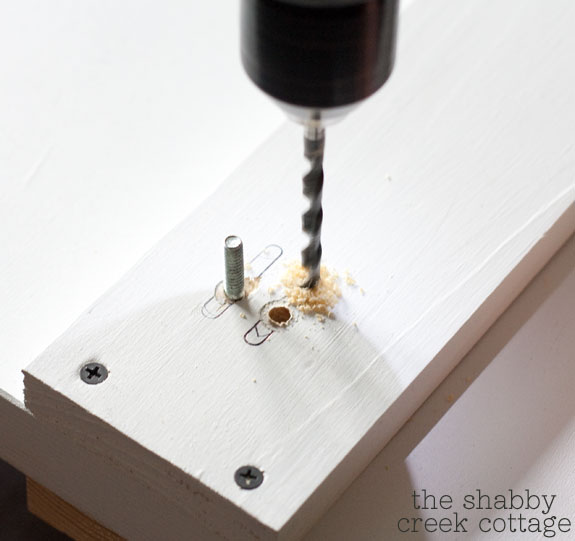
Using a drill bit that is the same size as your bolts, drill through both boards and the door, straight through. Here’s where you get to learn from our mistake – off set the holes, because if you put them side by side the bolt heads won’t have enough room. Drill one side on top, then scoot over (but still in your mark) and drill the second hole.
Then, put your headboard back in, bolt it on, and shake it all about. Ok, don’t really shake it. I was trying to be funny. Yeah…..
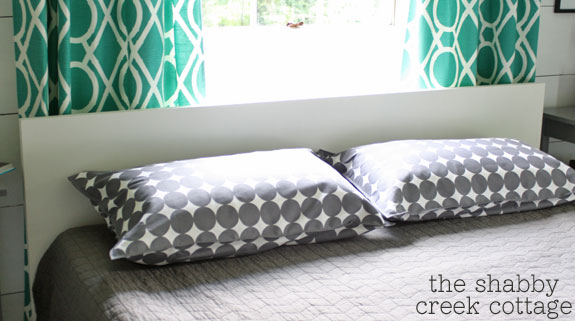
Your headboard is complete! Besides painting, the whole thing goes together in about 15 minutes. Seriously! It’s one of the easiest builds we’ve ever done – it’s sooooo simple. And because my husband was so worried about the strength of it all, we’ve used it for nearly six weeks before I wrote this post, just to test it all out. It still looks great, stayed strong, and over all is a win! The best part? It cost less than $40 to make. When you look at similar headboards, they can be $400+ so I’d say it’s a great deal.
Now it’s time for some pointers:
*Is your bed smaller? You can cut down the door. Go here to learn how to cut down a hollow core door.
*Don’t want it so tall? Use a narrower door. I wanted it as tall as possible, so I bought the widest Lowe’s carries.
*Like those pillows? Scoot on over to see my post on my amazing friend Andrea’s blog – I’m going to share how to make them. They’re super simple, too!
Thanks to Lowe’s for partnering with me on this post!
Want to see more great ideas?
Be sure to check out Lowe’s Creative Ideas or follow Lowe’s on Facebook.
____________________





Awesome headboard…going to be using the basics here for Pete’s new room…this is a perfect base for his style…thanks for always showing us the HOW TO!!! You simply rock at it! hugs…
Great idea and so inexpensive. Simple is always best!
So cool! Great idea, Gina!
Brilliant solution!
Great idea! Well done, I like the simplicity of it.
I am so glad you posted this project, we have a couple of doors we want to use to make a headboard and you have simplified the process for us. Thanks! I love your curtains, where did you get them?
This comment has been removed by the author.
Our headboard is actually an old bifold door we took off one of the closets! We’ve also built an insane amount of furniture with hollow-core doors. Check them out! You’d be surprised at how strong they are – we’ve never had an issue and my kids climb on the furniture!
Here they are – http://exploringdomesticity.blogspot.com/2013/04/hollow-core-doors-budget-building.html
Kristin
ExploringDomesticity.blogspot.com
Hi Gina, Nice job! Hokey Pokey made me laugh 🙂
I have nominated you for the Super Sweet Blogging Award!
please visit http://www.glassslipperrestorations.com/2013/07/02/super-sweet-blogging-award/
Thanks,
Cindy @ GlassSlipperRestorations.com
Thank you so much for this tutorial! I have the door but I’ve been scared to actually do the project because of the hollowness of it. It turned out great. I can’t wait to do mine.
I saw you on pinterest. I have to know where those curtains came from!! 🙂
Hi Annelise,
I made them 🙂 You can learn more about them here: http://www.theshabbycreekcottage.com/2013/08/make-this-easy-lined-curtains.html
Thank you! This is EXACTLY what I’ve had in mind – I thought about hollow core doors too, but couldn’t figure out how to drill into them without tearing them up. 🙂 I love the detailed pics – I am doing this!!
Very impressed with the idea of using a hollow core door. I’ve read right through the instructions and don’t understand what the mounting plate is for. Is to be attached to the bed (since it is freestanding) or to something else? Hope you can give me an answer. Very nice blog and I’ll come back and visit often now I’ve found you (via Pinterest).
Cheers,
Corinne
YOU SAVED MY LIFE!!! Well, not really, but you did save my pocketbook. I’ve been looking on here for quite a while for an easy, cheap, and modern headboard and could never figure out how to do it with a hollow core door. THANK YOU!!!!
Great tutorial! I really love the color of the drapes in the background – do you mind sharing where they, or the fabric, is from? I’ve been searching for that color to make a shower curtain! Thanks!
Hi Merrick, it’s from Online Fabric Store – you can find it here: http://www.onlinefabricstore.net/robert-allen-at-home-lattice-bamboo-pool-.htm
Gina! I can’t thank you enough for this idea… I’ve been trying to find a low-profile headboard for my king size bed, which is in front of my window also. Most headboards are too high and cover too much of the window which makes it look awkward and out of place. This is perfect. My husband, aka the “naysayer” keeps telling me we can’t make one, so while he’s away, I think I”ll do it myself and surprise him!
Thank you, thank you for showing how to attach the headboard to the mounting bracket. I know that seems like a simple thing but my carpentry skills are VERY limited and I have yet to find a tutorial that showed step by step how to do this. I have some old doors that I am dying to make a headboard out of for my youngest daughter. Thanks again.
Gina love the idea and i wanna try it.. Whats throwing me off is that the door is about 2 in. thick plus two 1x4s make it 4inches thick by my calculation, yet you say use 3 and a half inch bolts and nuts? Im thinkin you need longer bolts? Correct me if Im wrong plz… Thanks
1×4 are actually only 3/4 of an inch thick, and the door is just over an inch thick – so it’s about 3 inches thick all together. 3 inch bolts worked great for us!
Love the tutorial!! I’m going to make a headboard from a pine door I bought at a yard sale. I’m thrilled to find your method for attaching it to my bed frame instead of hanging it on the wall! We are redecorating and probably moving relatively soon, so I don’t want to attach anything to the newly painted wall, and this is perfect!! Thanks so much for sharing