Rustic farmhouse wall decor is never a bad idea, right? But sometimes you can’t find *exactly* what you’re looking for. And if you are lucky enough to find a great piece, it can be rather pricey sometimes. Which is why I DIY it. That… plus the fact that I love any excuse to pull out my power tools. So, you wanna make one? Let’s get to it.

*this post contains affiliate links – which means I make a tiny kick back if you purchase, with no additional cost to you whatsoever – thanks for supporting my site!*
DIY rustic farmhouse wall decor bin
You’ll need:
- 1 piece of fencing board, 6 ft long *usually called “dog earred” boards*
- Pin nail gun & 2 inch pin nails
- wood glue
- drill + 2 inch wood screws (2 to hang it)
- 120 sand paper
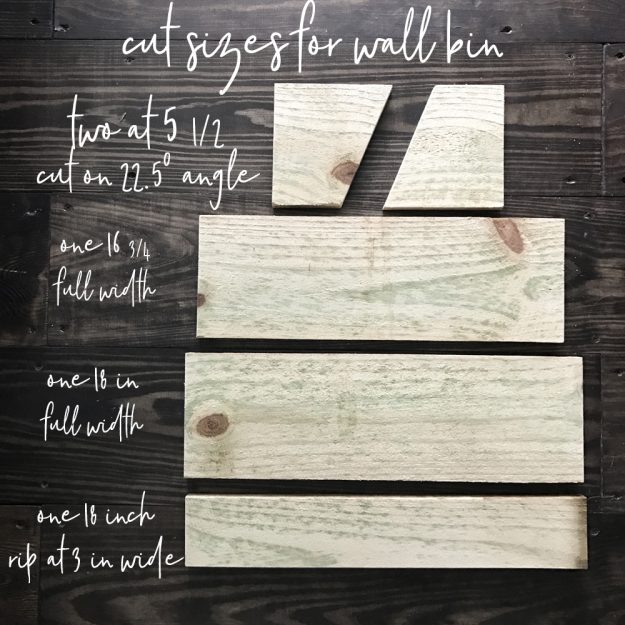
First you’ll need to cut the pieces. Using the reference above, you’ll need two 5 1/2 inch long pieces with a 22.5 degree angle cut on one end of each. You’ll also need one piece cut at 18 inches long + one at 16 3/4 inches long cut at full width, plus one 18 inch piece cut & ripped at 3 inches wide. The angled pieces are the ends, the 18 inch pieces are the front & back, then the 16 3/4 inch is the bottom.
Use wood glue along all seams, and nail them together with 1 1/2 inch pin nails. Drill a hole on the back in each corner to hang to the wall with screws. And you’re done!
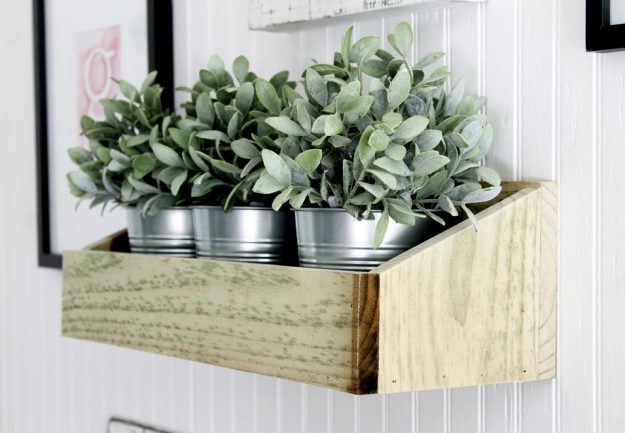
Of course you could paint it, but I love the texture of these boards as is – they give that “farmhouse wall decor” vibe so well. They are somewhat rough, and you could sand if you prefer, but I only sanded the ends of the cut areas. It’s such a simple little build, but I love how it turned out. Who knew you could do so much with $2 in about 15 minutes?
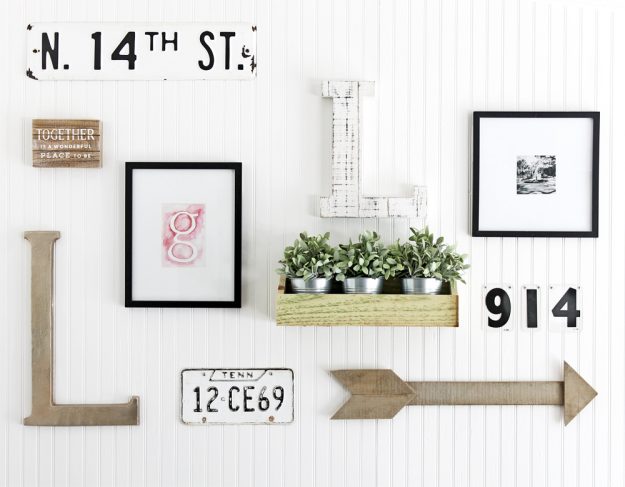
You could fill it with almost anything, but I’m kinda digging these Ikea planters on our living room gallery wall… whatcha think?

Hi Gina, love your little shelf, just a nice size and looks great with sloping sides. Have to agree, looks fine without painting. Think could use couple or 3 of these in our bathroom and guest bathroom. I would attempt to make them myself but am sworn off the power tools. Hands and eyes aren’t what they used to be.
Am looking forward to having hubs make these for me and hanging them up. While am waiting will think about what will put in them. Thanks for providing dimensions of each piece, will save grumbling from my wood person, lol.
Have wonderful weekend
That’s a great rustic bin, Gina. Thanks for showing how you cut the wood. That will be easy to make. Love that you used tin cans for the “vases.” The project is adorable.
Thanks so much Barb!!
The bin is a perfect size. Would be great near the door to hold keys and sunglasses too!
Hi! I would really like to make this project – and buy these little plants too! Could you fix the link to purchasing the little planters?
Hi Kristina, the link isn’t for the planters but to a post about my gallery wall. The cute little plants are from Ikea, they probably still have them though, they have all kinds of awesome fake plants and the prices are super cheap!
I like the idea! Rustic style bins will be a perfect decor element for my kitchen wall.
Thanks! You should make them, super easy!