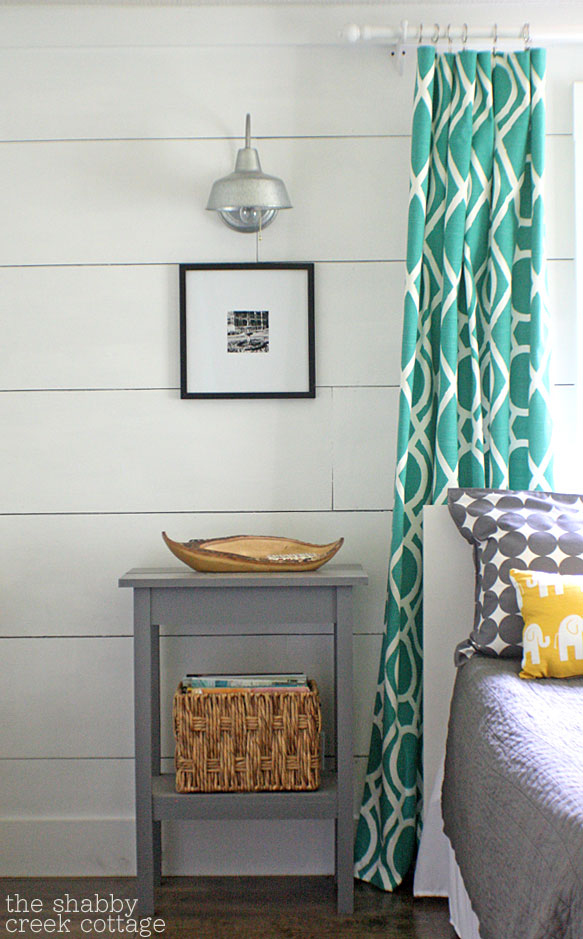
Every time I’ve shared a little glance at my bedroom makeover progress (like with the chair cushion, yellow table & plank wall) y’all have been all over those easy lined curtains. I know, they’re a bit bolder than I normally would choose. I took a risk, and the results kinda speak for themselves. The fabulous fabric is Robert Allen Bamboo Lattice in Pool {whew! that’s a mouthful!}. I made them with my basic pattern, which isn’t really a pattern at all. It’s more of a method, one that you can use to make any size panels you need.
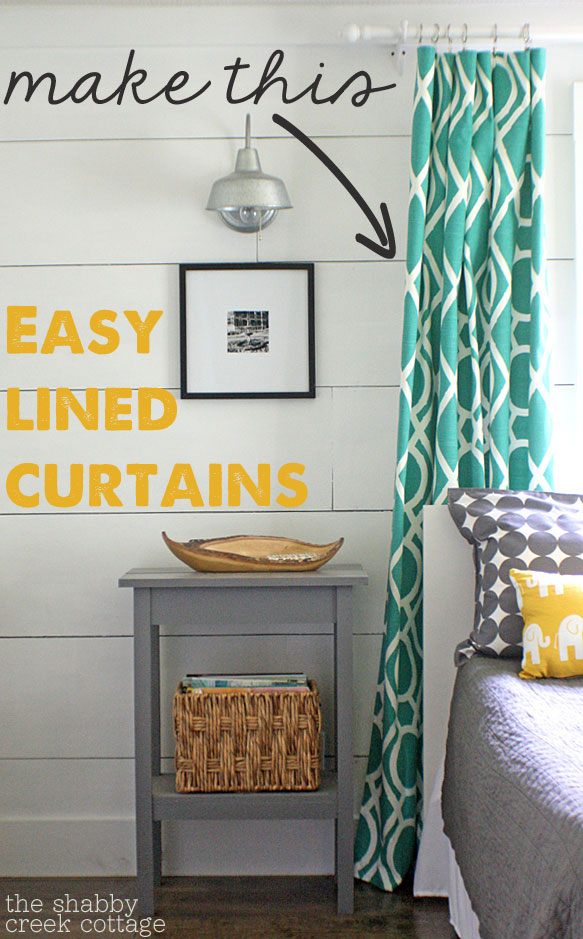
Before we get started, first things first: For this tutorial I used a MUCH smaller piece of fabric (which is actually a completely different pattern.) I used the smaller so you can see the method. To get your size, put up your curtain rod, add on your clips (the Threshold brand from Target are my absolute faves), and measure from the clips down to the floor. Add an inch onto your length. For the width on my panels, I used the stock width of the fabric, however you can do them whatever size you’d like.
Alright… let’s get down to bidness & make some easy lined curtains:
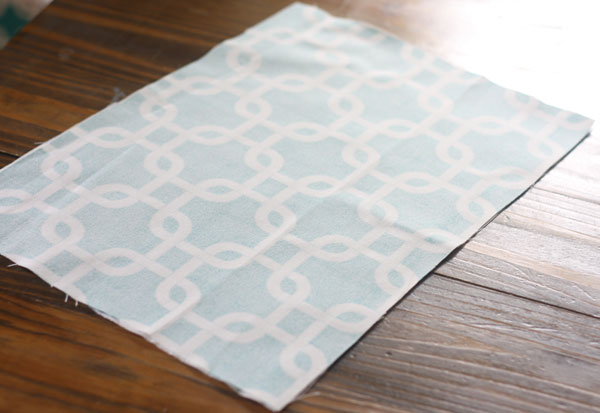
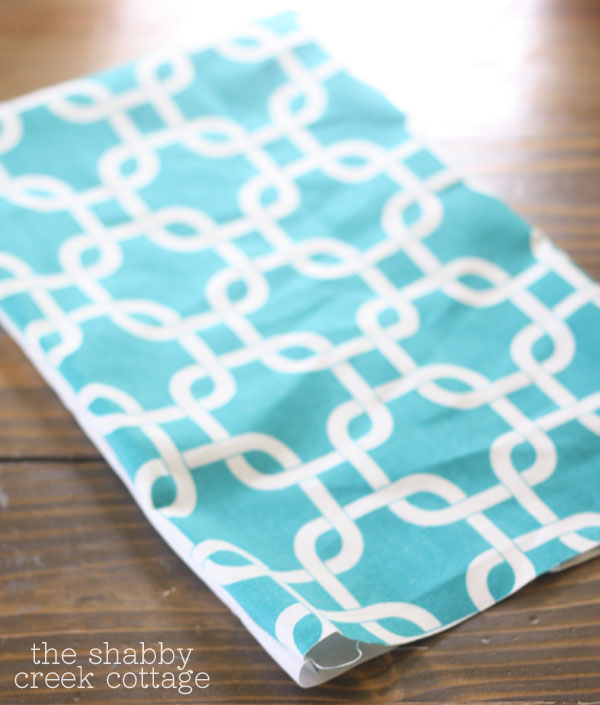
Start with your fabric, along with a piece of lining cut the same exact size.
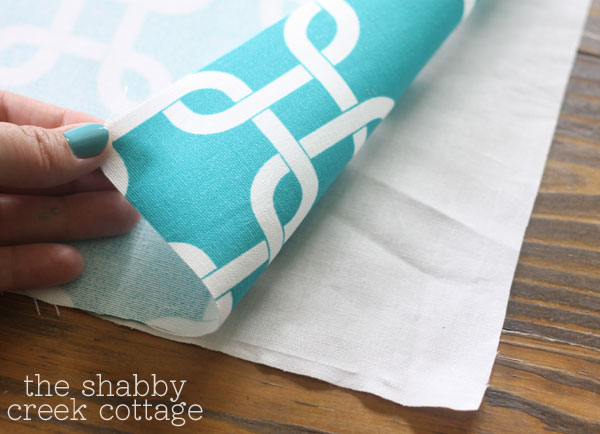
Put your fabric print towards the lining, so you can sew your first stitches.
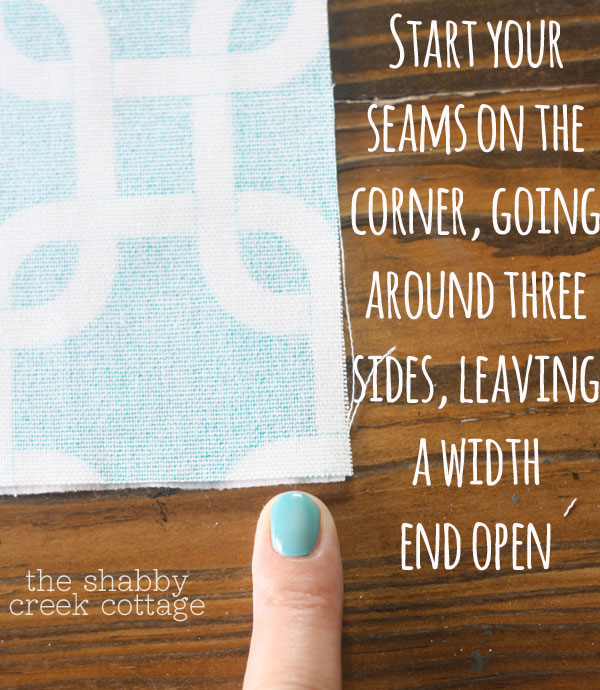
Stack it all up together and pin it all the way around, then start on a corner of a long end and stitch all the way around three sides (long side, short side, long side.)
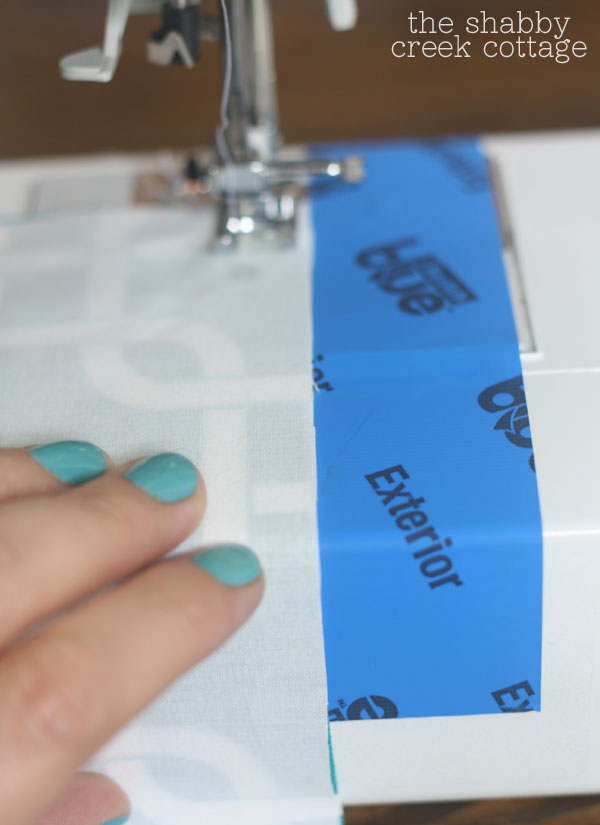
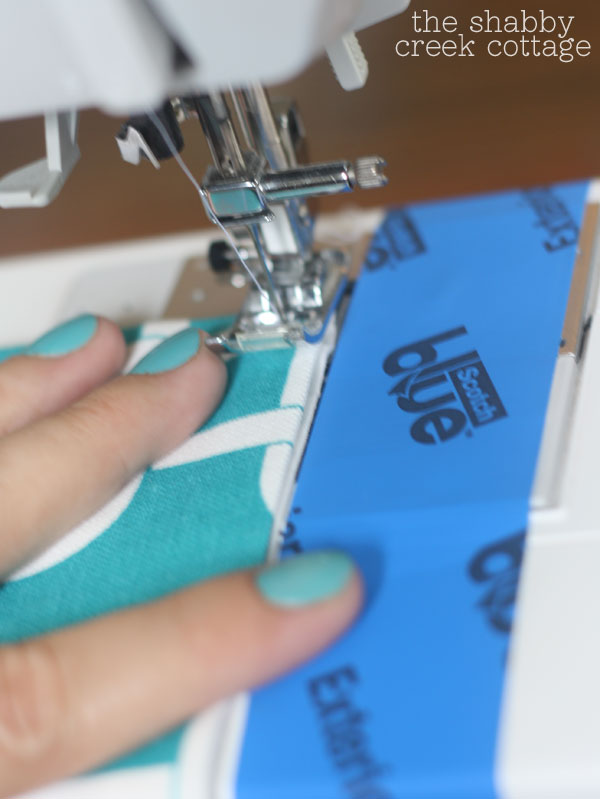
To help keep everything all lined up nicely, I take a piece of painter’s tape and mark a 1/2 inch seam allowance (using the guide on my machine). Then you know you can just keep the edge of the fabric on the tape guide and it’ll stay straight.
Related links:
Make Your Own Grommet Top Curtains
Quick & Easy French Script Curtains
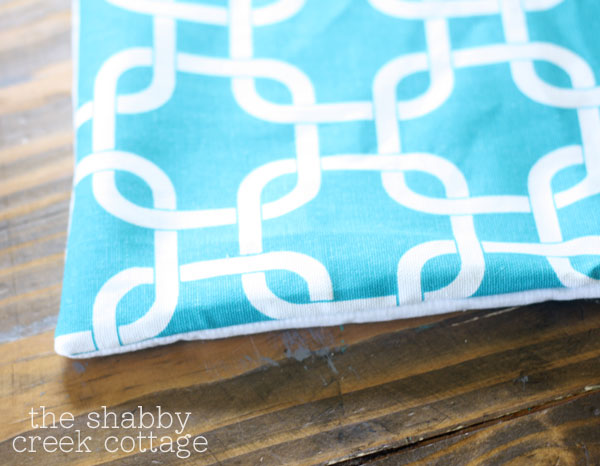
After all three sides are sewn down (be sure to double stitch when starting and stopping), flip it all out so it’s right side out. Think like a big pillow case.
Now it’s time to take the open end and mark it for turn down.
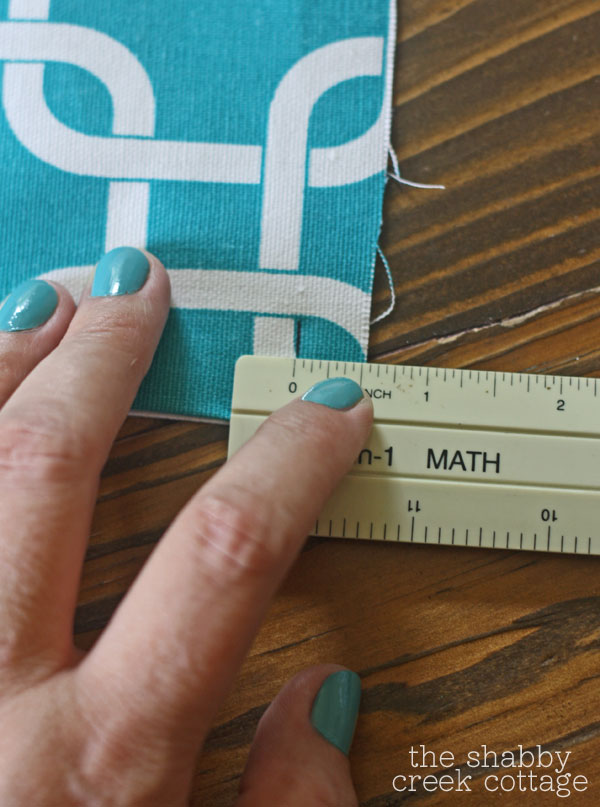
Mark it 1/2 inch from the cut end a few places down the edge, so you can turn it in and iron it down. This help gets the line perfect for the last hem.
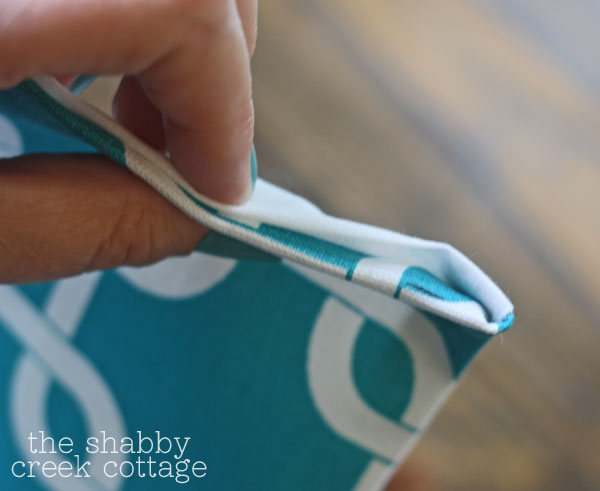
Now use an iron and press the seam, so it will stay in place for you while you run the stitch. Use pins to keep everything lined up and easier to handle while sewing.
With matching thread, run a stitch 1/4 of an inch all the way around all four sides, starting with the open end. That way all of your seams will stay put, your curtains will have plenty of structure and will hang nicely.
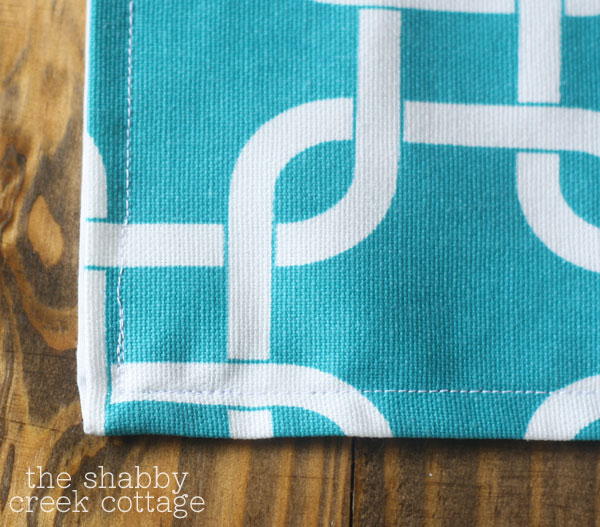
Please make sure to use matching thread. I used white so you could see the seam, but you want yours to be all pretty and stuff.
Iron them one last time, because after all that work you’re gonna want them to look their very best.
Put them on the clips, and that’s it. You just made easy lined curtains. Yes, it will take a while when you’re making big panels, but it’s totally worth the six hours of sewing it took me to make these four panels. Real, profesh curtains won’t have the top stitching – as they use fancy hidden stitches, but I actually appreciate the structure the top stitching gives to the panels. It helps them hang nicely, don’t you think?
Looking for more curtain ideas? You can find them in my DIY Curtain Ideas Gallery
*Disclaimer: I am not affiliated with OnlineFabricStore.net – I just love this fabric and I think you might, too*

Great tute and I love the fabric too.
Be a sweetie,
Shelia 😉
I love that you coordinated your nail polish with your fabric!
Haha! Totally just noticed that 🙂
How much fabric did you purchase?
Hi Aimee,
It took 5 yards per window, so 10 yards total.
Thanks so much for stopping by!
Gina
Thanks for this great tutorial! The way you broke it down makes it seem so simple and leaves me saying “hey, I can do that!”
These look great. I agree; you make a very simple and straight forward tutorial that makes the process easy. Stating the obvious here but, this same method can be used to make place mats (reversible) and other things as well.
Yep, Sylvia 🙂 It’s such a great method for tons of great things, huh?
Hello Gina, thank you for the tutorial.
Where did you get your nightstant?
Thank you!
Hi Marian,
My husband built them a couple of years ago, I just spruced them up with some leftover paint.
Thanks for stopping by!
Thanks so much Gina, loved your easy instructions. The last set I made, I used grommets to Han on a rod, but I love your clips.
Thank you kindly,
Beth
Thanks Beth, I like grommets too but do love the clips 🙂
He dis a great job and so did you! 🙂
Thank you for your answer.
Love love love that fabric. I’m not a sewer, but this sounds like something I could tackle.
I LOVE that fabric – your drapes look so fabulous amazing and gorgeous… especially with your stunning plank wall! I want to move into that room!
I have been a professional seamstress for 35+ years, & you’re right about the “fancy hidden stitches”, but I love your method, & will certainly use it for my own draperies from now on! So much less fuss, & the added structure is a plus. Love the matching fingernails, btw!
Incorporating nail polish too!!! Now that’s creativity, thank you for inspiration!
Ananasa.com – Home For Handmade
thank you for the first tutorial i understand 100%! and lemme tell you i have read 3google pages worth of websites with various methods, lol! i just purchased 13yards of fabric and need to make 4 panels and i have been breaking out in a cold sweat about undertaking this project bc i am a novice sewer. now i am much more calm, thanks again!
Super Cute and perfect timing for me! We just bought a new house and I need some great curtains!!!. Thanks
Love those curtains and wish I knew how to sew. I just painted my bedroom a beautiful blue/teal just like your nails and fabric. What are the measurements of the curtains/ window?
Good, easy breezy method! If anyone does have to measure, the classic width for a set of curtains is the width of the window, plus 1/2 that width again. This will give the standard loose folds we’re all accustomed to seeing.
Thank you so much, I’m going to buy fabric today
Good for you, have fun!
Thank you so (sew) much for putting this mini tutorial together. I have had lovely material sitting and waiting for me to make bedroom curtains for one of my daughters. You made this seem (seam) so easy. I will not really start the process. The material is a medium grey with bold markings of yellow, red, and blue. I was thinking of getting lining material to match one of these colors or a lighter version of the grey from the curtain. Which will look better? Or should I just use white? Thanks, pat
Thank you so (sew) much for putting this mini tutorial together. I have had lovely material sitting and waiting for me to make bedroom curtains for one of my daughters. You made this seem (seam) so easy. I will now really start the process. The material is a medium grey with bold markings of yellow, red, and blue. I was thinking of getting lining material to match one of these colors or a lighter version of the grey from the curtain. Which will look better? Or should I just use white? Thanks, pat
My friend and I just used your tutorial to make curtains (w/blackout lining) for my teenage son’s room. They were so easy. We hung them with clips, but left enough material at the top (tucked into the curtain) in case we want to come back and put the grommets in later. They are a great blue/gray/white dot pattern and keep his room at least 15 degrees cooler in the summer. He likes that the sun doesn’t wake him up in the summer months! Thanks for your great directions and pictures.
So glad you tried it! 🙂
Thank you Gina!! You made this so easy. I made four curtains for my daughter in 8hrs. Your nails look fantastic.
Love these beautiful curtains! How did you put the clips on? Did you have to puncture a hole throughout the fabric?
They just clip on similar to clothes pins – no holes needed!
I can’t deal with the puffiness… I don’t sew the curtains on top and bottom… I hem both the lining and curtain material for the bottom… making sure that the lining is shorter than the curtain.
I also make my lining about 2 inches less all the way around 3 sides… then the side edges fold around to the back. .. not the puffiness full of air.. and they wash easier than if it is sewn all the way around….
I love your fabric! I am looking for a similar pattern in yellow for my bedroom, but am having a hard time finding anything that isn’t a just a cotton quilting-weight fabric. What weight is the fabric you used?
Thanks for the tutorial. I’ve been looking for a fast, simple way to make curtains and finally found it. I can’t wait to get started on my living room curtains; as well as the curtains for the other rooms. I’ve got 13 windows, so I needed something fast.
Thanks
I’m using this tutorial today to make reversible curtains for our bathroom! Thanks for the great tutorial!
Excellent post, i did read it twice so sorry for
that, i’ve passed it on to my associates, so with any luck they
should enjoy it as well.
Thanks so much Chloe 🙂
Hi Gina,
Easy instructions that even I can follow. The curtains…simply gorgeous!
Thanks so much Julie!! Good luck, I’m sure your will turn out great!!
I have a question about the 4th seam. Is it only one seam, 1/4 inch from the edge, or do you sew a seam at the edge and then again 1/4 inch from the edge (so 2 seams). The instructions weren’t very clear for me.
I am making curtains for a vintage airstream.
It’s one seam, 1/4 inch from the edge 🙂
you make it look easy Gina! Turned out great!
Thanks so much Yvonda, it really is easy!
I have a question about pre-made drapes I purchased for a beach house. The windows are continuous for about 50 feet. I bought ready-made grommet type drapes and will attach to a ceiling mount bracket with roller hand drawn style. My question is these panels are 36 inches wide by 108 inches long. Should I sew them together side to side and so they will not separate when pulled shut? If I. Do that should I take out the side hems and make a new hem or what do you think about using fusible tape?
I guess you could but they may look more natural as separate panels. The fusible tape is great for some things but may not be able to hold up over time. It is really a personal preference 🙂
Thank you so much for this idea. I made some Harry Potter curtains for our shed pub and they turned out really well. I did change the top so that I did a 1/2 inch turn over hem and then 11/2 inch turnover the top so that the curtains slid onto the pole instead of needing clips.
Oh sounds wonderful Minty 🙂
Could I use same process but then add another fold over across top for curtain rods?
Sure you could Debi, good luck!